Leaderboard


Popular Content
Showing content with the highest reputation since 03/27/25 in Posts
-
Repairing a stripped spark plug hole is a much smaller project than the other options... I haven't tried, but I've seen people do it in the vehicle and just blow the chips out afterwards.3 points
-
Two weeks ago we drove the Subarus out west. Somewhat last minute shift of plans to western AZ for our trip as that was the only part of the western US that had a decent weather forecast for the week. In retrospect we probably should have done the last week of April instead so we had more options but it worked out. Saturday morning Z and A and B met at my house at 8AM and we packed up and headed west. Got to a campground east of Denver and stayed the night. Not too much below freezing but we got a dusting of snow overnight. Sunday we kept driving and made it into Nevada and camped east of Vegas along Lake Mead, saw some donkeys on the way in, the first group of many we'd see that week. It was very windy that night. The ground was too hard to effectively stake in the tents so I put the loops around some large rocks but we didn't sleep well as the tent sounded like it was going to start ripping apart at times despite parking the car just upwind of it. Monday we took the scenic route to Hoover Dam including some unpaved trails. Continued into Arizona and started down some Massey trails. Saw a lot of Joshua trees in NW Arizona, some of them quite green. Started on Massey NW29. Massey NW28 was fairly high up in the mountains and we got snowed on again, this time in Arizona. Might have been graupel (small white pellets) but probably not hail. Excellent views. Saw an old Ford truck down the slope from the trail (middle of picture below) and hiked down to it. On the way we also saw a Saturn. Neither had batteries. The Ford's transmission tunnel had been cut out (appeared to be cut out where we found it, we saw at least one chunk of it laying on the ground). The transmission had been removed and presumably carried hundreds of feet either up or down a steep loose rocky grade. Some cool mine ruins at the end of the side trail. Definitely want to take this one clockwise (as viewed from above) which we fortunately did, there was a lot of rocky downhill in one section but the uphill in the direction we took wasn't bad. The next point of interest we saw were some murals that had been painted on rocks along the trail that were originally painted in the 1960s and then repainted early this century. That night we were trying to find a more sheltered spot from the wind but even a small pond at the bottom of a 100' deep mining pit was windy so we just camped out in a wash along Massey NW26. That night was windy too but not quite as bad as the previous. There were also donkeys nearby at night and in the morning. Tuesday the first trails, Massey NW26 and NW27, took us the rest of the way to Lake Mohave. Then back up into the mountains and more graupel. Saw another truck rolled down the slope off Massey NW19 trail. Drove to the remains of an old mine, probably the biggest ruins/tailings we saw that week. Got some more graupel and we were getting a bit hungry so I cooked some dino nuggets in an abandoned mining shack. A climbed the sandy tailings pile in the Forester. Numerous old cars half buried in gravel. Next we drove to Massey NW15 towards Alamo lake. It was getting late so we found a neat well used campsite under a couple big trees along Massey NW17 and finally slept well, basically no wind, A hammocked between the trees. In the morning we found an old overgrown truck bed, a homemade vault toilet, and an old well. Wednesday morning we drove to some other mine ruins and then down to Big Sandy River. Z briefly got the Impreza stuck but we were able to just jack the rear end back up out of the sand, put down sand ladders, and he drove out. We drove the rest of the way to Alamo Lake and then took Massey NW14 to a river crossing as there is a bridge for the gas pipeline but not for vehicles. I waded a few options and picked the one with multiple firmer crossings rather than one with a single long crossing and soft spot in the middle. Both cars drove through the various crossings/mudholes without incident and we celebrated with some PB&Js. It was very green along the river, not super surprising but not really what we'd expected driving in western Arizona. We took Massey NW12 to Swansea, perhaps the largest mine/ghost town ruins of the week, and spent a while exploring on foot. Drove down Massey NW13, a pretty fun wash, as close as possible to the Bill Williams river we'd crossed earlier and found the remains of the old pump house, more donkeys along the way. Took Massey NW6, crossed a canal and continued. Started getting dark so we found a spot off the main road to camp for the night. Thursday morning we visited more old mines along Massey NW1. Saw the Bouse fisherman, a bit disappointing honestly. Back to more old mines along Massey NW3 and a cave/arch at the top of a hill. Headed down to Quartzite for fuel on the way to Kofa NWR. When we got to the highway there was a sign to “wait for the pilot car” and the old man driving the minivan ahead of us got out and sat on his hood to smoke a cigarette. After a few minutes of impatiently waiting I noticed the powerline grade along the highway so we followed that for about five miles, crossing various washes along the way, until we'd passed the construction zone and got back on the highway. The Mobil gas station sold water for $0.25/gallon or $1 / 5 gallons (quarters only) so we got some water for drinking and rinsed off our heads. Best quarter I ever spent. The first trail we took in Kofa was Massey C2 up an extremely scenic wash/canyon. Small arch at the top of the canyon, skull rock, and a large balanced rock. You can no longer drive all the way through, you'd have to do a through hike, but we hiked from the end of the driving path up to the saddle to check out the view. Then we drove down Massey C1 (Palm Canyon trail) to hike back to get a view of the only native palm trees still growing in Arizona. It's a fairly arduous trek to actually hike up to them (start at the red post to the right) and it was getting dark so we hiked back to the cars to find a campsite. Found a decent one close to the intersection of Massey C3 and C4 where we wanted to start the next morning. Friday morning we drove south on Massey C4 to an old mining town/museum. A bit of a tourist trap but there were a lot of cool old things to see, plus they had flush toilets. We looped back to the highway and went back by the campsite to head east through the NWR on Massey C6 and C9. Where C3 meets C6 is the site of a large mine, fair amount of equipment/ruins and some tunnels to explore. We headed north out of the NWR on Massey C10, drove along the top of a dam, and drove down a bit of a fun pipeline grade. Crossed the interstate, continued north on Massey C11, and found a spot to camp next to a small old mine of course. Saturday morning we drove up to the highway and started heading home. Stayed in the same campground we had on the way out east of Denver. It was cold again, the small pond by our site was frozen in the morning, but no snow. Sunday we drove the rest of the way home. B's Forester drove about 4400 miles so the Impreza probably did about 4300. Forester needs a RF CV axle and one of his valve stems was leaking so we swapped on one of the spares in Iowa. Impreza needs a RF tie rod. Most disappointingly the coolant temperature crept up a few times on long slow uphill trails with the AC on and once in deep sand with the AC off. AC needs some work/tuning too, I might try running it at a lower voltage. It seemed to work fine last summer but it was mostly discharged before the trip and since I recharged it, the high and low pressure slowly diverge until it eventually shuts off and then it will cycle back on again. It does this every minute or so and you can feel it surging while driving. Not sure if it's fully charged. I'd forgotten how rocky a lot of the Arizona trails are. I'm not talking about challenging rock crawling, although there was some of that, rather many of the trails had a lot of 4-6” rocks that were just annoying and rattled the cars. For instance my glovebox latch came unscrewed near the end of the week. Haven't run into trails quite like that for such long distances in other states. A used the low range on the Impreza once at the top of a hill when he didn't have quite enough momentum to get to the top. Forester low range got used 5-10 times. Overall a good trip. No major problems, only got stuck twice briefly, saw some good scenery, hit some fun trails and had good weather. Sorry travelvw, not a lot of critters or carnage on this trip.3 points
-
I haven't worked on one of those, but the most common cause of such problems is bad wiring between the body and the door where it flexes, followed by burnt out speakers. Does opening and closing the door, or wiggling the bundle of wires to the door, make it go on and off? Does thwapping the door over the speaker make it go on and off? Does poking something through the grille and pushing on the speaker cone make it go on and off? If it's not the door flex wiring or the speaker, then look into the radio itself and the rest of the harness wiring.3 points
-
Battery voltage fluctuating with the turn signals is normal. The two 1156 bulbs draw about 5A when hot (~27W each), and at least double that cold, i.e. every time they blink on. The stock alternator is 55 or 60A iirc. You're pulling surges of a quarter of its high-rpm rating, and you're at idle (since you can hear the fuel pump) where it can barely keep up with the loads anyway. And when the voltage dips, the fuel pump slows down. A spark when connecting the battery is also 100% normal, and does not imply anything wrong, modified or otherwise. You're charging the capacitors in every electronic module, including the radio, ECU, fuel pump controller (I can't remember if that year has one or not), cruise control module, etc etc.2 points
-
2.2 swap. Runs for ever.2 points
-
After some Al-Cu brazing practice, the old brass pipes are now attached to the new aluminum heater core. Had to redo the brass pipes to the copper elbows because the melting temperature of the AL-Cu brazing sticks is higher than the plumbing solder used for the brass pipes to the other end of the copper elbows. The brass pipes are made of thin brass, so that necessitated using brazed elbows rather than the shark-bite type. Next step is to slightly modify the plastic bosses that anchor the pipes to the heater box.

 2 points
 -
B and I did some work on our cars. Replaced a front CV axle in the Forester that's been making noise occasionally but for quite a while. B changed his engine and trans oils. Trying to figure out Impreza's potential cooling problems. Seems better with the new thermostat but still crept up a couple times on our last trip out west in mild ambient temps. Really need to get some temp senders calibrated to the Haltech and get them installed on top and bottom of radiator. IIRC the middle of the coolant temp gauge is about 210F on the Haltech but I can't guarantee either is accurate. Infrared temp gun near the coolant temp sensor indicates it's at least close. Then 3/4 of the way up the gauge is 217F at the Haltech, probably still nothing to worry about but should confirm actual temps. Also thermostat is at the bottom/inlet of engine while the temp sensor is at the top so I'm getting coolant temp readings from the opposite end of the system than where the temps are controlled. One thing we did was a smoke test on three different Subarus. The Impreza's fans seemed to suck in the smoke as well as my white Outback with the stock fans. Could see at least some of it blowing out the back of the radiator, didn't seem to be blowing around the sides or out from between the condenser and radiator. So I think the fans are at least decent but since the overheating is a low vehicle speed issue perhaps we could get better fans although these had the highest CFM rating of any fans I could find. One idea I have is to add a large heater core above the ABS unit under the hood vent on the passenger side with an electric fan on it. The one we added to the back of the black Outback dropped coolant temps by 20F so that should do the trick and would be fairly easy to add. AC was discharged before our last trip so I added some refrigerant but now it will cycle on and off about once a minute. The high side spikes up to about 250psi while the low side drops to 20psi, then they briefly start to converge before the compressor kicks off. Wondering if I have a clogged orifice as this seems like a much larger pressure difference than the charts show. One time out west the coolant temps went up the power steering pump stopped working at low RPMs. After we got home I first tried installing a pump from an EZ30. Bracket is slightly different, no big deal, I'll swap the bracket. Nope, pulley is a different size too, not going to mess with trying to swap that over. So much for Legos. Got an EZ36 PS pump from a local junkyard and swapped it in this morning which solved that issue. We decided to tack up a couple trailing arms for B's eventual billet rear knuckle swap. Also trying to figure out my gas tank filling issue on the Impreza. I replaced the carbon canister which is usually the culprit. Not much better, also the one I pulled out seems good (not dumping carbon pellets out like the bad ones usually do). Pulled the hose off the canister that goes to the gas tank vent. When we blow compressed air in the gas filler air comes out that tube (seemed maybe a little blocked at first) similar to the Forester's. Last time I went to fill up with gas it shut off before the tank was full, I pulled that hose off the canister and then the tank filled as it should. Next time I'll try to remember to pull the other large hose off the canister instead.1 point
-
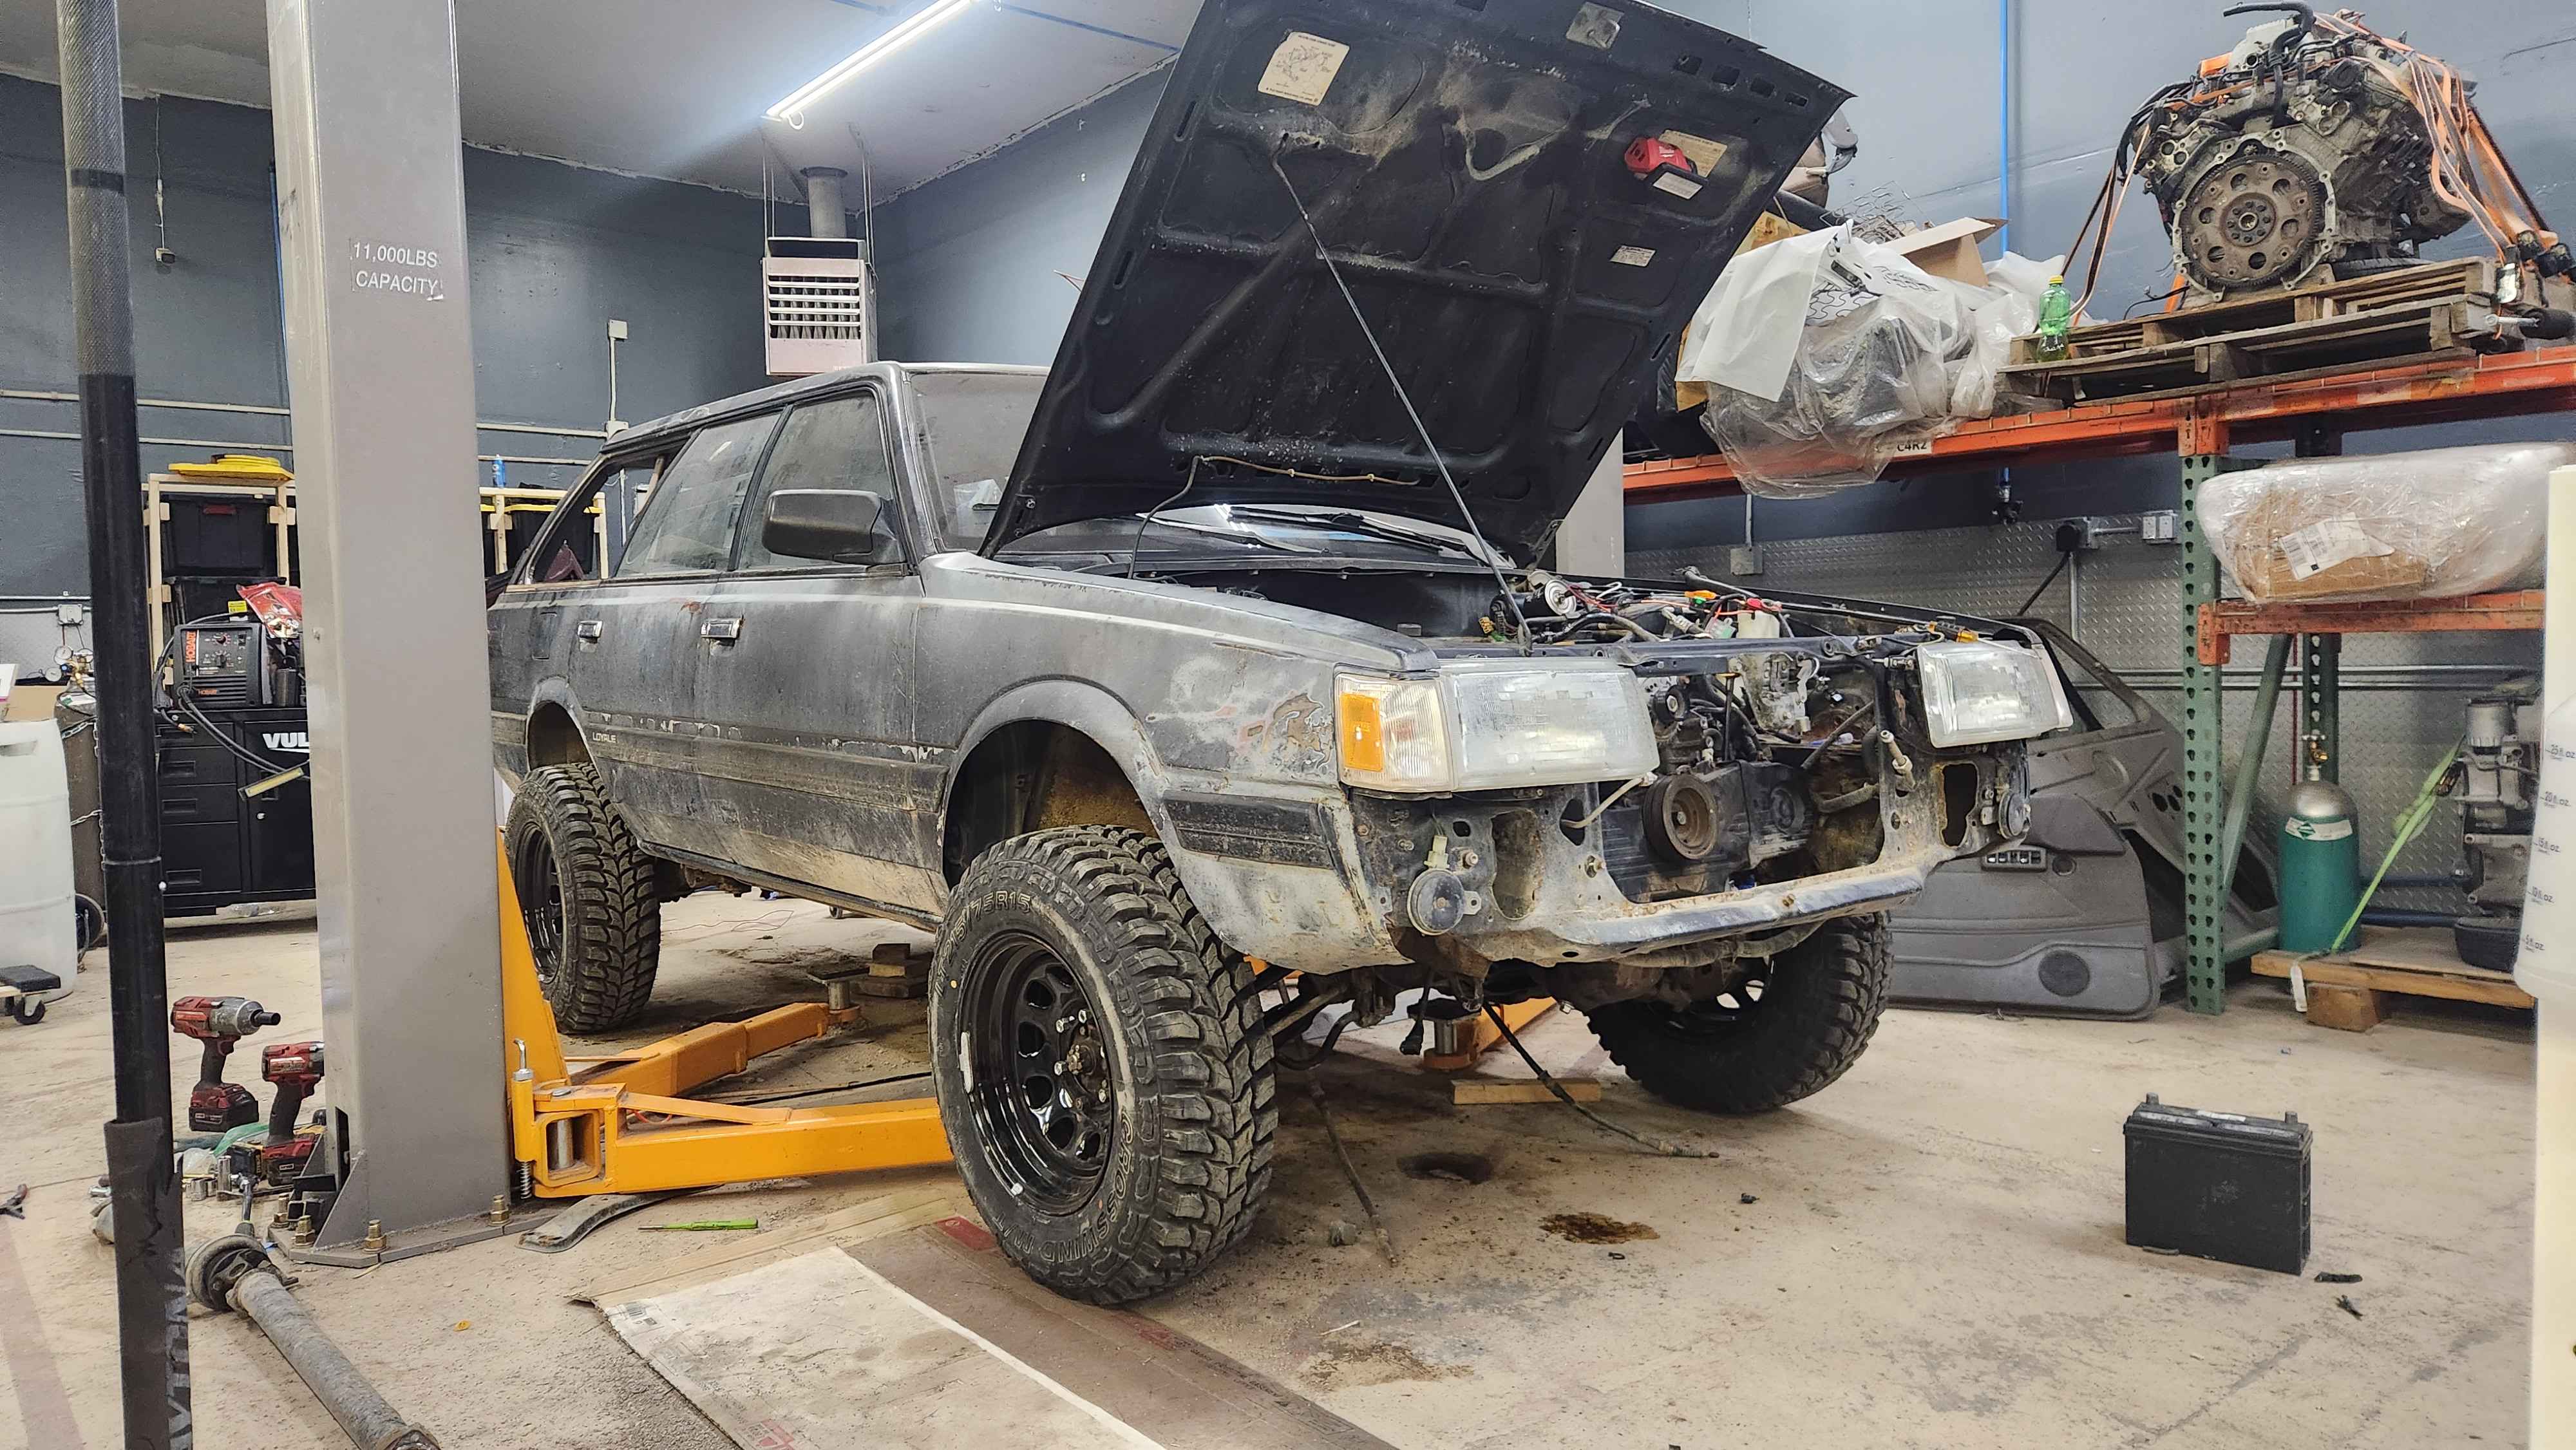
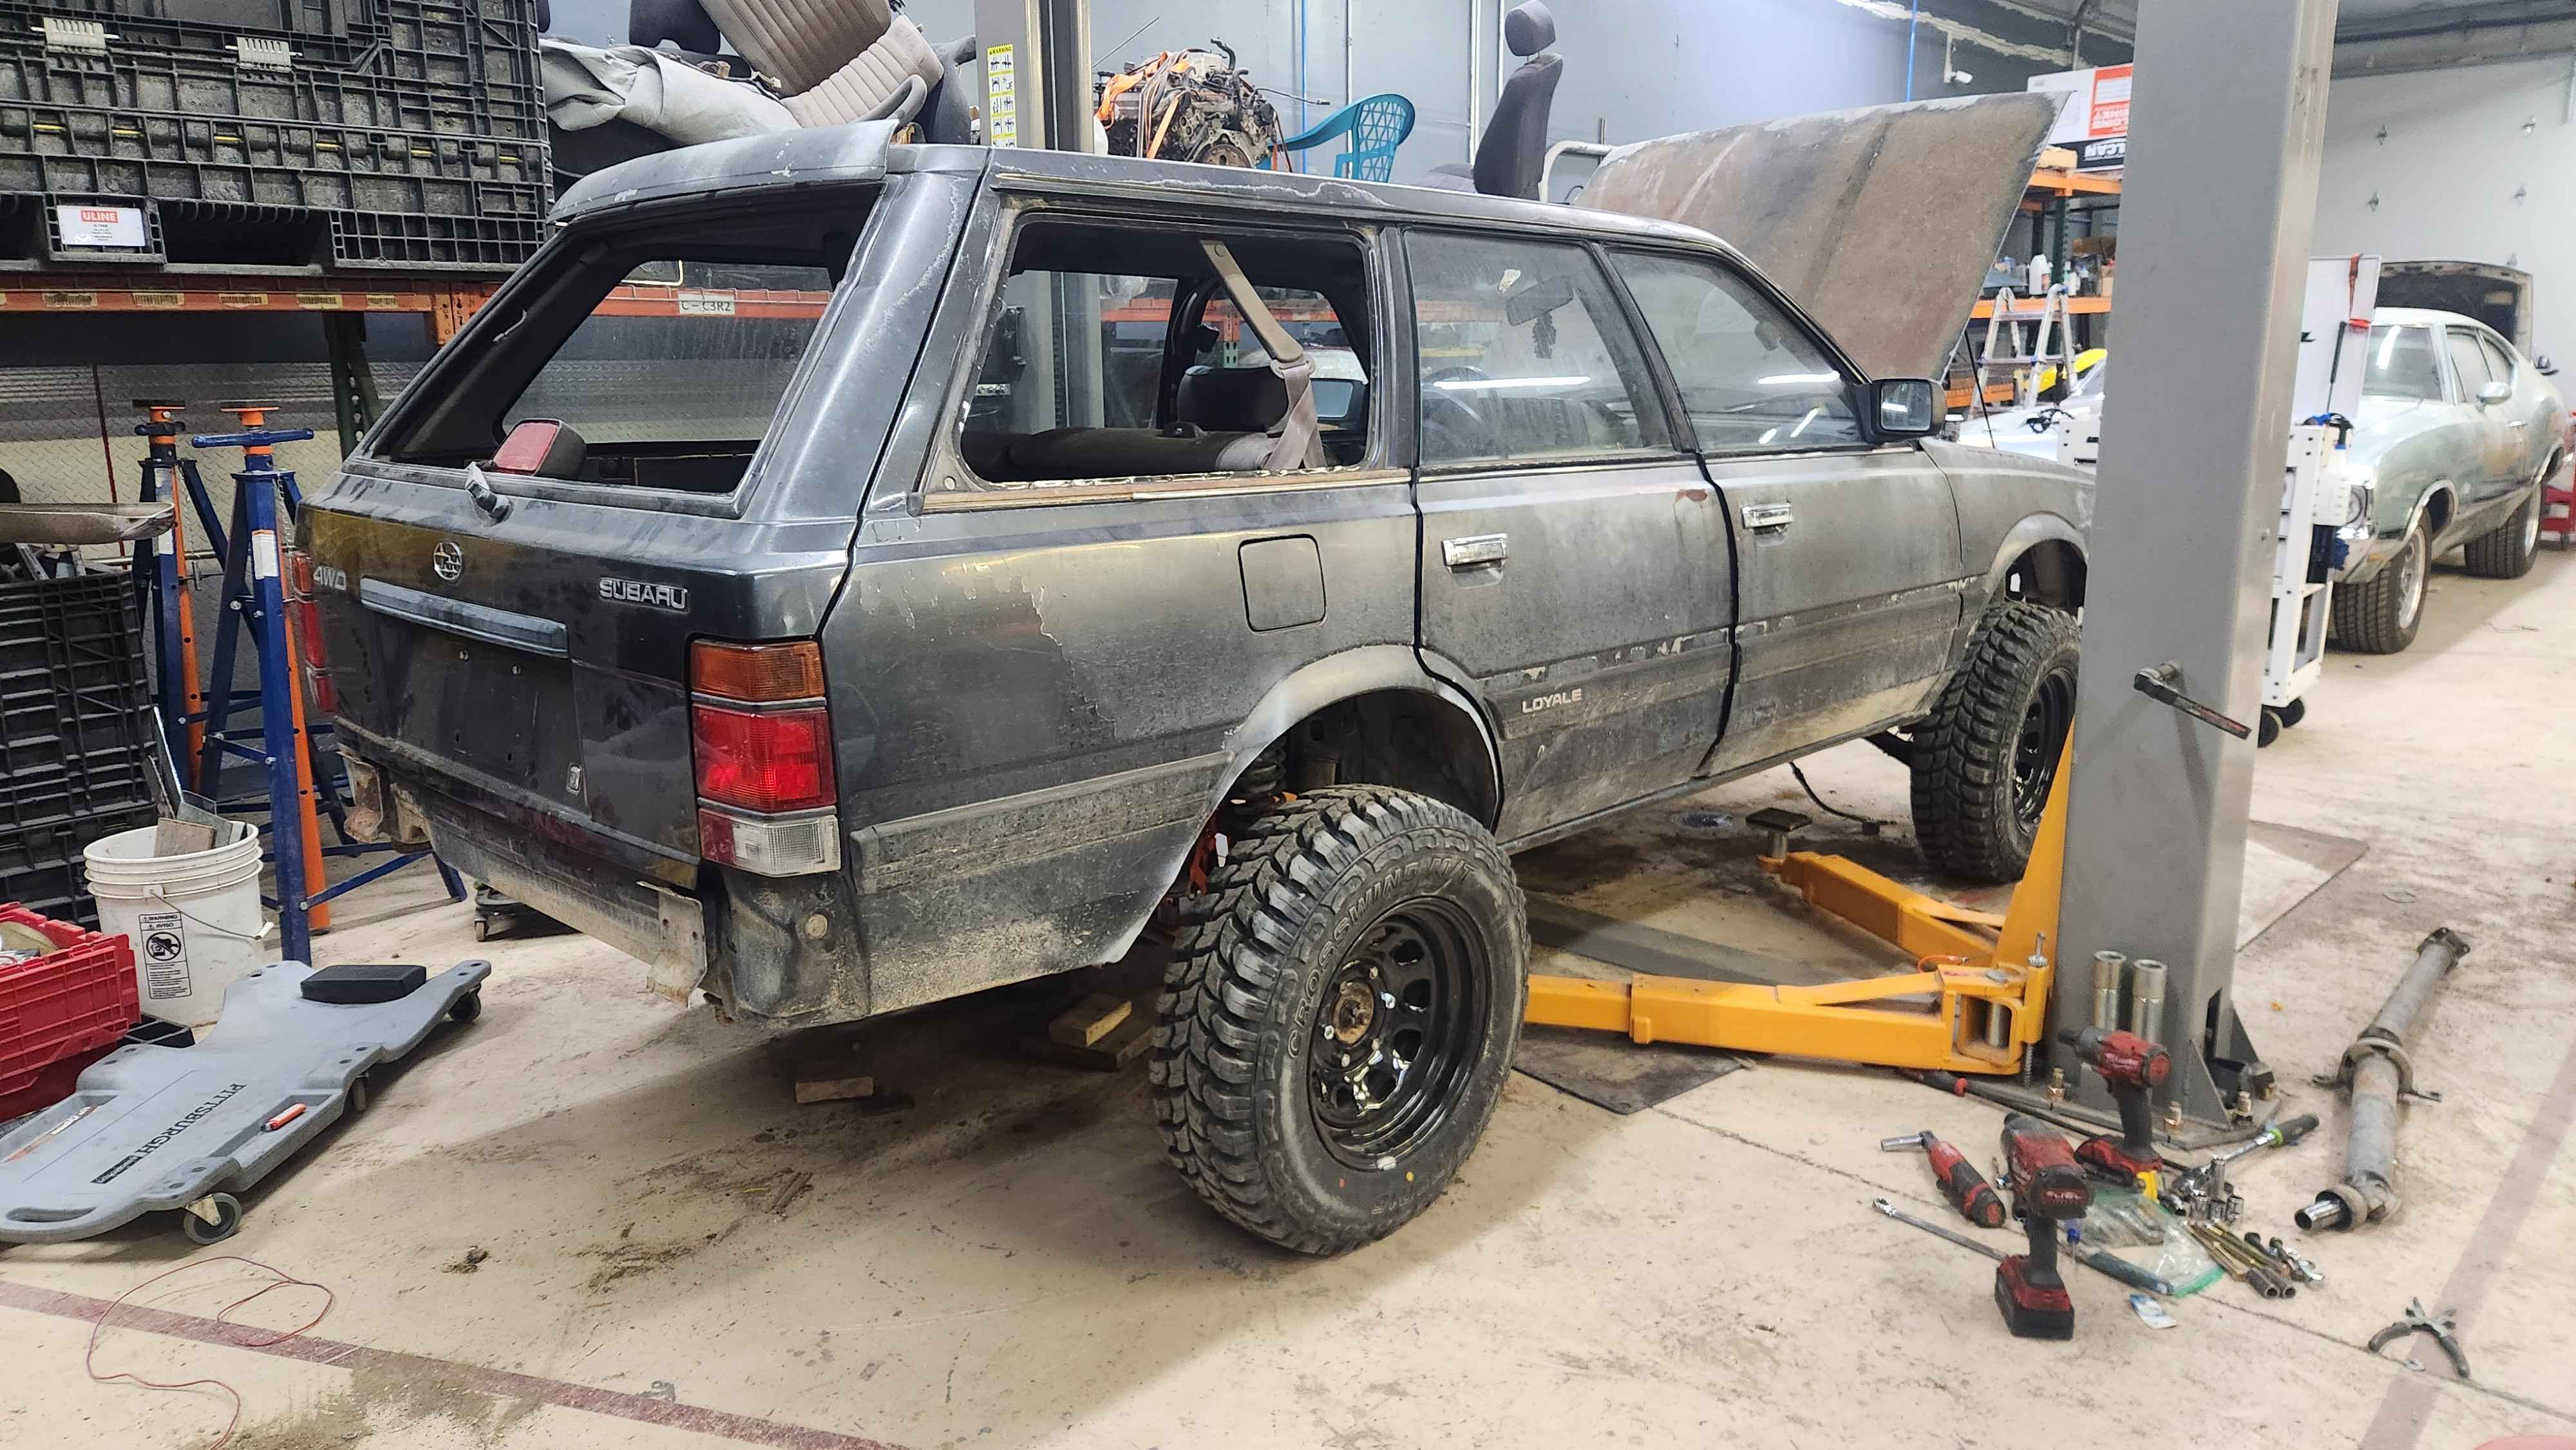
A number of weeks ago I posted a couple random questions and today I'm here to update you on the rig I'm building with and for my nephew. First off thanks to this awesome site and its members for assisting in almost every step so far. A while back I did some work for a friend and afterward he threw this Loyale at me for free because it was just taking space, had engine problems, and a broken rear hatch glass. I did diagnose a blown head pretty quickly during some high speed forest trail testing that may or may not have also caused another broken window in addition to some subtle impacts to the rocker panels and a torn cv. After the field test I went ahead and added it to the row of cars behind my dads barn that he definitely doesn't hate. He has a pretty specific "wtf?" face that is visible from about 100 yards. Fast forward to a few months ago my nephew is about to graduate an apprentice electrician program, has already been hired by a job starting in January, and he needs something he can drive to work here in town for a year or two till he can afford his own car. He's commented multiple times that he "loves that shitty looking wagon parked behind the barn" so I decide it's time for him to learn how a car is put together and how to maintain his very own "shitty wagon" as he put it. So Dec 1st I get the Loyale on the trailer super early and I'm at the shop by 7am. All I gotta do is clear out my 2 stalls and then I can dig in. At exactly 7:58 am I pick up a leaf spring pack that I didn't realize had what I assume to be a missing 10mm socket jammed between two leaves. As I sat the pack down whatever it was came free causing the pack to quickly close on the tip of my thumb on my left hand (non-dominant). After slumping to the floor and briefly wondering if this is how my life ends I pulled myself together and grabbed a 3/4 wrench within reach which I used to pry my thumb free. After that I did the smart thing and went home to take a 4 hour nap. Long story short (hah) after my nap the subsequent ER visit showed a fractured thumb in 3 places. Definitely a great start to the new project. So I was forced to sit back and instruct my nephew over the last 8 weeks while my mangled, nearly severed thumb was healing. Ate a burger and pointed at things while my nephew pulled the engine, sub frames, he did the timing belt + pump, seals and gaskets all around (engine, trans, diffs), thinned out the wiring harness, auto locker in rear, wired a new stereo and speaker set, tons of other menial tasks, and finally he learned the birds and the bees when it comes to engines and transmissions getting it on. Resulting in the beautiful union between an EJ22 and a 5 speed dual range. Kid has learned a lot in the evenings after work and I've enjoyed a lot of sitting in rolling chair with a beer and a laser pointer. Yesterday was the first day I actually pushed my mental and physical capabilities by getting into the shop before 1pm. As my left hand gripped my harbor freight ratchet that I should warranty soon, I could feel the strength returning to my mostly healed but still kinda stings a bit sometimes thumb and within no time I had the engine and trans mounted with the SJR 4" lift. Next I made short work of a 6 lug conversion front and back, ending the night with the front suspension done and front wheels on. Today I had to run a bunch of errands and shop for groceries which that is a separate blog so I can't get into it here but I did manage to swing by the shop for a few hours and get the rear sub frame installed with wheels on and the weight dropped. Leading to a picture needing to be taken, and a forum post needing to be composed. I'll be sure to update one more time when she drives out of the shop. Sincere thanks again to this sub. Would have beat my head against the wall quite a bit without yall. (still might tho)

 1 point
 -
Parts are out there, but they're not common at all. If it were me, I'd pull the turbo engine and keep it around. Then pull your NA EA81 and convert it to TBI using an EA82 SPFI intake and throttle body. There is documentation out there of how to do this but you'd be looking at a bit of work. Either way I'd say it's worth it, save these cars and SAVE YOUR PARTS! Good luck mate :]1 point
-
Yup. Corrosion creates high resistance connections that will heat up and ruin the compression/slip fit of the terminals and then it melts everything around it, all without ever blowing a fuse. I'm okay with the non-electric fan on my DL but it was tough finding a good thermostatic clutch when mine seized up last fall. I ended up finding one at PicknPull from a GL-10. It looked brand new and has been working great.1 point
-
The fuel pressure regulator is responsible for the fuel pressure. Those stats on the pump just say what it’s capable of. The fuel pressure regulator will monitor the pressure correctly as it falls within the range on the pump’s details. I’d run that pump. Cheers Bennie1 point
-
Awesome pics and trip report as usual Todd. I reckon my favourite pic is the one you walked in for - with the two big rocky outcrops that made a saddle and the sunset in the background; the vegetation on either side of the pic give us a nice amount of colour to balance it out. Mint! Cheers Bennie1 point
-
Thank you. So then it’s about the harness and the amount of lamp connectors only? Will the shells cross over without a fitment issue? Old days it would be set off for both. I’ll have to go look. I just figured if it was easy then someone else would have already done it.1 point
-
I doubt that you can buy the OEM breather hoses from Subaru anymore. The double curve hoses are particularly hard to replace by shopping on line because the offset of the two ends is unique to the car, and unlikely to be made by Gates and others. So I improvised for a fraction of the retail prices that I see listed on Ebay, by using 3/4" diameter high temp silicone coolant hose in the multilayer type, brass barbed elbows and then enough 7/8" clamps to make those single and double curves. Once the original hoses crack, then your engine is not going to run well. So I wanted to replace with the new and pliable hoses to head off that potential breakdown.1 point
-
Hello, I live in Oregon. Looking for a windshield in the northwest. I believe 72-79 possibly 80 will fit please correct me if I’m wrong. Thanks!1 point
-
Thank you1 point
-
I've had several pumps in my 87 DL wagon in the last two years and they all begin to whine and moan after a few months but only when they get warm. The whine pulses up and down when the turn signals are on or when any change is made to the loading on the battery. The pumps all work great at first and are pretty quiet but eventually I begin to hear them after a long drive home from work. I just figure it is cheap pumps that quickly lose the gearing tolerance after a few thousand miles.1 point
-
The only thing critical is that the blue/red wire on the fan sees positive voltage and that the yellow/white gets a ground that comes from the thermo snap switch. The wires on the thermo snap switch could get swapped but is doesn't matter since all it is doing is supplying the ground connection for the fan whenever the coolant is hot enough. When the key is on and the engine either hot or cold, you should always read +12 volts on one wire going to the snap switch connector. The other wire will be grounded to the chassis. When the coolant is hot enough, the snap switch closes and the fan is connected to ground and turns on. You could have the wires on the snap switch reversed and it would not matter. To test the fan, temporarily jumper across the connector at the snap switch with a paper clip (ignition key in the run position) and the fan should turn on. That tells you if the fan is okay. To test the snap switch, you will need to get it hot enough to trigger it. If you can take it out easily, connect it to a VOM and heat it in a pan of boiling water to see if the contacts go from open to closed.1 point
-
Looking for a windshield 79 wagon 4wd windshield1 point
-
Nah I wouldn’t touch that as it’s got the EJ25D. Smooth engine when it’s operating properly, nasty head gasket which started the whole EJ25 reputation of having forever headgasket issues. Nice looking vehicle, I’d recommend having a game plan for when that EJ25D gives you issues. STi conversion been done many times before, great candidate for it Cheers Bennie1 point
-
UPDATE. All seems good enough for now. My oversight and approach was somewhat lacking. There was extra weight in the back of the wagon all this time. Nothing broken or out of place at either L or R coil spring/shock mounts. Both shocks are still good. Left spring does sag but only just a bit. I got the car on a level driveway and took photos. And I was I was able to temporarily get my fuel pump working again when the car wouldn't start this morning. Voltage was getting there, but motor was at a "dead spot" on the 34 year old orig fuel pump. So I reversed the polarity and spun it backwards for a few seconds. Then it was working as normal. Yes, I do have a Ford F150 electric fuel pump, but never got around to installing it. Need to check it for fuel line fitting adapters. Thanks
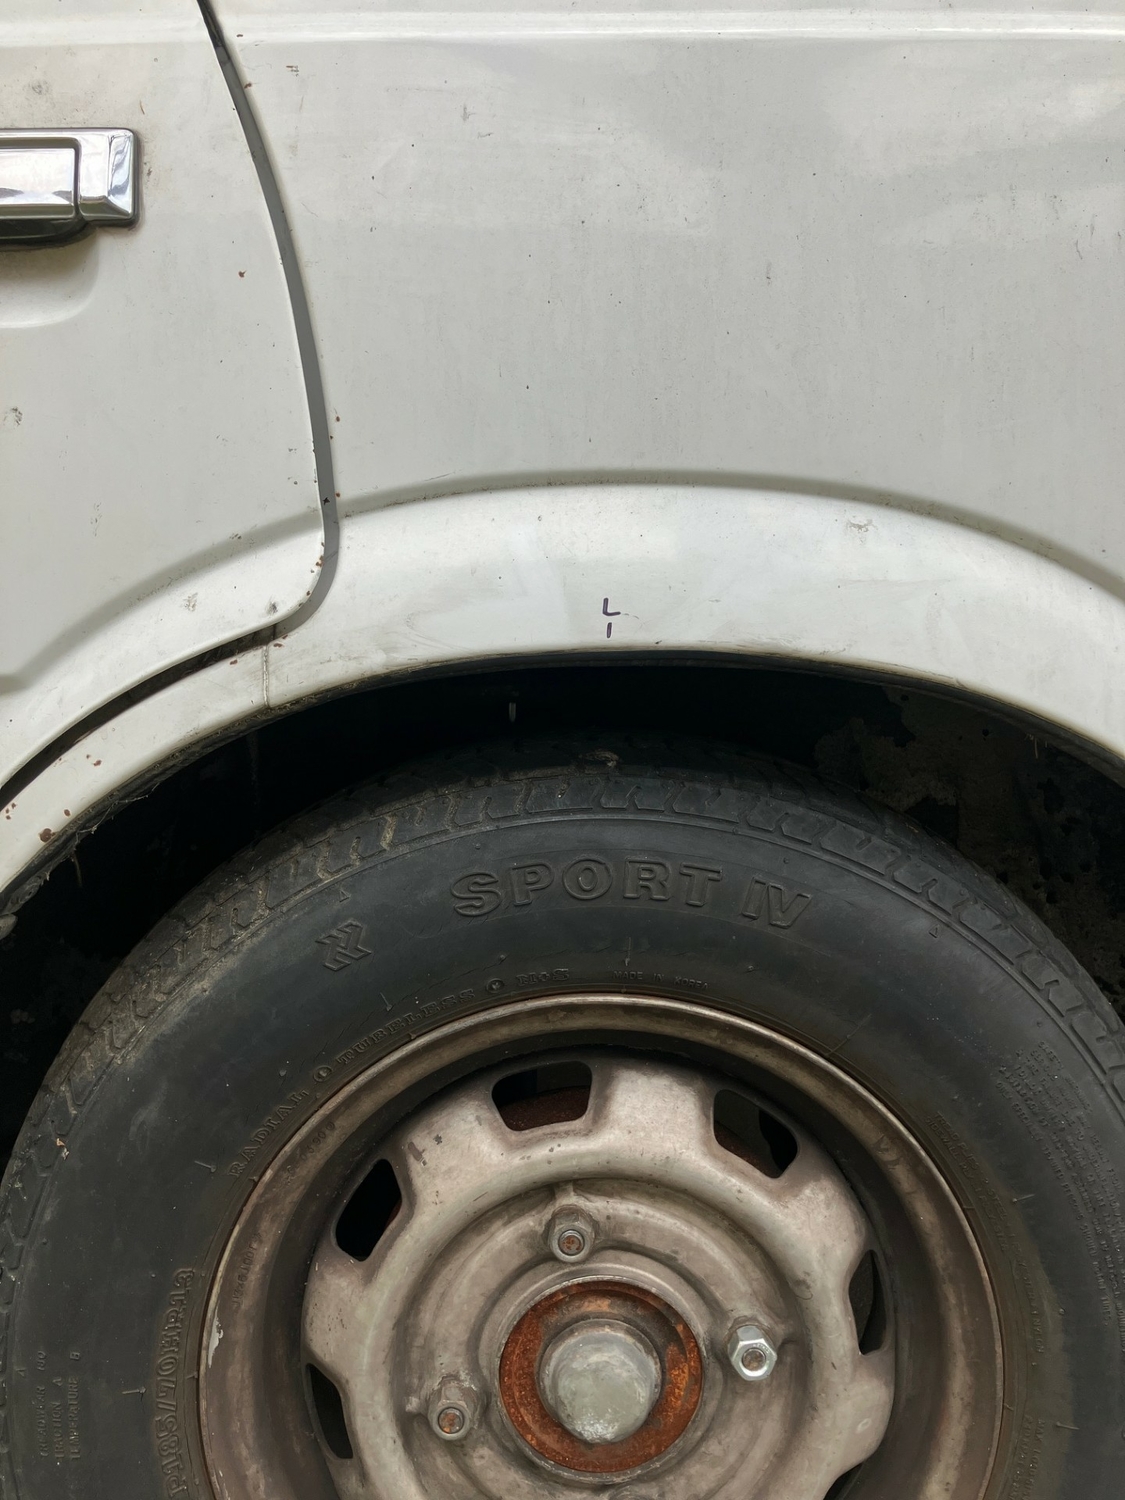
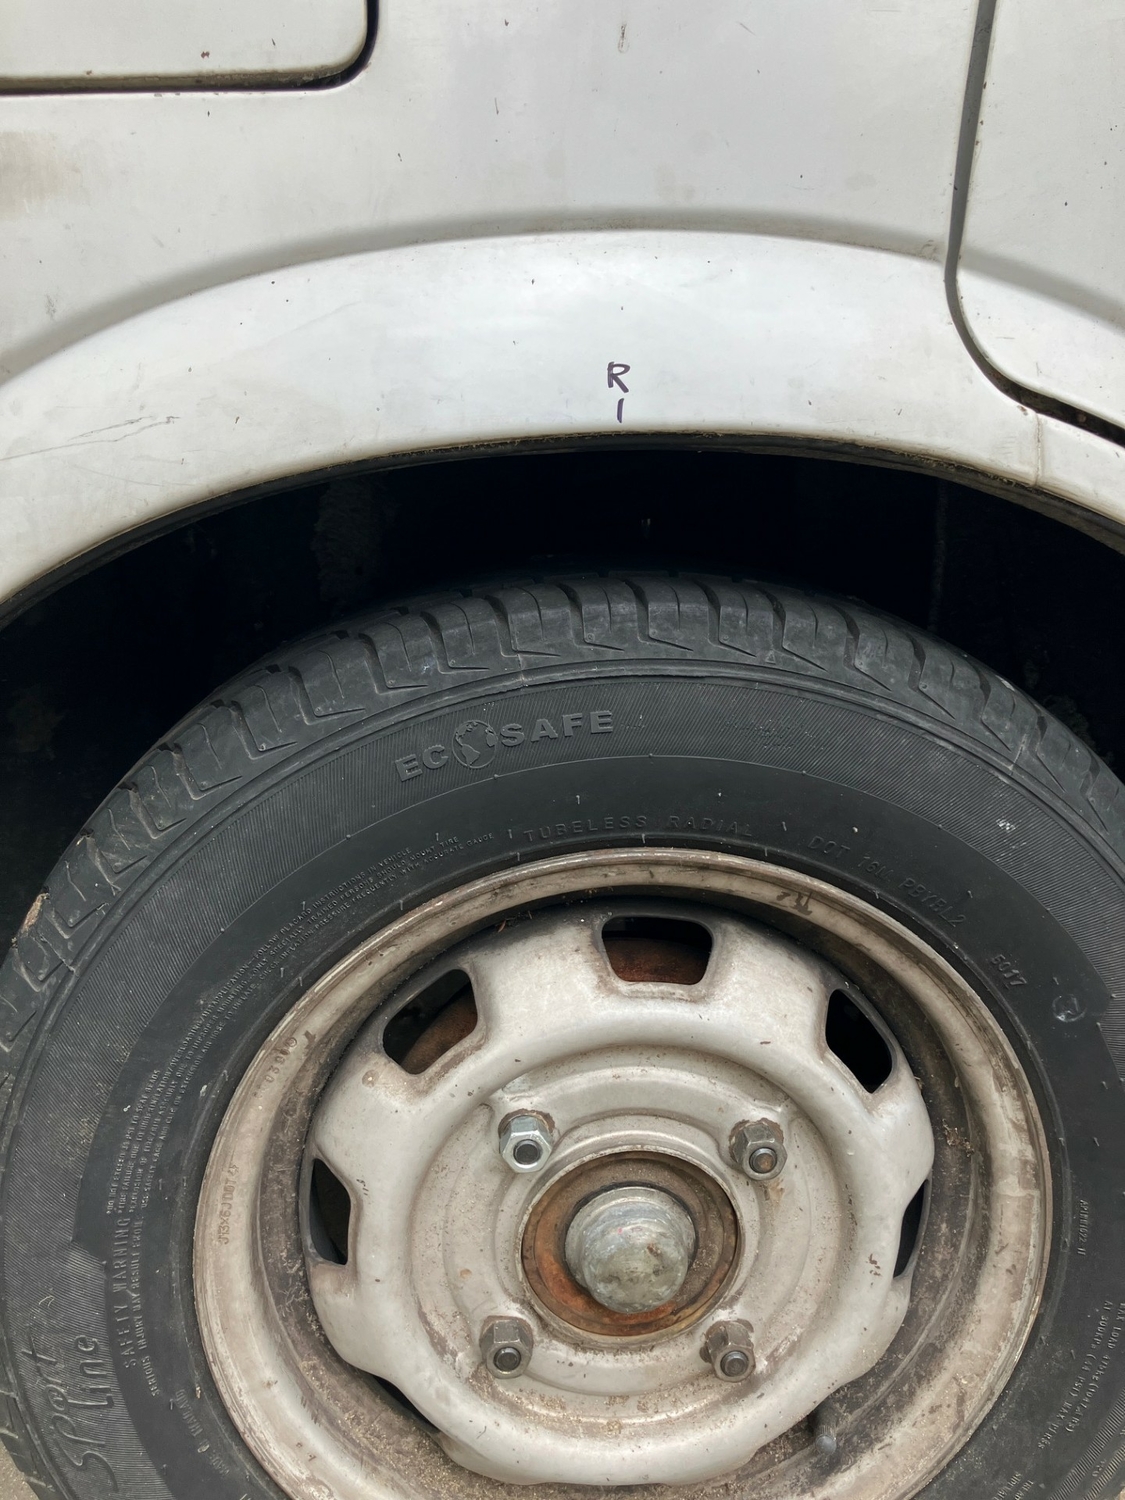 1 point
 -
Thanks Bennie. Will be jacking up the car tomorrow morning and see whats up and compare measurements on L & R side. Will take a few photos. And YES I WILL BE USING JACK STANDS!1 point
-
An aftermarket head unit will always create a tiny spark when connecting the battery. Other than that the fuel pump issue is either a poorly operating alternator, old wiring with resistance points or a battery that isn’t coping as well as it used to. Lastly could be some sketchy wiring done by a pervious owner. You’d really need to check out if anything was modified before your ownership. Eg: I have a Gen1 RS turbo Liberty (Legacy over your way) that someone used the door switch circuit as the earth for the aftermarket head unit. Whenever someone opens a door the headunit turns off as the circuit becomes active. Classic (*facepalm*). Cheers Bennie1 point
-
Lots of power. 25-27 MPG. TEMP GAUGE inoperative. Used old exhaust Manifold, Intake air manifold. Old engine belt pully lower drivers side failed at 186000 miles. engine locked up. Installed new front axles, brake drums, disks, struts, catalytic converter.1 point
-
Totally shooting from the hip here, these are all ideas and I've never done any of these methods. 1. Maybe you could fill the piston from the bottom (use it as a bowl) and fill it with dry ice or liquid nitrogen. Maybe you could get the piston cold enough to get it to shrink and you could use your timber+hammer method to remove it then. You may have a temperature transfer to the cylinder walls so this may not work. But the sleeves and piston should contract at different rates. 2. Pour water into the cylinder all the way to the top. Reinstall the head (maybe add some cheap RTV or the like) and stick the block half with the head on into the freezer. Maybe the hydraulic pressure from the water freezing could remove the piston. Or you'll end up cracking the block or head so best use a head that is already too far gone.1 point
-
has this been posted before? i found this over on the legacy gt forum and thought it should be included here. i was impressed. apparently the cause of the 99 speedo failure is a bad ground connection on the speedo circuit board. by adding a a wire to replace the bad connection the speedo will work again. and although you have to pull the speedo to fix it you do not have to remove the circuit board from the speedo. (EDIT: i've been looking at the pics and i'm not sure you can fix it with out removing the circuit board, FYI.) the the blue "s" shaped wire is the fix, see the pics. pics: write up, not by original fixer: So I just had this problem in a 99 Legacy Outback that I got and searched the internets and found the solution(at least to my particular problem). Here's a test, if your speedo isn't working and you push in the trip odometer and it starts working again(however briefly) then both of your speed sensors are just fine. The 99s seem to have a problem with a ground in the chipboard of the speedo unit itself. Here's how to fix it. Sorry for the lack of pictures but i'll try to describe it in detail. Start by unhooking your negative battery terminal so you don't zap yourself and/or set of the airbag accidentally. Remove the two screws at the top of the shroud covering the speedometer and the two at the bottom as well underneath the switches(fog lights cruise). Now the whole shroud should come off with a little persuasion and you can get your hand or fingers in there to pop off all the wiring harnesses to your different switches(cruise fog lights etc.) Remember where they are, or as I like to do, take a cell phone picture. Now there are two more screws on the top and two more on the bottom holding your speedometer cluster in place. Remove all of those and wiggle your speedometer out a little bit. There are a total of 4 harnesses to disconnect, one on the top left, two on the top right, and one directly in the middle(the speedo "cable") Take the whole cluster out and bring it inside to work on a table or something. Take the cluster apart by removing the plastic shield in front and unscrewing the 5 screws right behind the speedo head in the back of the board by where the speedo cables' harness was. When you get the whole speedo head out, pull off the chipboard and look at the middle pin of the 5 pins that the harness plugs into. It has a chipboard wire going a few mms to a soldering point called ground. This is the problem with your speedo. The 99s have a bad connection to that ground. THIS IS REALLY EASY!!! all you have to do is take a small wire from anything and solder it to the middle pin and solder the other side to the ground. Voila. You're done! You just bypassed the bad connections on the board with your own wire and now it has constant ground and will be happy. Put everything back together the same way you pulled it apart and your speedometer will be eternally grateful. I had never taken any part of my interior apart, and done VERY little soldering or dealing with chipboards before, and the entire process took me about an hour and a half. hope this helps. taglines: speedofix, 99speedofix1 point
-
After all that, the engine Runs Flawlessly, Stable and Reliable! As I explained at post Nº 3 above, I obtained another Weber 32/36 carburetor: So I changed it after a Decade, to test the Choke and Anti-Dieseling Fuel Cutoff solenoid: Photo of the finished install: Here is how the new Weber looks, already installed and Running smoothly: And This is How my 1985 Weberized EA82 Subaru Wagon Looks Now: Named: The "BumbleBeast" Here's the Build Thread: ~► http://www.ultimatesubaru.org/forum/topic/122276-the-bumble-beast/ This is a Video of the Weber Carburetor, Working on my "BumbleBeast" Subaru: Feel free to ask Any questions regarding the Weber Carb Swap, on its Discussion Thread, which is Here: ~► http://www.ultimatesubaru.org/forum/topic/148641-to-27-loyale/ I Hope This Write-up will be Helpful. There are interesting comments regarding this writeup, on Facebook, like this one: If you find this writeup, Useful, please let me know by hitting the "Like" Button below. I only ask this as a Motivation to continue Sharing my work with you. Kind Regards.1 point
-
Found what I needed.1 point
-
try this... http://www.suberdave.com/USMB/HTKYSA.PDF1 point