mickytrus
-
Posts
351 -
Joined
-
Last visited
Content Type
Profiles
Forums
Gallery
Store
Everything posted by mickytrus
-
Uber Scoober - tell me about how you car sits
mickytrus replied to mickytrus's topic in Old Gen.: 80's GL/DL/XT/Loyales...
So you don't think there is like 2" lift in that T wgn.....? Does anyone have pics of what 2" of lift looks like...... Those Peugeot wheels look really nice on there..... I wonder If I can get some wheels like that still? Any suggestions on where to get wheels. in the US............ I am not in a position to go five lug.... That set a wheels would be perfect... -
I ripped this car apart.... top to bottom.... had the interior out.... doors off hatch off..... etc... PUt it bACK TOGETHER end now the power locks "no workie".... like not a one of the locks.... I can get out a tester and test lite if I have to.. but, any suggestions? Also in the back hatch I have one electrical connection.... It is astray... I don't see where to plug it in.... can't seem to remember it being plugged in or not...... it hangs down on the driver side... maybe two wires in it... and a black connector on it...... Thanks......... :-\ just slightly.... and no patience anymore.....
-
Uber Scoober - tell me about how you car sits
mickytrus replied to mickytrus's topic in Old Gen.: 80's GL/DL/XT/Loyales...
Yeah, that is probably the gig... it was a red Loyale/DL... with a rust hole in the pass fender.. but, very clean and detailed... here is the link. to it... http://www.ultimatesubaru.org/forum/showthread.php?t=127197&page=67 it is the red one down the page... Any insight would be great.... I want to set mine up like this....... -
Uber, I was looking at your car in the posts of older models.... Can you tell me about, how your car sits? Is it a 2" lift? where'd you get the parts?(cose, etc) how was it to do the install(what did you have to do?) and your tires? Are they 15" four lugs? The car looks and sits great..... I like the idea of getting it up out of the road slop....... AND how does the car handle since the mods? I don't see myself off roading... and I do get some good fuel mileage(stock which is important)... How is the fuel economy since lifting it and the larger tires?(has that changed as a result) AND if anyone else can Chime in regarding... this mod and their experience in anyway.... I would seriously appreciate it... I am kinda at the end of about six months of painstaking work on this car(AKA: Jackson Ho')(I'll post some pics soon) Just finishing up some motor madd-ness.... I would really like to do up the car with a little lift....(since I just got done with the tummy tuck) Peace, Micky:burnout:
-
I am going to ditch the clutch fan. I ditched the AC... and alot of posts say One: the fan was for the AC.... and you can get a little more juice(power) out of this motor by losing the clutch fan..... However, I would really like to run an AUX. fan....... I am even thinking of running it off the Defrost switch the AC clutch used to use.... So does anyone have a link they could send me to a nice AUX fan. I would like to see if I could bolt it on the RAD.... Make it look OEM... I mean really I guess I could run an OEM fan.. (run two side by side) WELL, LET ME KNOW WHAT YOU THINK THANKS, MICKY:banana:
-
Head bolts. Any thread sealer r locker
mickytrus replied to mickytrus's topic in Old Gen.: 80's GL/DL/XT/Loyales...
Thanks. -
See if you can place something ... Stabilize it... such that it is behind the head and in front of the shaft..... Like a piece firm card board.. wire it in so it obstructs the shaft from the head... THe idea here is so you can determine where this slop is spitting out.... Could be the head gasket.. On the passenger side.. the oil o-ring is on the fire wall side of the head.... These love to squirt oil out.... so the cardboard will get squirted on, on the head side of the card board..... and on the axle side it will be clean. (if it is the o-ring in the head gasket) if it is the axle, the axle side of the cardboard will have the slop on it.... Yeah, and axle will sling grease out of a tiny hole in a boot.( I got one doing it right now)... and the head o-ring.... will shoot it out while driving..... (like a spray gun)
-
Yeah, I have seen that gasket just degrade... and offer zero support..... I an not going to use the gasket.. I am not sure when I will attack this....... I am getting a little toasted... been keeping late hours for about a week working on this pup (Jackson Ho') is her name. Toninght I will start it up.... Hopefully, she will pur like a kitten...... I ended up replacing the tensioners and the idler gear...... as well as all the gaskets and seals above the pan...(less the rear seal) Used MilesFoxes.... Grand Head resurfing technique.....(thanks again)
-
Yeah, I unplugged it and ripped the accessorieds out last summer... I was due to get that big hunk of terd of the motor.... That thing has to weigh 20 pounds. Anway... I picked up a 3/8" inch black gas nipple...(I forget what size I got) but the idea goat brought up I took to the next step... Just in that I bought a nipple smaller than what I needed in size. To this nipple I added a 3/8 black coupling... The coupling made it longer than the desired size... Then I tightened the coupling on to the nipple, this was done till it was the right size. There is no cutting involved. AC unit is gone now..... The only thing with this method is that there are only three points of support. It causes the swivel of the alternator to be bolted in while the other two point are a little loose... It is important to make sure the belt is straight. then the two points can be tightened. then the swivel can be tightened..... I would like to think that this is a temporary rig. till I can get the actual bracket from an older gen car. A welder and a little metal fab experience could mod this very easily and use the nipple concept. Just bolt it ... and then weld it..... I any event.. this is better than having that useless dead unit there.
-
'91 Loyale - EA82 - Nasty Oil leak.
mickytrus replied to GorgeSuby's topic in Old Gen.: 80's GL/DL/XT/Loyales...
Could be blowing it out the head... that is what mine liked to do..... Hopefully, it is fixed now..... new head gasket..... I ran it it for 40k leaking like a pig......... I would run 20w50 in it. with a quart of Lucas engine oil stablizer.... that slowed it down some......... You need to ascertain where the leak is don't guess..... I remember not that long ago.... I didn't run the car for like a month. or more..... Started it up..... and watched it drip.... so get under it... while its running.... see if you can see it drip.... Try throwing some card board under it... after you get home at night to see where the drops are with respect to the engine above..... then decide.... -
Dig it.... Thanks for the input Q
-
My Ac is toast.... hasn't worked in ages and not really interested in reviving it. What I would really like to do is remove the compressor... I removed everything else.. This will require some kind of revamping... I don't want to get into re-engineering the alternator bracket..... Anybody have any suggestions.... ????? thanks, Micky
-
Thanks, Sounds good.:headbang::headbang:
-
Ok, Sounds good.... Question on the omission of the cork gasket... which I can relate to............ :dead:When I use the "spooge".... ultra grey........ any procedure to tightening? Do I tighten but leave the ultra grey space between the mating surfaces to dry(say 3/16"- setup space). and then when the product dries.... tighten?????? to "torque specs" Thanks, Micky....
-
Anyone, have any tricks to doing an oil pan gasket while motor is in car...... Like I can loosen the motor mounts... and lift the motor up... Is it alright to support the motor by the heads? Or is this bad juju.......... It is those last bolts near the rear inspection plate... and holding the motor up that are my concerns.... I don't have an engine hoist or... an a-frame........ Thanks, Micky
-
Head bolts. Any thread sealer r locker
mickytrus replied to mickytrus's topic in Old Gen.: 80's GL/DL/XT/Loyales...
Thanks for all the input on this. Yeah, I torqued and did the 24hr check...... I may consider a hot retorque... How long does one wait...... for a hot retorque? 50 miles 300 miles....? I am not putting the timing belt covers back on... so...... that will alleviate some aggravation... It is just that I sealed the cam boxes... so I will have to go through the troubles of recleaning and resealing...... but, if it can improve a good seal... and provide longevity to the seal.... I would say it is worth it.......... -
Head bolts. Any thread sealer r locker
mickytrus replied to mickytrus's topic in Old Gen.: 80's GL/DL/XT/Loyales...
So follow torque sequence,,,,,, Torque in three steps to specified tightness....... that is it.... Does anybody "let stand till the bread rises?":headbang: I can get the heads on and then work on the water pump and the fuel pump.... that should be good for a couple of hours and then recheck final tightness following the torque sequence.... Is that long enough to let the heads sit.... Is there any relevance to my madness? Micky -
Head bolts. Any thread sealer r locker
mickytrus replied to mickytrus's topic in Old Gen.: 80's GL/DL/XT/Loyales...
Sorry it was rather late last night It is an ea82 What is the retorque procedure? I am using ishino gaskets , parts Store said they were oem. Do I install heads and then Go bake a cake? If there is a link You can offer to an old thread. I Would appreciate -
Hi About to throw on my heads? Does any one use locktite? And is this good preventative? My bolts looked like something Was leaking. By them Thanks micky
-
Cool Thanks ! GenDis So I am going to collect my items to resurface at home... I got a nice butcher block work bench.... I need a piece of glass... 5/16 X ? X ? by what do you recommend... I am assuming that your sheet of 220 wet dry paper is 8.5 X 11.... so when you glue the paper down(on the glass)..... are you gluing two sheets next to each other, thus getting a 17 X 11 sanding surface? And what kind of stroke do you use while sliding the head on the sand paper? Are you (represent with clock as direction) moving/sliding the head from the center position to say 10 oclock and then back to center position and then moving/sliding the head to say 2 oclock? and then back to center position...... repeat process till completed? MilesFox with the peening I meant peening the crack itself. just get a small pointed punch and sort of tap down the edges of the crack to smoosh it together. Ok, I can dig it... The only potential for compromise with the crack is the valve seats. I have seen valve seats pop out. you can stake the side of the valve seat near the crack to prevent this. This is what peening the crack would be. So what if it look like the crack goes through the seat? I cant really determine this cause the valves are still in..... I would peen it right before the seat? I get the idea with peening generally speaking.... If you had a crack in a concrete wall.... one may drill the crack at its end point then fill the wall..... similar concept... Again much thanks, Micky
-
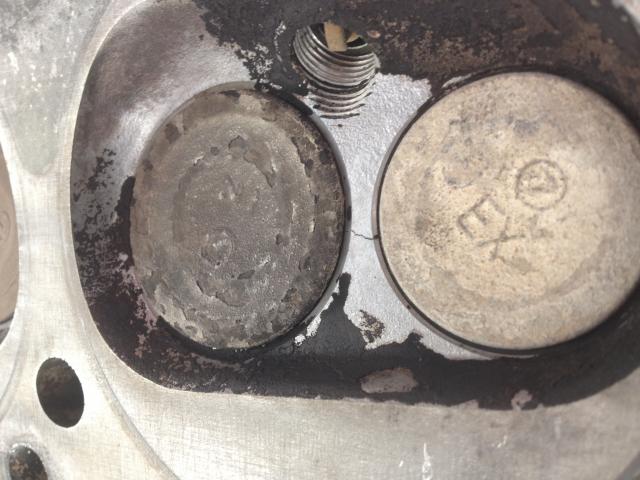
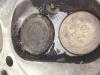
Thanks for all the input on this... this is a pic on one of the cracks in the combustion area on the head... they are all like this.. in the middle like previously mentioned...... Just figured a picture is best for everybody to see... So resurfacing my self...... I want the head to be true removed of any warping..... How can this be done.... without a milling machine ? Where do you recomend I get a kit for lapping the valves.... or if you could just provide me with a link to such a kit.......... MilesFox.... wondering if you could explain the peening on the gaskets? What do you mean ? Thanks, Micky
-
Geez. I got this smartphone but It hasn't made me smarter. There I was stAring at those cracked heads At the parts store. And I didn't get A picture. So will describe. Cracks are between Valves starting in the casted area the Cracks proceed towards the exhaust Valves down towards the valves and Give an unclear impression that they Go toward(through) the seat A picture says 1000 words. Sorry for the lack of a picture
-
Yeah, He is going to send them back to me (from their machine shop to the part store) I will look at them and probably send them back to be resurfaced to look at........ I think he said, the crack goes in between from one to the other like I------E dotted line representing the crack between the I ntake and E xhaust....... What is a TSB? Also the valves were not removed... they are just doing a resurface....(this place;they don't remove the valves) so he didn't look inside the port... crack is between valves in combustion chamber part of head. thanks
-
Hi, Yeah doing a timing belt... the car always leaked like a pig so I figured that I would regasket the motor..... you know new head gaskets etc....... so I dropped off the heads to be resurfaced... The old place I used to use went out of bussiness.. too bad........... So I used the parts place that I use..... Anyway, I get a call they are telling me the heads are both cracked...... now... mind you the car ran fine..... I had no complaints about how the car ran..... It just was the timing belt snapped....... Any thoughts on this cracked head story... I really don't want to buy new heads at 250.00 a pop........... Again, the car ran fine..... Thanks, Micky:horse:
-
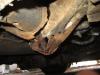
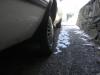
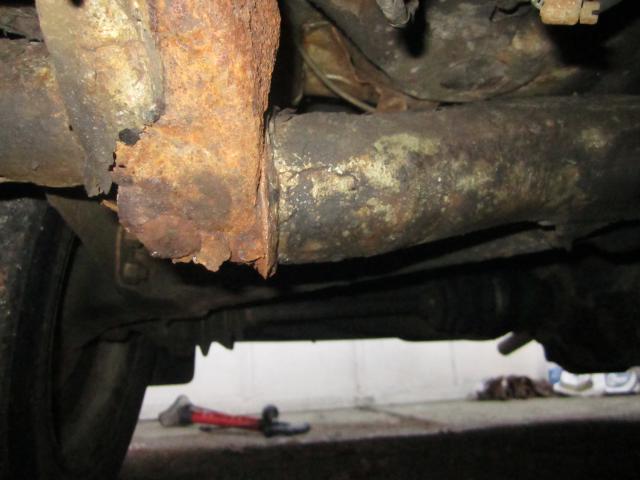
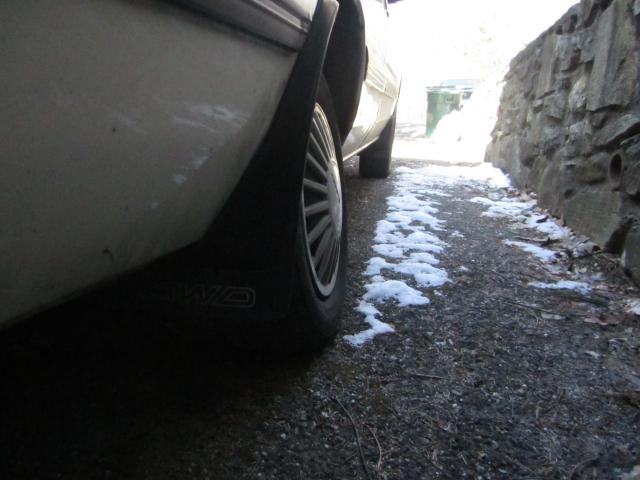
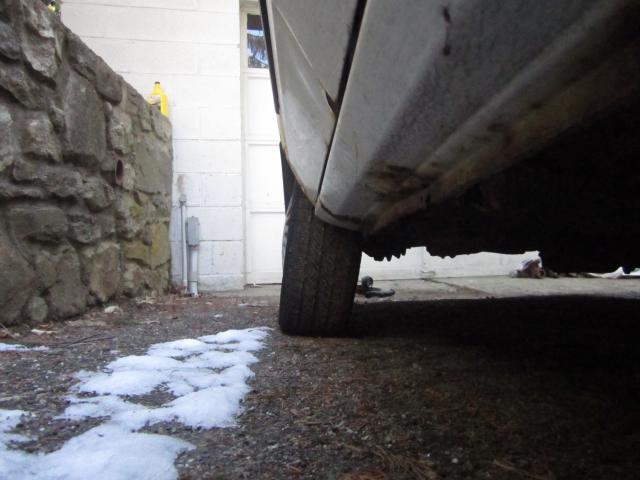
Rear suspension rotted out
mickytrus replied to mickytrus's topic in Old Gen.: 80's GL/DL/XT/Loyales...
here are some pics of the break. I had mentioned I would post them.... good to see what/how they can break. As for the car... Yeah, that is a good optimistic approach. work on it for an hour and see what happens....... I ended up getting another loyale... Out of RI.... 3 hours away.. this means I have four of them in my yard now....... I'll post a pic of the "ho's". It would be cool to get another 15k on the car.(her name is Trixie).. she would have 300K... that was the ultimate goal... . I seem to be having trouble with the Image attachments..... more pics