

-tombba-
-
Posts
230 -
Joined
-
Last visited
-
Days Won
2
Content Type
Profiles
Forums
Gallery
Store
Posts posted by -tombba-
-
-
That's intresting. I may just have to fins a better EJ series clutch disc for me now

-
Omg I love it! It's amazing please tell me how you got that color. Since I have not taken my dash out yet I'm still a bit mystified how to change the needle color. Great job
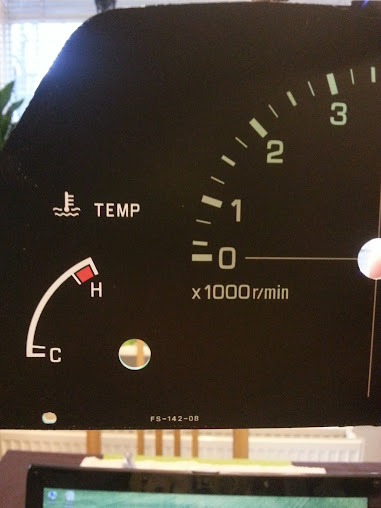
You just remove the nedles and sand the orange backing color off. The part near the center is the trickiest but it took about 10min to do all four of these. After sanding all the color off just apply any wanted color to the back. In my case I used a ligh blue nail polish from my girlfriends supplys (It's light blue with golden flakes in it
) The temperature meter is the trickiest part since you have to fit the small plastic part again to the backside of the meter after taking the needle off. It's actually really simple thing to do you just need to be careful with that thing. -
Looks nice in my opinion
I wish I would have those alloys instead of my H-style rims. -
Yes needles do look good in light blue
Still waiting for my T10 and T5 leds to come. Picture taken it two normal 5mm super bright white leds that don't spread the light evenly. But just a small teaser pic this one
Note that the car picture in center part looks white/blueish too. I think the light will not spread evenly since the original setup did not look even either but it will remain seen. I'll post the final pics after it's done. -
86' factory manual says that australia models had it but no indication that other versions had catalytic converter in factory manual. If it's carbed IT most likely did not have it and mpfi or turbo non australian models neither seems to have it.
-
I sent you a PM that includes download link for the wiring diagrams.
-
I have a factory manual from 86 model EA82 if that helps just pm me and I'll scan you the whole wiring diagram section of it.
-
So I was supposed to do some schoolwork BUT this what happened instead now
Here's how it looks with standard bulbs:

Heres a better pics of the sanding done on the backgrounds:

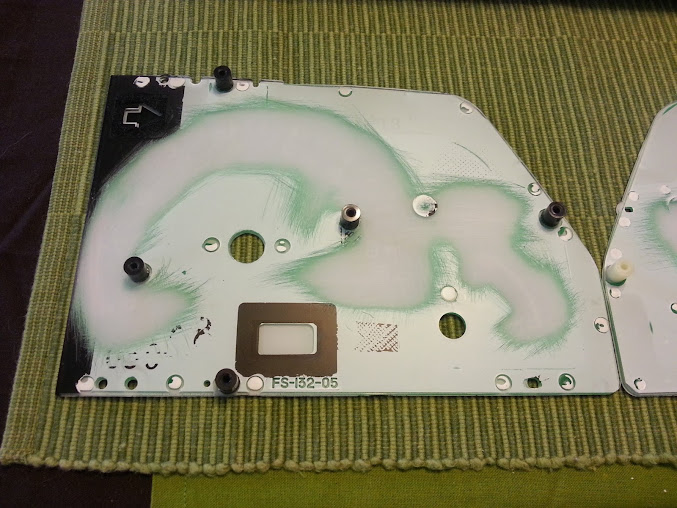
And some other findings from the center piece of the dash
These are only a rubber mounts that has small lamps stuffed into them

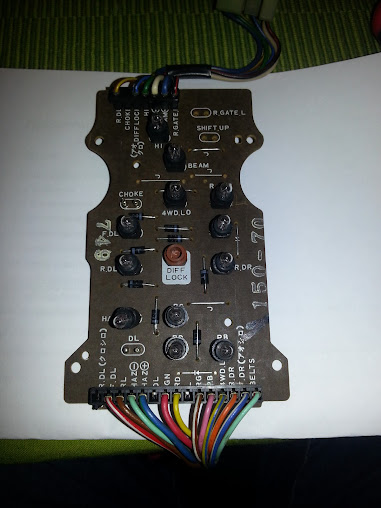
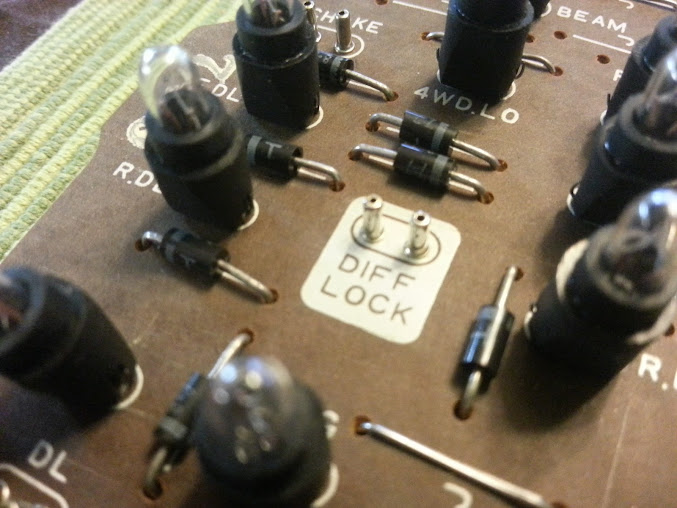
OEM shift light does anyone has this working ?

And if someone is intrested to change the color of the needles it can be done by sanding the back of them and painting it to any desired color.
And that's about it this time. Just have to order a bunch of leds and get things going onwards then.
Oh and if anyone want's to use the pics go ahead
-
Nice, if its too far gone you could always fab up a rear diff bracket on a 2wd subframe.
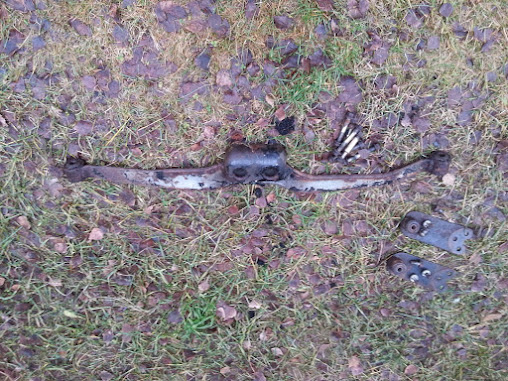
That mounting bar, we call it the mustache bar. I assume it got the name when some drunk subieholic put it up to his face and looked thru the 2 bolt holes.
The part that I found was nearly paper thin from the inside of the mounting brackets (the tube part I mean). Thought I would weld some 3mm thick square bar inside the tube and close the ends after that. Then was going to put also a 3mm thick square tube parts top of the tube (this only inside the end brackets). Think that would stiffen it up nicely
Well see how it comes when I have time to make it since I did not have enough time to do it yesterday. But if the plan fails I do have a spare subframe in my wagon so that will sort it out if the other plans fail Ahh I didn't know that this was tehe menioned mustache bar. Well Ialways learn something new
-
I'll answer to myself here
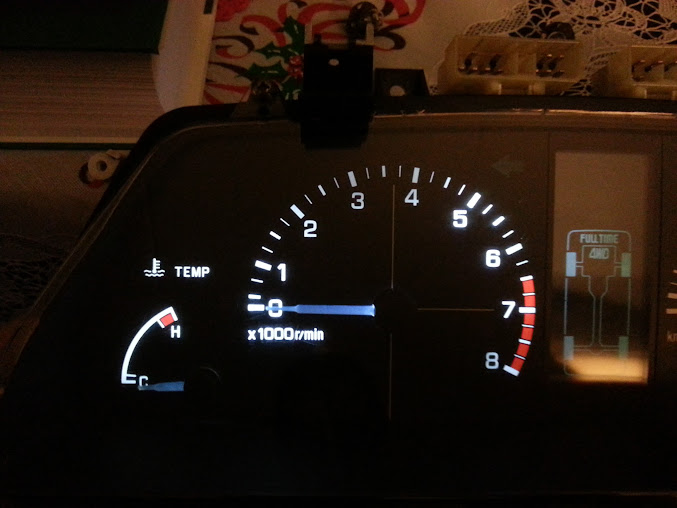
The turbo light dies not have the green painted on it. But a little update to you guys too. My dash was from -88 model and did have a green color painted on it. So I did a small mod and it's now white. Altought this is not yt finished but this gives you the idea how to get the green color off from the gauges.
First you need to remove the gauges from the dashboard panel itself. The you need to take the plastic spreader or whatever it is apart from it too. Then you can get to work. Take some sanding paper (i just used very coarse one to do this. It was 80grit) Here is a pic after I have sanded the temperature gauges color of rom the back (backlightcoming outfrom the window in the back):
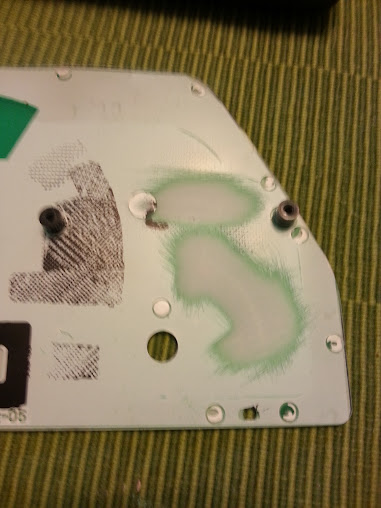
So just sand the backings of the gauge readings. You don't need to do the whole thing.
Here's what the temperature gauge looks like after sandind. You can see that the rpm meter is still green (not very well in the picture but the difference is bigger in real life).
After sanding the back color off the next step would ofcourse be to put everything back together. Not a very big job to do. Took me about 60mins the whole thing (not including was the unmounting from car itself).
-
Got some parts sorted out already. These I did find from my own inventory
The most important parts for now:
Rear axle crossmember doing some electrolysys bath
(it's a bit rotten from other end but will be sorted out with some reinforcements tomorrow: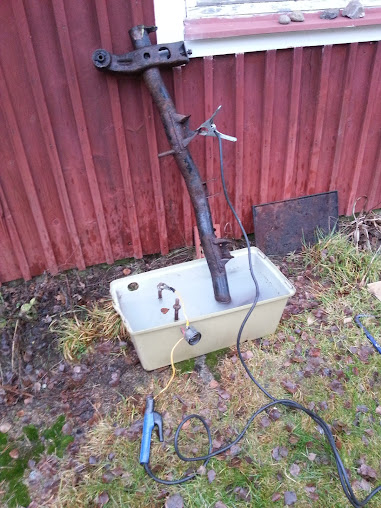
Rear diff mounting bracket and brackets to sit between crossember and trailing arm:
Also got some other parts ready including:
-Both rear trailing arms
-Rear CV axles
-Rear diff (3.700)
-Driveshaft with bearing mount on it
-
And Tombba, violet is very nice.
It was indeed nice
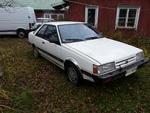
ps: I like that white turbo leone a lot too ! White color makes it look so clean JBM like.

My white one looks like a cow after a lot of rust repairs

-
oh thats great. took this frm wiki. mine isnt the twin carb so unfortunately i dont have 95ps/ 93hp. and as u see the us version only has 67hp

Horsepower:
67 bhp (50 kW; 68 PS) at 5,200 rpm (US)
82 PS (60 kW) at 5,600 rpm (JDM, emissions cleaned)
95 PS (70 kW) at 6,400 rpm (JDM twin-carb, emissions cleaned)
87 PS (64 kW) at 5,600 rpm (JDM, no emissions equipment)
That's the same place I did check earlier. No mention from the 75bhp (or 76PS) engine
Well I'm not going to keep the EA71 for long so someone would get a good update over the US version I haven't figuret out any use to my engine after I swap it to the EA82T yet. -
This one Looks Cool! ... :cool: ... I Like it!
I Wish I could obtain a pair of Corner Lights like the ones on that Violet Subaru.
Kind Regards.
Thanks
I did like it a lot too but I just had to sell it in order to get some cash at the time. It was a big mistake but didn't have any other possibilities then. And what comes to it nowdays it has been driven to a pole sideways so it's about 1x1meter sized metal cube now 
I think I have a one spare set of those corner lights to sell but the postage would be sky high (around 40€) when sending to your location. If you'te intrested just send me an PM and I will take some pctures of the lights on next weekend when I'm going to my "garage"
That violet one had the same corner lights as my white ones but it's the image that makes them look different. -
american version or the others that are lhd. this one is rated at 80hp, abt the same power as the 1800cc ea81 tht you peeps have. anyways heres the vid
Mine is rated @75bhp it's a european version so once again it seems the european version is different from other market area engines
There's no mention of 75bhp EA71 engine to be found on the internet thingy. Funny thing these power ratings now that I had a small look around my EA82 carbed engine was rated @90bhp once again more than US market and my current EA82T engine is rated @134bhp. So we get more power than US models and less than JDM in europe it seems. -
Nice, the white with black trim looks good! Lol yea that rear camber might cause some problems.
Its always nice to start with a whole parts car, every single piece of my recent swap came from a different car!
Yep that helps a lot when I can have the whole car in front of me. Especialli when I know what parts have already been changed to the parts car since it was the daily driver before and after that it has got a lot of new parts in it.
I'm not sure if I'm going to keep that coupe in it's original coor since it need a bit paintwork anyway. The rear camber is horrible because the rear axle submember "pipe" thingy that has rotten into two pieces. Hopefuly I got one as a spare part and one from the donor car in good shape.
-
Here's what I've had and have:
So these two I do have now:
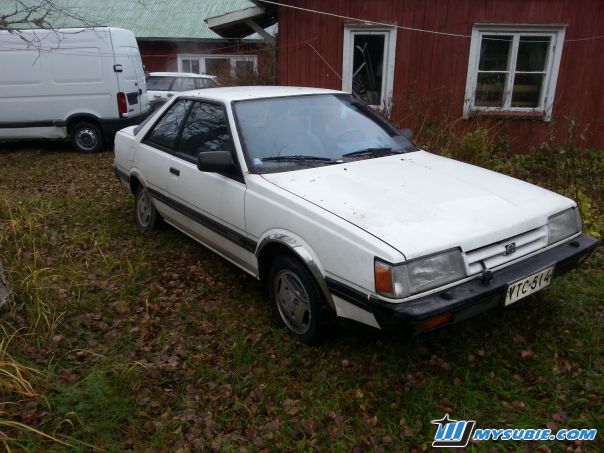
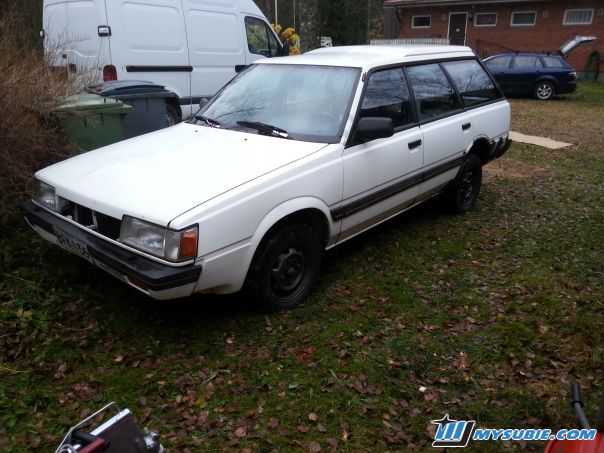
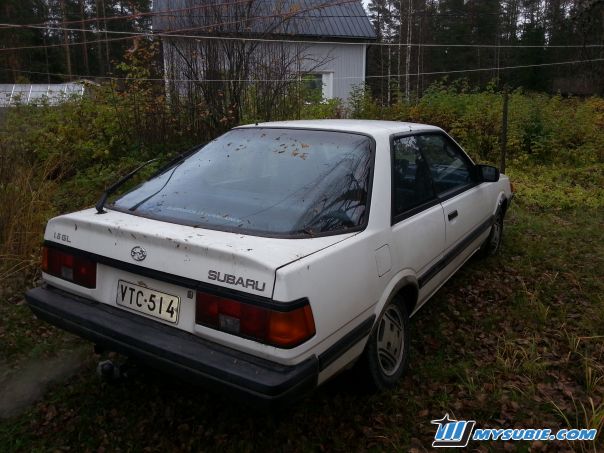
The 1.6 GL coupe:
The part's car for the coupe. It's EA82T full time awd with mods:
And had this few years ago. Was EA82T with on demand 4wd, This I would have kept if I wouldn't have to sell it to get some money:

I've also had couple of EA82 stylecarbed cars. One was a EA82 car -88 sedan wich I drove daily and other one was -87 carbed lifted roof wagon that I chopped in pieces. Future plan is to build my coupe up and running and paint it so it lasts for a while
-
Mines noisy as well...has been for the past year since i bought car...i assume its normal! I can hear fuel pump change sound when the turn signal is on too lol.
Yep mine too. Carbed one used to have that little knocking like sound when pump was running and the fuel injected ones keep the usual whining noise too
Not a thing to be concerned about if it otherwise works fine. -
Just thought I would add some pics of these cars so here they are:
The coupe (notice the race like rear camber due to axle brea down :-p) :
And the STW (looks way better in pics that it really is):
-
By dividing the miles since last fill-up by the gallons of fuel I've filled it up with.
My girlfriend even added it up because we couldn't believe! I went 686 miles on 1 and 1/4 tank of fuel. (48MPG) then went to Cheyenne I'll pull out the receipts if needed and got 53MPG. I fill up with 11-12 gals from empty.

This brings my mind to my old EA82T engined leone wagon that runned a nice 45mpg readings when my fuel pump was living it's last moments. It was running pretty lean and after I swapped a new pump in the fuel economy dropped to around 35-38mpg (car was FTAWD manual gearbox) on the highway. So the fuel pumpwould be a one spot to check.
-
I started a thread on my swap but I have not posted any updates or pictures yet. I'm going one step farther and swapping to 5 lug + rear handbrake. I'll post up some updates/pictures soon...
I did notice that thread a while ago but since it did not have more images it did ot quite answer my question. I'll be waiting for the photos what I need to do for the carrier beargin and mustache bar mounting.
-
This looks awesome ! I might have to do this to my EA82T
Does anyone know does the turbo light have the green tint on itself ? It would be cool to change it's colour to something else -
Whoops
I was thinking of the 1st generation leone coupe.
Since its a 3rd generation then;
Need to swap in a 4wd gas tank to make room for the rear diff.
Is the wheelbase shorter on the 3 door coupes vs the wagons? If so you will have to shorten the rear driveshaft.
I'm not sure about the wheelbase but I think it's the same. I've used a driveshaft from coupe in a stw without any mods so it should not be a problem. Carfolio states that the wheelbase is the same in estate and coupe (2464mm). I did know that I have to change the gas tank due to the rear diff.
-
I replaced mine with the cheapest option I found when I was changing it. Didn't have anyproblems with it. I think the most important thing is to make sure the gasket sits straight on the mounting surface and that the surfaces are clean. I used a sealing silicone with the gasket. It's still going nicely after 5 years of the swap.
You might get the leak sorted by cleaning the gasket surfaces and changing the gasket once again and use good guality gasket seal between.
Finally got a new exhaust
in Old Gen.: 80's GL/DL/XT/Loyales...
Posted · Edited by -tombba-
Mmmm. That setup brings back some nice momeries It has to sound good too ! I had very similar setup in my turbo wagon altought it had 2,5" pipe size.