Crazyeights
Members
-
Joined
-
Last visited
Everything posted by Crazyeights
-
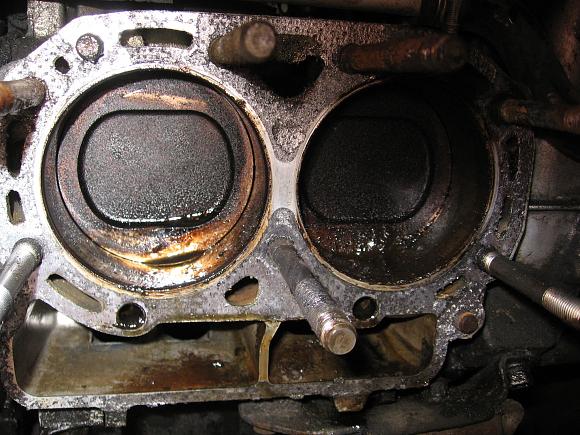
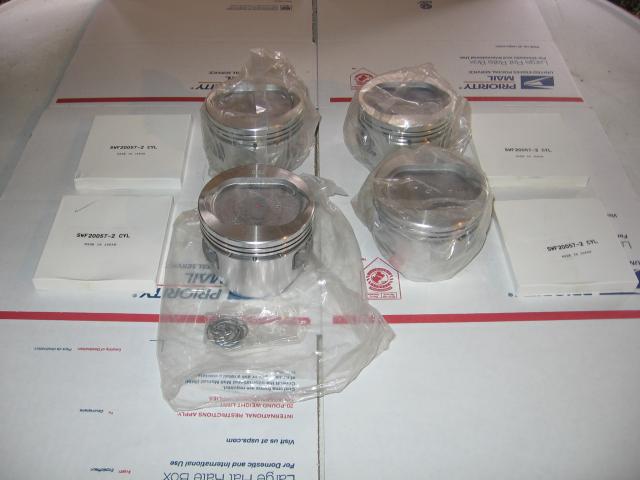
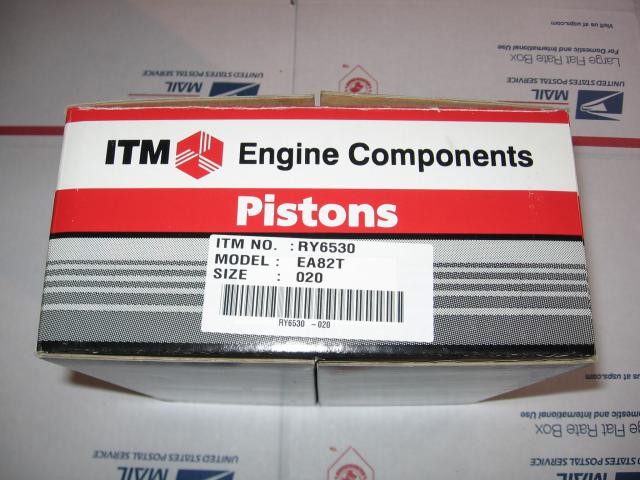
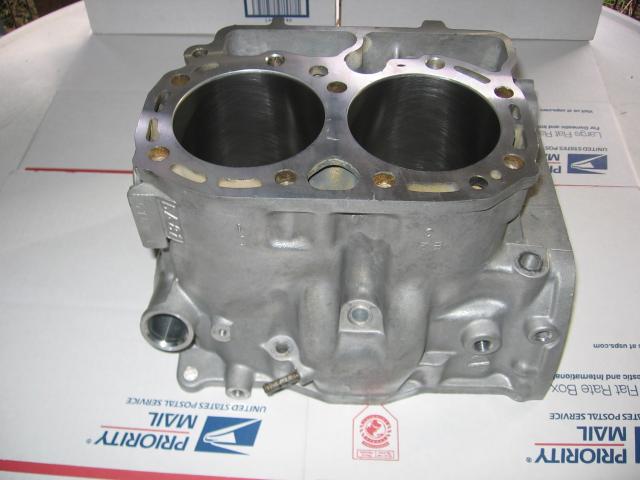
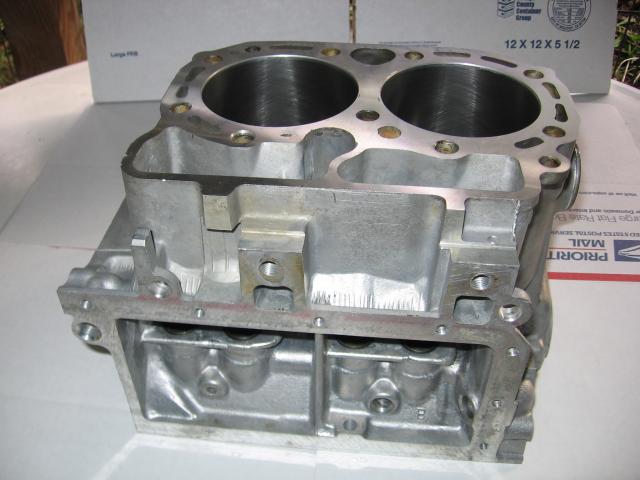
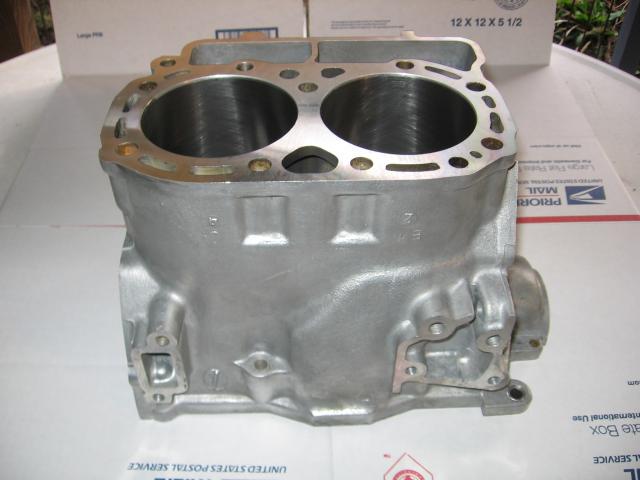
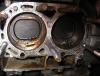
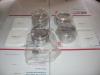
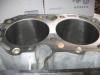
They are actually oversize EA82-T pistons, but they will work in the EA81-T just fine. I found them on Ebay from Thompson Engine. The machinist I work with has expensive equipment to do blocks like these - They do EJ's too. I know there are special concerns when doing Subaru blocks. I think the case halves were torqued together first - I am not sure but they might have also used torque plates as well. Piston to cylinder wall clearance is .0016" and they took about .005" off of the deck on each half to clean them up.
-
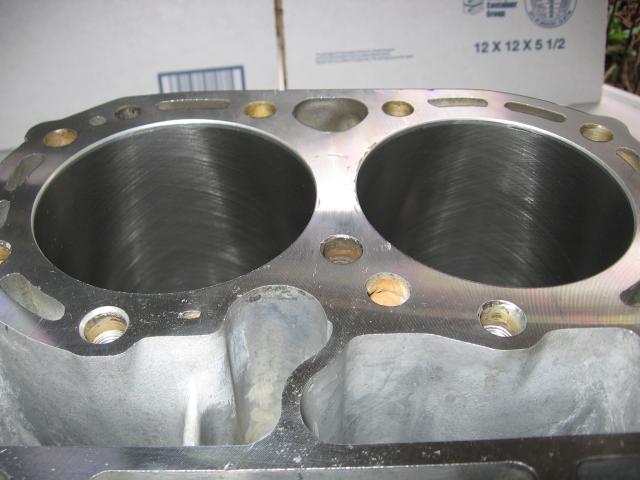
No, the size difference is to little to affect the power output. It is just enough to clean up the damage in the cylinders, .020"
-
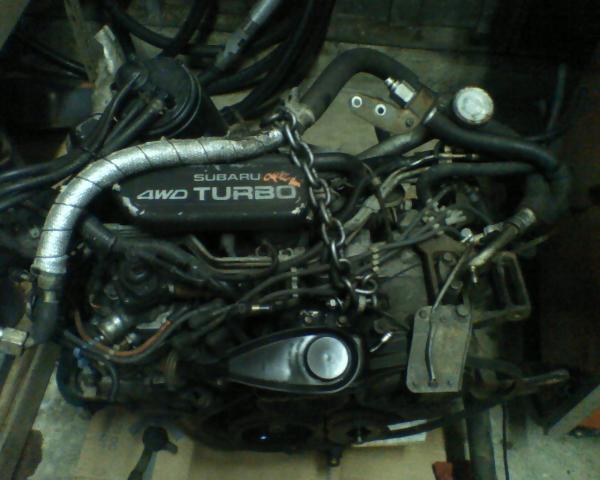
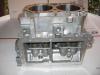
Here are a few before the tear down, sorry these are a little out of sequence.
-
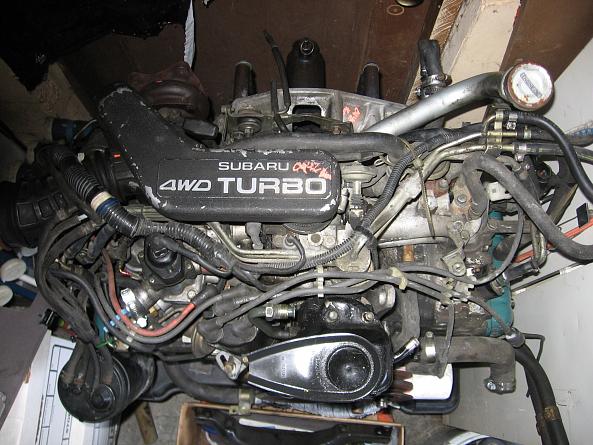
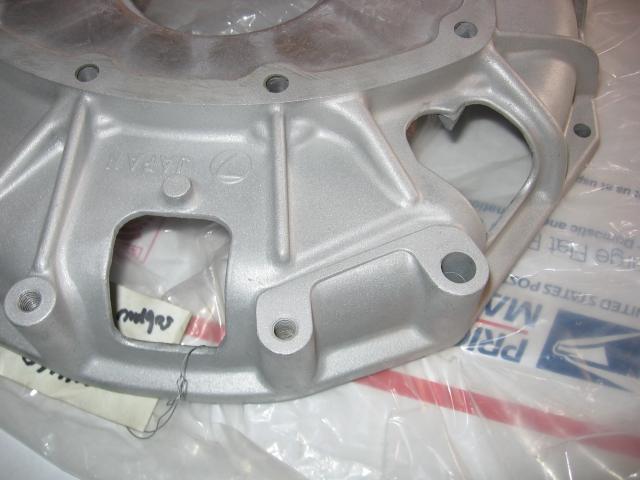
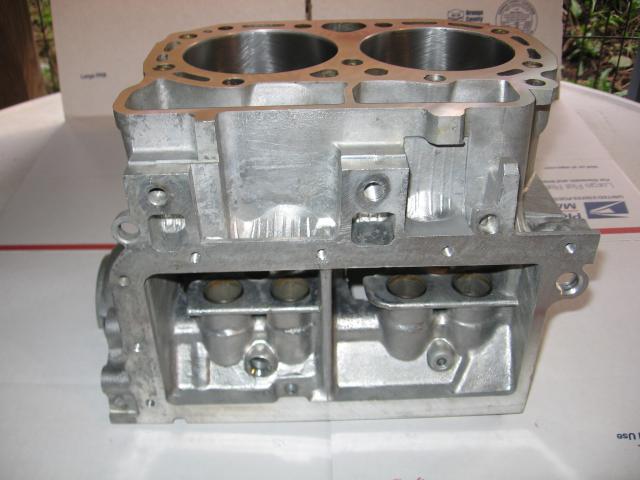
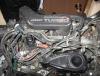
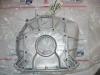
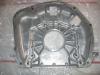
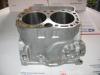
Here are a few more shots of the rear housing and the new oversize pistons. The original crank is pretty badly damaged from a failed rod bearing. I have a replacement crank going in for a mic and polish soon. Then I need to decide what to do about the cam. I'm not sure what a Delta grind would do for a Turbo motor or if I should just put it back in stock. The hydro lifters all look perfect. This engine only had about 144k on it when the bearing went. More to come...

-
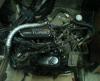
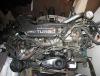
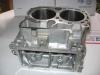
The thread started here with some pics of the tear down. I think I have some more if there is any interest. EA81T Block and Head pics I decided to save this one because it's a Turbo block with Hydro lifters and rebuildable EA's are getting REALLY hard to find. Here are some pics of the case parts just back from the machine shop bored .020" over, deck squared up and cleaned, ect.

-
Very Nice!
-
Sounds nice, now - so much for Shawn's original thread. Sorry
-
No I don't have any accurate EGT readings yet, but you are 100% correct increasing the fuel pressure did help - perhaps even more than the EGR now that you mention it:clap: I don't think I can really squeeze any more HP/Torque out of this poor little EA81 anyway, but it sure is fun to drive:D
-
This is a good permanent fix, however the compression in my EA81 is quite high and I run a lot of timing advance (in the order of 28 degrees with a Delta cam) combined with more fuel pressure I actually need the EGR to help keep cylinder temps down For a stock engine I agree, just go with the resistors and be done with it.
-
Just went through this on my SPFI swapped EA81. Ended up going through a pile of them before I found a couple good ones (I get the feeling these solenoids are NOT reliable). Just apply power and ground to each solenoid and see it it audibly clicks. If it does, see it it holds and vents vacuum by blowing in one end with a short piece of vacuum hose. You could also adapt an EGR solenoid (should work for purge too) from a late model Ford or just about anything else with a similar coil resistance (sorry, can't remember what it is off hand - maybe 16-33 ohms?) If both solenoids test good then I would suspect a wiring or ECM problem. Good Luck
-
And those were EA81T's not EA82's. Only way was if someone swapped it.
-
Crazyeights replied to 987687's topic in 1990 to Present Legacy, Impreza, Outback, Forester, Baja, WRX&WrxSTI, SVXI was faced with this MANY years ago on an EA at another shop. I had NO TIME (Boss) and just used an air chisel and punched access holes in the bell housing. It was getting a used engine anyway. Do you have enough room to pull the convertor out with the engine? Probably not. Someone will come along with a better idea soon I am sure. I don't really recommend the way I did it:( Good Luck, and do post the secret if there is one:D
-
I have already done the EA81 performance build - pretty much every mod you can including LOTS of head and FI work. One tip I can offer about the cam. If you are having the cam reground - start with a Hydro cam as it has a larger base circle to work with, even if you are building a solid lifter engine. This will help reduce valve train noise. Once you re-grind a solid lifter cam the base circle is reduced enough that when combined a reface on the lifters, another .020" off the heads, .005" off the deck, ect you end up with incurable valve train geometry problems = NOISY! When built and tuned correctly the little EA81 PULLS HARD up to over 4000 rpms and still produces pretty decent fuel mileage. I would recommend doing it again if you can find a core worth building. Good Luck and HAVE FUN!
-
Cool! That means the #74 MUST be the EA81T cam as all the other ones I have a confirmed solid lifter cams. Thanks a Bunch Folks!
-
@GD Can you verify the casting numbers for an EA81(T) cam? I didn't take careful enough notes. I need to verify the correct cam before I send it to Delta for my EA81T - I think it's a #74? I also have a #71, and a #76 I think:rolleyes:
-
Delta Cams in Tacoma WA. They should be able to help and they know the EA81.
-
Try some searching - I think this is already being attempted in another thread. I just can't remember where/when.
-
Is this what you were looking for? EA81 performance build essay
-
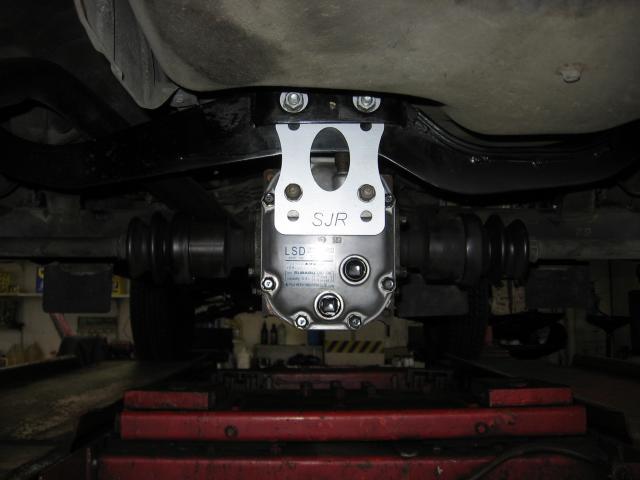
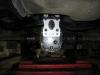
Received and put in my Blue Slant center section in the '83 Wagon - Many Thanks Paul! Finally got around to taking pics of the 3.9 LSD and the Rear Disc Brake Conversion [ATTACH]9072[/ATTACH] [ATTACH]9073[/ATTACH]


-
http://www.cars101.com/subaru/1983gl.html I wish I would have had a chance to clean it up a little more first before the photos. Thanks Joe!
-
YES! I would love to have a REAL EA81 A-Bar that would fit my 83 Wagon:clap:
-
Crazyeights replied to methusalah's topic in 1990 to Present Legacy, Impreza, Outback, Forester, Baja, WRX&WrxSTI, SVXCheers to you for pointing out an obvious oversight:D This forum is full of talented people with lots of experience and tons of good information.
-
Crazyeights replied to methusalah's topic in 1990 to Present Legacy, Impreza, Outback, Forester, Baja, WRX&WrxSTI, SVXGood point! I wasn't thinking about the two part balancers - but the type where the belt groove section of the pulley you are using bolts directly to the center hub.
-
Crazyeights replied to methusalah's topic in 1990 to Present Legacy, Impreza, Outback, Forester, Baja, WRX&WrxSTI, SVXThis is just about fool-proof and it works on almost all cars:D Take an old belt and wrap it around the crank pulley like a strap wrench at least one turn. Hook the loop around another pulley or something strong and preferably attached to the engine and use a breaker bar to loosen the bolt. Reverse the direction of the belt wrap and use a torque wrench and some loctite to re-install. Good Luck!
-
I think he is planning to run coil over plug without any disty.