upnorthguy
Members
-
Joined
-
Last visited
Everything posted by upnorthguy
-
upnorthguy replied to upnorthguy's topic in 1990 to Present Legacy, Impreza, Outback, Forester, Baja, WRX&WrxSTI, SVXSo many good ideas. I sprayed liquid wrench again last night so hopefully that is dripping and soaking where it can. This has been a northern Virginia car since its original purchase so there is no significant rust to speak of as salt is limited in use here. The fasteners inside the engine compartment have been in good shape so far so I'm hoping that will translate to minimal corrosion along the bell housing...but you never know. I think I'm going to pick up a bottle jack to have it ready if needed. I'm sure I will be back with progress reports this weekend.
-
upnorthguy replied to its_masters's topic in 1990 to Present Legacy, Impreza, Outback, Forester, Baja, WRX&WrxSTI, SVXBeer Garage has some excellent photos and descriptions of a number of seals he did that the gang described above (crank/cam seals, oil pump o-ring, oil separator plate on back of engine).
-
upnorthguy replied to softball's topic in 1990 to Present Legacy, Impreza, Outback, Forester, Baja, WRX&WrxSTI, SVXThis is in the wrong section (Legacy, Impreza, Outback..see top of page). There is another forum section that is the Old Gen:80's GL/DL/Loyale that covers cars with similar engines/systems. Hopefully an Admin can move this to that section where you will get better info (although many people post in both sections).
-
upnorthguy replied to upnorthguy's topic in 1990 to Present Legacy, Impreza, Outback, Forester, Baja, WRX&WrxSTI, SVXJohnc- Thanks for the ideas. My climbing webbing supply has been steadily dwindling because it is so handy. I've done some great towing with it (just remember to use a bowline so you can actually get the knot undone or you will be cutting it!) and I definitely never use it for climbing after it has been reallocated to industrial use. I was planning on using the lift point on the bracket where the three main connections were and the other point next to the alternator (I'm assuming that is the A/C bracket?) that has an obvious hook placement. I already have my hoist arm nice and low and the chain I have isn't too long...I don't want to be jacking it any higher than I need to. Although I have no issues with height because I am outside, I don't want to run out of ram length, as you suggested.
-
upnorthguy replied to upnorthguy's topic in 1990 to Present Legacy, Impreza, Outback, Forester, Baja, WRX&WrxSTI, SVXOh yeah, a ratcheting 14mm wrench sounds like just the ticket. I've been eyeing a set of those for a bit...nothing like a project to justify some new tools. Good suggestion! I have a 3 ton floor jack so I can raise the car pretty high, and I have my jack stands almost maxed. I did get the driver's side from underneath. While cursing the tricky placement, I did contemplate popping the roll pin for the axle, but wanted to exhaust all my creative wrench combos before doing that. My close axle inspection (after wiping away the thick layer of grimy oil sludge) did reveal that I've got two green OEM axle cups, which was a nice surprise. I saw that one inner CV boot is torn now so I'll be getting some boots to do a rebuild. I have my floor jack in place under the tranny ready to jack it up. Thanks for the tips. I don't have any large washers at the moment, but that is a good idea. I'm just going to stop by the local big box hardware store and get a couple of small steel shackles for $3 something each and I'll be set.
-
upnorthguy replied to upnorthguy's topic in 1990 to Present Legacy, Impreza, Outback, Forester, Baja, WRX&WrxSTI, SVXI don't have any old seatbelts around, but you are right- they are very strong and tough. I have some 1" tubular webbing that I've used for rock climbing anchors that could easily support the engine (and would be easier to use as it is narrower and less stiff) but the late hour was a good signal to wrap things up. I should pick up a seatbelt next run to the junk yard.
-
upnorthguy replied to upnorthguy's topic in 1990 to Present Legacy, Impreza, Outback, Forester, Baja, WRX&WrxSTI, SVXI didn't think about the pressure building up in the tank- another good suggestion, thanks. I got the three bellhousing connections and the alt so I'm clear there. I still need to do a final double check to make sure there isn't anything extra in there but the extra ground strap is a good thing for me to check. I had a vague memory of seeing a description about using some of the bolts to lift, but the night end time seemed like a better option with work looming in the morning. That and I didn't want to go back inside and search for the info. (I could really use a voice activated computer outside next to my project). Plus, my arm clean up was a solid 20 minutes with all the oil sludge I had accumulated.
-
upnorthguy replied to upnorthguy's topic in 1990 to Present Legacy, Impreza, Outback, Forester, Baja, WRX&WrxSTI, SVXGood call on that. With rain expected all week, I have a few days for some oil to soak in. I will spray tonight.
-
upnorthguy replied to huffman142's topic in 1990 to Present Legacy, Impreza, Outback, Forester, Baja, WRX&WrxSTI, SVXThe contacts can and do wear out in the starter, but that is a pretty easy fix. Usually you start having problems starting the vehicle (often times clicking or something like that, it is usually intermittent in the beginning). A tap on the starter with a hammer (or just about anything) can often get it going again in case you are stuck, but it won't solve the underlying problem. I'm not sure about the 06 style, but for my older Legacy a set of contacts was $15 and 30 minutes to unbolt and remove the starter and replace the contacts.
-
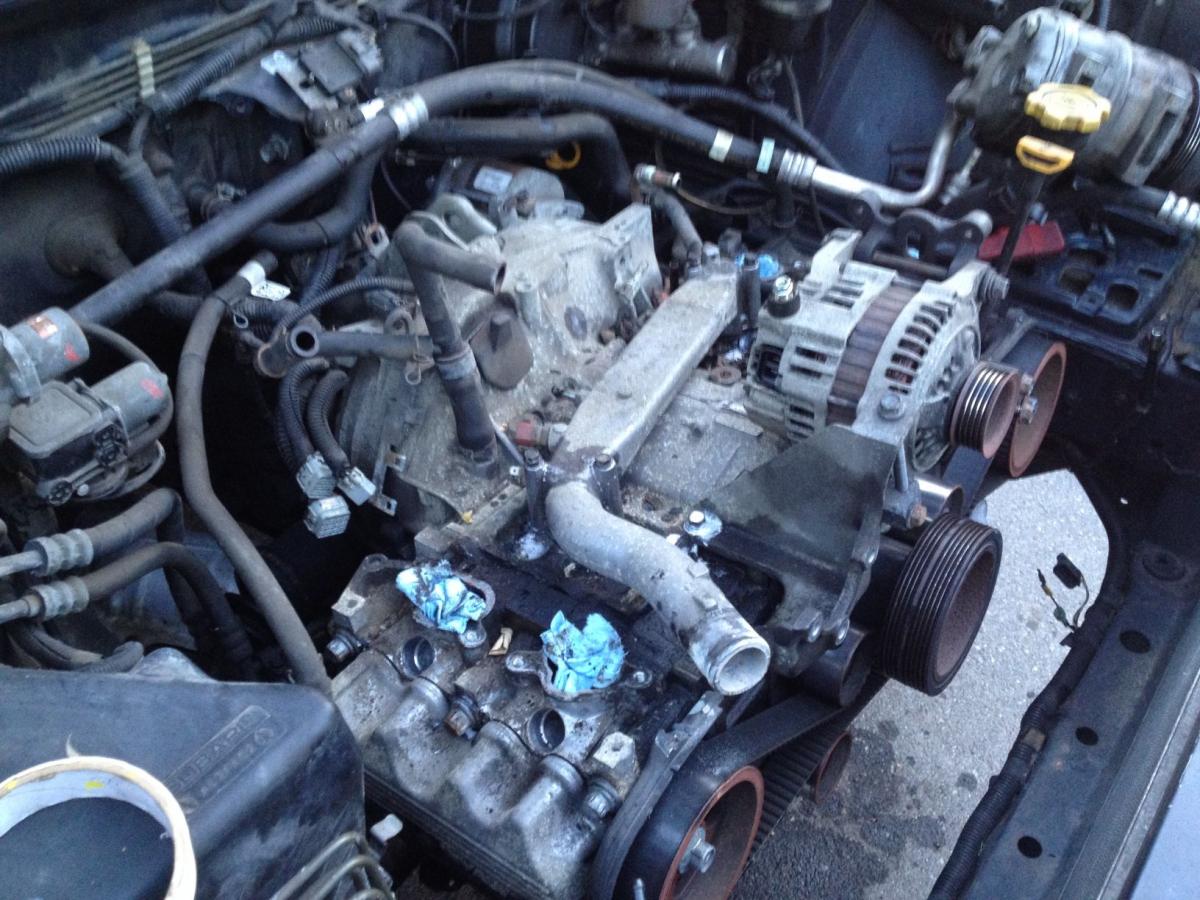
Finally started on the engine removal of my EJ22 so I could get at the oil separator plate replacement. I'm knocking on wood as I write that I didn't have any sheared bolts yesterday, which is always a pleasant surprise. For my maiden voyage, I spent about five hours marking, undoing electrical connections and getting everything undone. The engine is unbolted and ready to lift. My last three hours were in the dark (I don't have a garage, so I'm in my cul-de-sac) and when I went to get the cherry picker set up I realized that there was only a chain, and no quick links or shackles to attach to the lift points. I figured that was a good time to pack up for the night. Those lower engine nuts near the drive shafts were a bit of a bear to get. The passenger side is tight and I had a hard time getting the correct combo to get in there (3/8 wrench with short 14 mm socket was not long enough to clear obstacles, 1/2 with adapter and 14 mm was too long and hit axle cup, 3/8 with deep 14 mm was also too long). Finally was able to crack it using a standard socket so I could get a swivel on it with a 14 and a long extension. The biggest surprises were (1) the number of acorns sitting on top of the block under the intake manifold next to the coolant crossover pipe and (2) how little gas came out of the fuel lines when I disconnected those. (The Beer Garage description had me ready to catch a lot more.) Rain predicted for the next few days so the lift will likely have to wait until the weekend. Then I can replace/reseal the plate and a bunch of other o-rings and seals and tighten up the oil pump screws. For reference I used , the factory service manual, and Beer Garage.

-
upnorthguy replied to 88coupe's topic in 1990 to Present Legacy, Impreza, Outback, Forester, Baja, WRX&WrxSTI, SVXI just did this on my 95 a few weeks ago. I just put it on ramps and drained/filled three times as Rooster described. Getting at the drain plug is easier/quicker for me than fiddling with the AT cooler hose connection in the tight quarters. I used the house brand ATF from Advance Auto and it is working fine. By the third drain the fluid was looking good. The hardest part was getting the funnel into the ATF fill tube (and that wasn't too bad). Make sure you have a long neck funnel.
-
upnorthguy replied to scotteverett's topic in 1990 to Present Legacy, Impreza, Outback, Forester, Baja, WRX&WrxSTI, SVXI haven't swapped out a rack on a Subaru, but I know grossgary often chimes in that the racks rarely fail and if they leak, it is usually just an o-ring replacement. By "right side cracked boot" I take that to refer to the CV boot on one of the drive shafts. They all eventually crack/split and the grease spins out and they start to click during turns as they wear. Replacing the half shaft with a good one from a junk yard or a rebuilt Subaru is best as the OEM are much better than any replacement from parts stores. They can be rebooted. Prices will vary a lot depending on if you can do the work and just need parts or if you are going to pay someone to do it. Junk yard half shafts that you pull can be as little as $20, but you have to remove them (which can take some time/effort). There is a place (I think it may be in CO) that sells rebuilt Subaru half shafts (someone will probably reply with contact info). A replacement from the parts store is about $80, but they often make noise and are generally low quality. A new rack would be pretty pricey (around $225 from Autozone, OEM a lot more). Again, a junkyard replacement would be a lot less. I found some on www.car-part.com for $75, the pull it yard near me only wants $30). O-rings will be a couple of bits.
-
upnorthguy replied to igammie's topic in 1990 to Present Legacy, Impreza, Outback, Forester, Baja, WRX&WrxSTI, SVXhttp://jdmfsm.info/Auto/Japan/Subaru/ Bummer..this link is no longer good...takes you a Google page. Anyone have another spot? I guess I should have been less lazy and downloaded the pages for my car.
-
upnorthguy replied to Hinano's topic in 1990 to Present Legacy, Impreza, Outback, Forester, Baja, WRX&WrxSTI, SVXI think he got that (described as "that mount thing on the top of my engine")
-
upnorthguy replied to darsdoug's topic in 1990 to Present Legacy, Impreza, Outback, Forester, Baja, WRX&WrxSTI, SVXThere is room to use a longer bolt (I can't recall if I could get 10, 15 or 20 mm longer) and it was enough to get past the bad spots and get more bite. You could also swap out the tensioner bracket (three bolts holds it onto the block). I ended up getting another while at the pick and pull. I think I paid $5 for it and that solved it (and much cheaper than a helicoil, unless you already have the correct size in your arsenal).
-
upnorthguy replied to upnorthguy's topic in 1990 to Present Legacy, Impreza, Outback, Forester, Baja, WRX&WrxSTI, SVXgb- Thanks. I knew there was a screw underneath...I was just trying to be careful to not break whatever tab(s) were holding those covers in place. Prying on the outside of the end covers doesn't do it...you need to try on the inside of the covers (just underneath where the strap goes into the cover). That pops the cap free and then you can slide the cap towards the center of the handle to access the screws.
-
I'm finally getting around to swapping in the sunroof assembly I got at the junkyard a few months ago. I cannot recall how to undo the plastic cover that is over the ends of the oh sh!t handle (officially, the "assist grip"). There are two varieties. One is really easy (there are little covers that have a slot that accepts a small screwdriver and you just pop them open to access the screw). The other variety is where the handle goes into a cover that must be snapped over the entire end of the handle. It basically looks very similar to this WRX handle image I found: http://www.slidegood.com/02-subaru-wrx-wrx-grab-handle-1661 When I was taking out the sunroof from the donor car, I remember thinking, "D@mn, those handle covers are tricky, I should remember how to do that later so I don't screw up my car." Of course, I cannot remember the trick to pop them off. Any tips?
-
upnorthguy replied to nickb21's topic in 1990 to Present Legacy, Impreza, Outback, Forester, Baja, WRX&WrxSTI, SVXThis sunset of manuals came up in another post a month or two ago, IIRC.
-
upnorthguy replied to ThosL's topic in 1990 to Present Legacy, Impreza, Outback, Forester, Baja, WRX&WrxSTI, SVXFirst post says that Monroe said a tie rod end (outer) is "needed", not inner. Although, who knows what is needed without feeling the play in the ends. Replacing (outer) tie rod ends is pretty easy if you are so inclined. The hardest part is usually getting the outer end unthreaded from the inner tie rod end (after you remove the jam nut). I had good success using a pipe wrench on my last set. I can give you more detail if you want/need it. I haven't replaced inner tie rod ends yet, but I did clean and regrease mine when doing steering boots recently. I didn't find any play in my inners so I left them alone. MercedesDieselGuy has a good video on youtube about inner replacement (and quite a few other things he did on a '95 Legacy). All that tie rod discussion aside, I agree with the above posts that worn ties can give you some funky handling/sound/vibration. I wouldn't mess with any steering parts until you know you have smooth rubber on the front end. People follow bad advice from shops all the time. If you don't know or have experience with the car/issue, then you trust the "expert" to be right/honest/fair when giving you a diagnosis. I think someone could make a good living as a TV reporter by putting a known bad part/parts on a car and taking it to various shops to see what they come up as a recommended fix. Especially if you had a woman doing it since shops seem to often prey on the ladies and their perceived lack of knowledge about all things mechanical (which is, of course, just a stereotypical view).
-
upnorthguy replied to IdiotSavant's topic in 1990 to Present Legacy, Impreza, Outback, Forester, Baja, WRX&WrxSTI, SVXThe cat heat shield isn't shown in the pic near the beginning of the thread (that one must have already rusted off). In the opposed forces diagram it is part 22 on the right plus the shield to the right of that (not numbered, all held up by bolt part 4). There is still the large heat shield above the cat that is connected to the body, this would be the lower shield that would "prevent grass fires" for those parking in tall dry grass.
-
upnorthguy replied to bgambino's topic in 1990 to Present Legacy, Impreza, Outback, Forester, Baja, WRX&WrxSTI, SVXOutback struts and springs get you a couple of inches. That is what I would like to do to my '95 wagon if I get around to it (my LS came standard with 15" rims). Run some searches in this forum...there are a number of threads on lifting that cover the goods.
-
upnorthguy replied to IdiotSavant's topic in 1990 to Present Legacy, Impreza, Outback, Forester, Baja, WRX&WrxSTI, SVXCanadian cat arrived on Friday and I installed it yesterday. Fit was very good. Gaskets worked fine and the spring bolts were good (a little longer than original, but still tightened up OK). The two bolts supplied to secure the front flange (closer to the front cat) were pretty long and I'm not sure they would have fit. Luckily the original bolts came free for me so I reused those. The bolt hanger slot on the cat was a little too small for the OEM bolt but a minute with the dremel opened it up enough. My heatshield bolts were in really rough shape so I haven't transferred that yet as it is going to take some more work to get it removed from the old cat (if at all).
-
upnorthguy replied to Bushwick's topic in 1990 to Present Legacy, Impreza, Outback, Forester, Baja, WRX&WrxSTI, SVXI didn't think I was ever going to hear about Carnot again after my science classes.
-
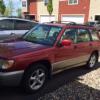
upnorthguy replied to scotteverett's topic in 1990 to Present Legacy, Impreza, Outback, Forester, Baja, WRX&WrxSTI, SVXThe premium pricing in the NW is amazing. There is a steady supply of 95-99 Outbacks around DC for $1500-$4000 in the 120k-200k mileage range. Road trip! (I'm sure there are other places closer to Seattle that aren't in the premium price range)
-
upnorthguy replied to mid atlantic's topic in 1990 to Present Legacy, Impreza, Outback, Forester, Baja, WRX&WrxSTI, SVXBeer Garage has a nice write up of a timing belt replacement (and other things, like tightening the oil pump screws as mentioned by Olnick).