-
Posts
1936 -
Joined
-
Last visited
-
Days Won
40
Content Type
Profiles
Forums
Gallery
Store
Posts posted by pontoontodd
-
-
Wired in a connector for DBW TB and installed that.
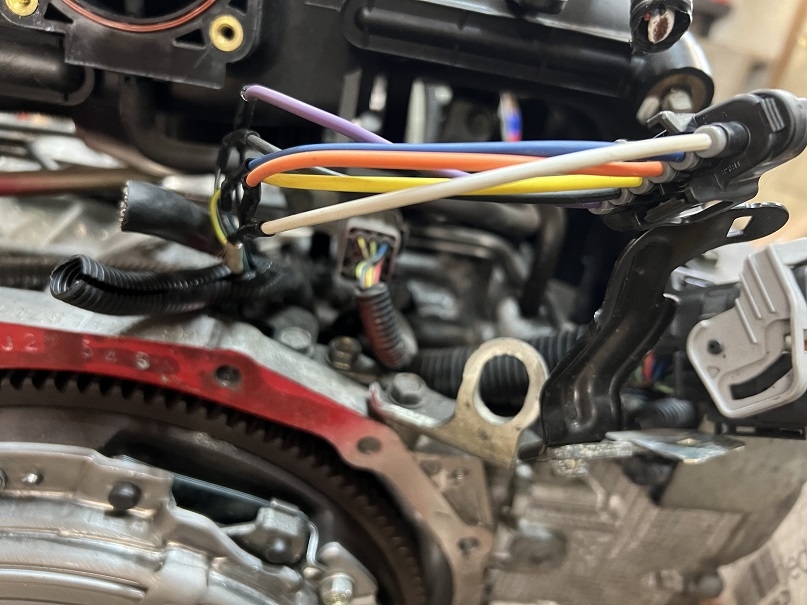
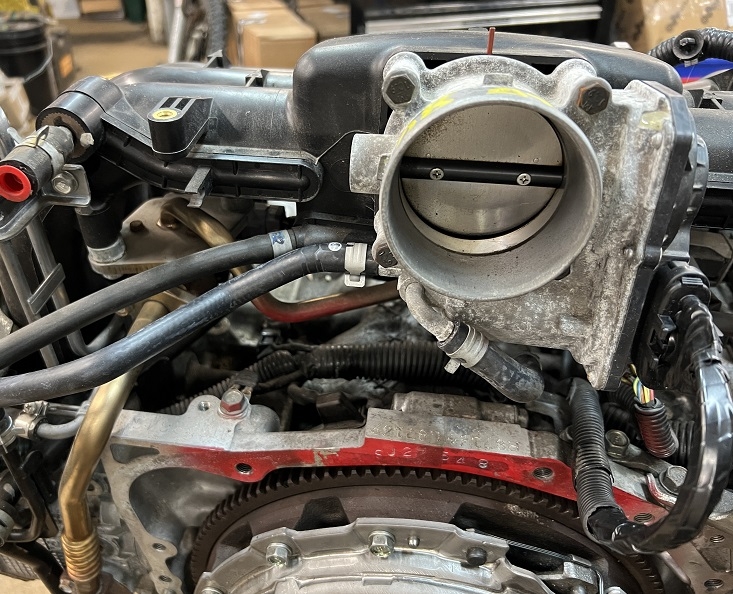
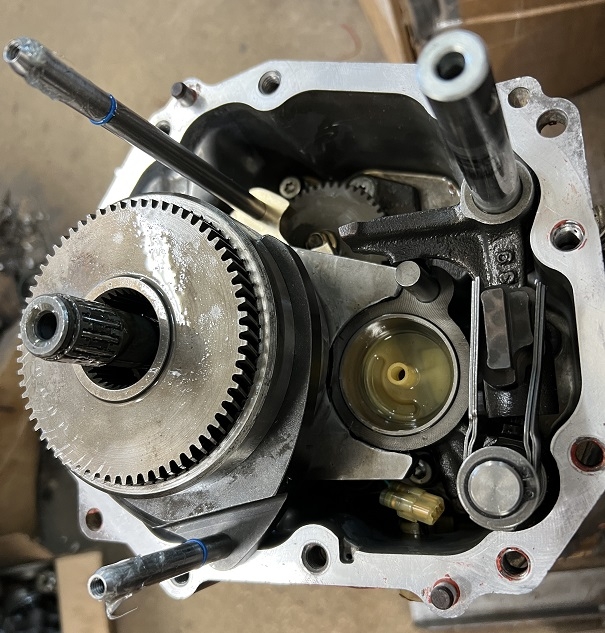
Installed low range in my other good 6MT for the Impreza.
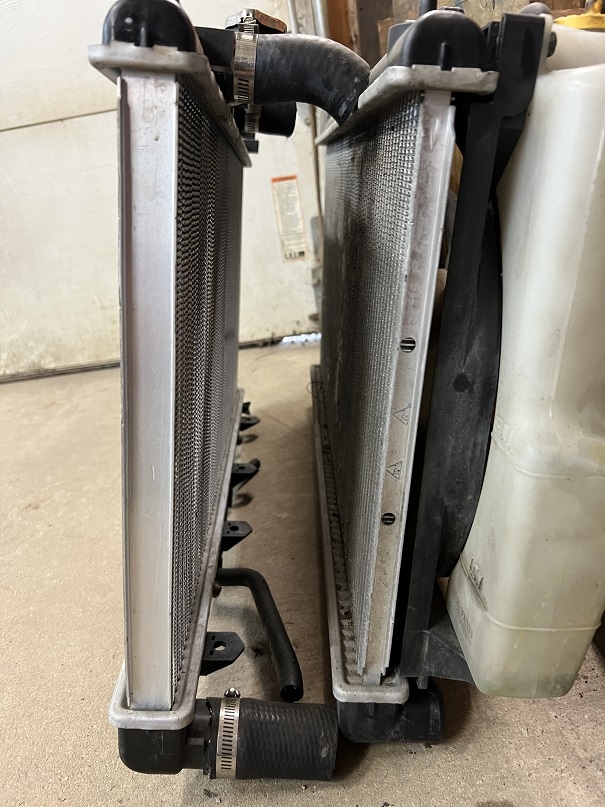
EZ30"D" radiator on left, EJ22 radiator from 98 Impreza on right.
EJ22 and 4EAT from 98 Impreza.
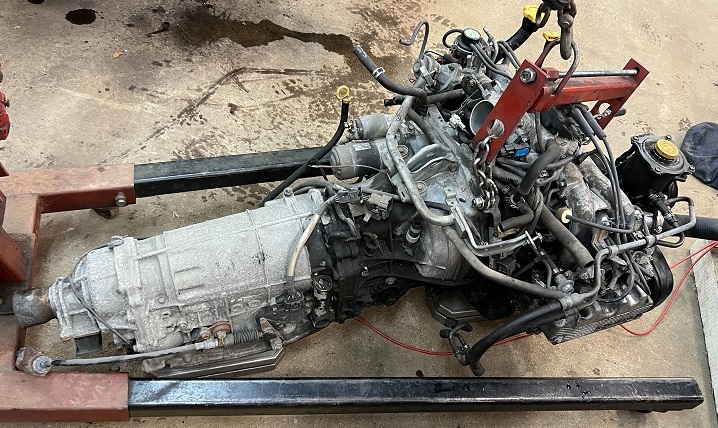
EZ36 and 6MT in 98 Impreza.
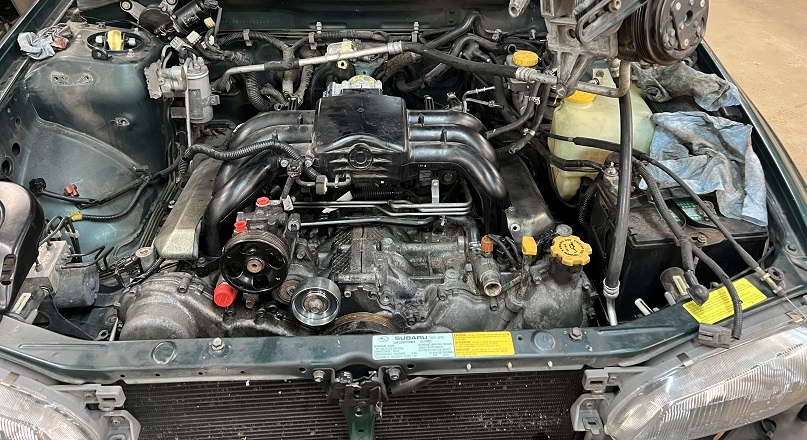
Biggest issue seems to be radiator clearance. I've seen at least one person put this engine in this car with AC and a ~2" thick radiator but the lower passenger side cam phaser was basically rubbing on their radiator. Seems to be the same for me, which wouldn't be good for off road use. Going to shop around for some narrower radiators, should be a decent fit if we can just avoid those cam phasers.
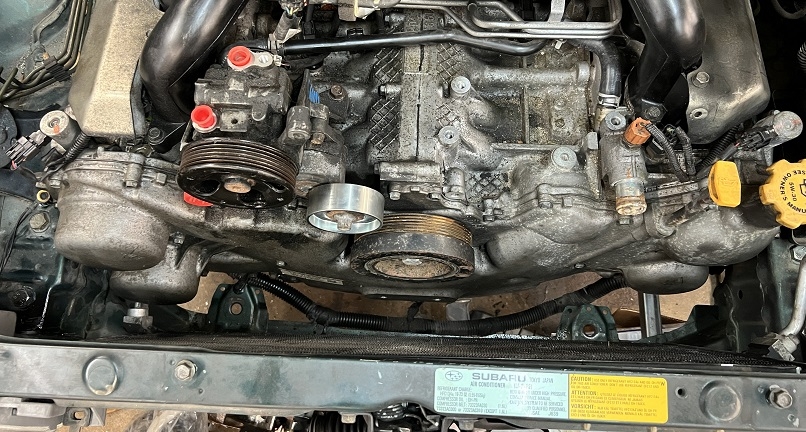
Not a lot of room in front, stock condenser wouldn't fit in front of radiator support due to headlights, would be a tight fit for condenser and fans between that and front bumper anyhow. Yes at this stage it wouldn't be too difficult to shift the bumper forward a bit but it already sticks out pretty far.
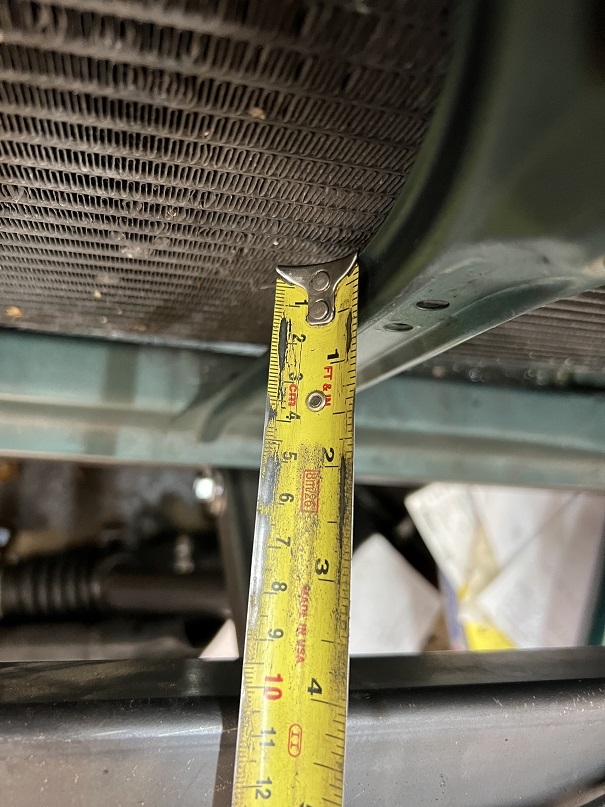
On the plus side, should be a pretty straight shot for a skid from the radiator support to the front crossmember, might have to drop it down a bit for the oil pan but the timing covers are pretty high up. Headers need to be shortened vertically and probably at least the driver's side extended to put the flange in a better spot. They're not bolted up 100% so might look a little off.
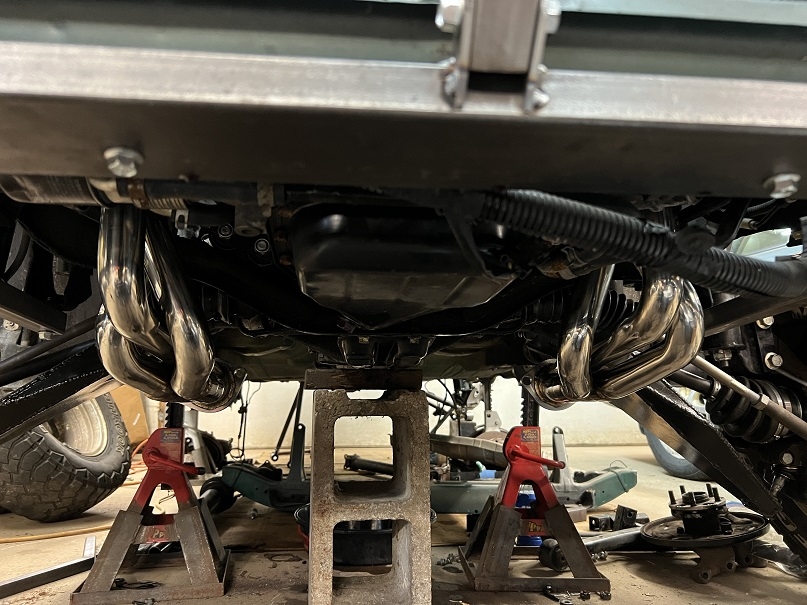
Plenty of room in trans tunnel.
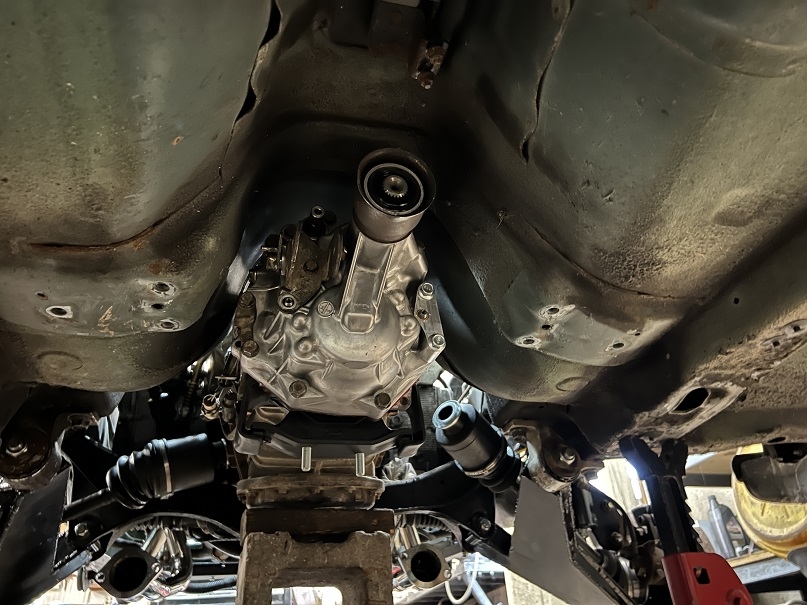
Z turned up some trailing arm sleeves for the front pivot. He also did some test fitting on the R180 to female front axle diff stubs. I have the RR billet knuckle almost done.
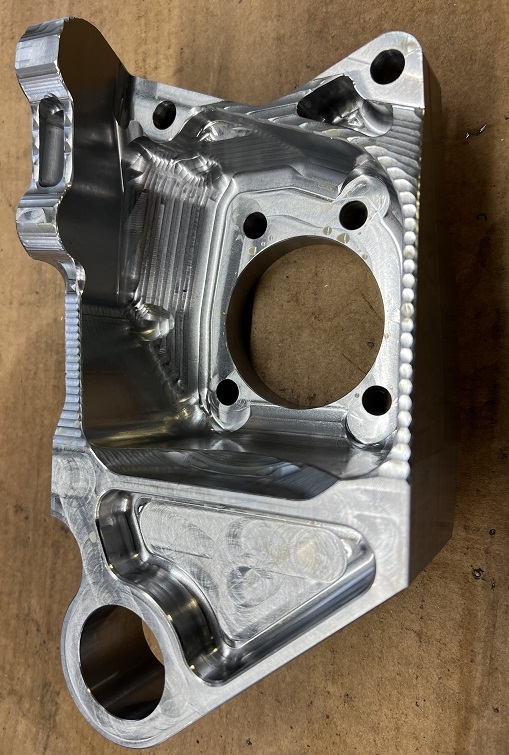
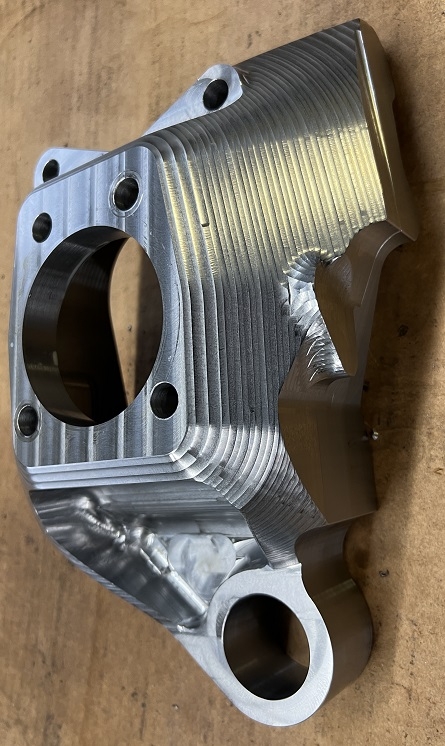
So we're closer to getting that whole package figured out.
While we were doing a bunch of this disassembly and assembly we weighed a bunch of things:
11# 98 Impreza EJ22 alternator
14# 2013 Outback EZ36 alternator
466# 98 Impreza EJ22 engine and 4EAT w/ PS pump, engine mounts, starter, engine oil
362# 2013 Outback EZ36 engine w/ flywheel, clutch, PS pump, engine mounts
198# 2007 STI 6MT
127# 5MT
So the EZ36 & 6MT is only about 100# heavier than the EJ22 & 4EAT.
-
22 hours ago, docmidBratt said:
So update after todays work
The cam and crank triggers are the the same between both bg5 and sf5.
Have power going to coil pack
Have checked coil pack and tested it. working fine.
Cranks over easy but still no spark.
Got good earths, added a few more to make sure.
checked all plugs
Bit off a loss now.
Didn't check igniter, don't no what im looking for ha ha ha
Yea i only have iphone on a prepay system do not connected to net to post pics from track
but my wife made a instagram account and put something on it but i dont no what
But next time i'll get some shots and a flick or 2
Thanks doc
Do you have some kind of OBDII scan tool / app? Might tell you something, at a minimum whether the ECU is coming on. Is it getting fuel?
-
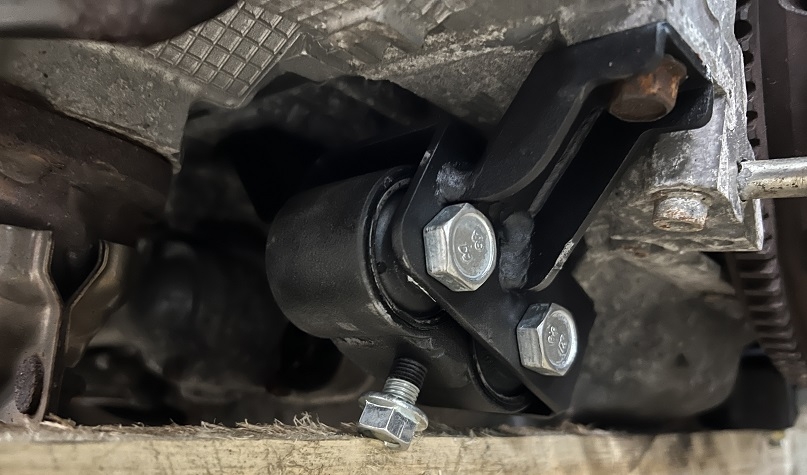
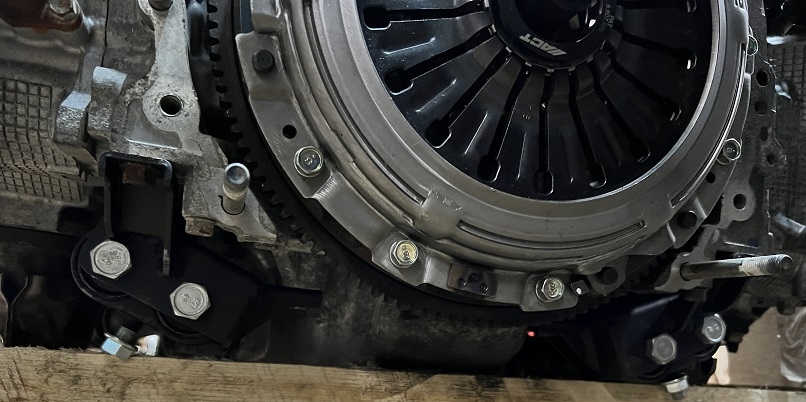
Still need a few parts before we put the engine and trans in. B replaced some of the coolant hoses and put the Kein engine mounts on.
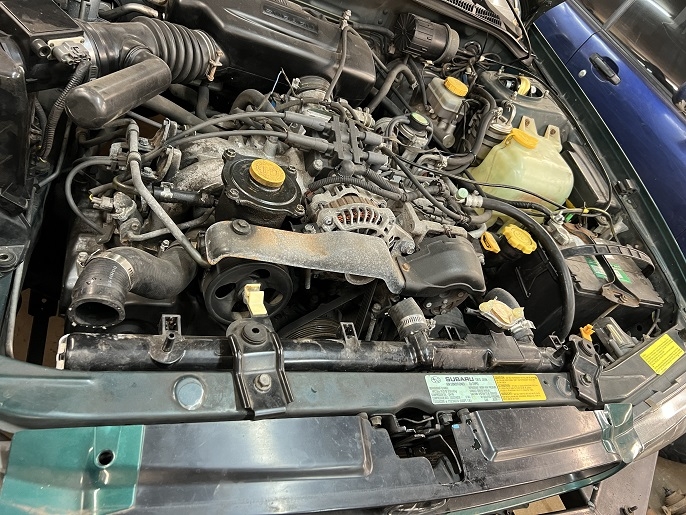
I put the used H6 radiator in. Bottom lines up perfect, need to move the top mounts but that'll be easy. It'll be tight with the EZ36 even with no fans.
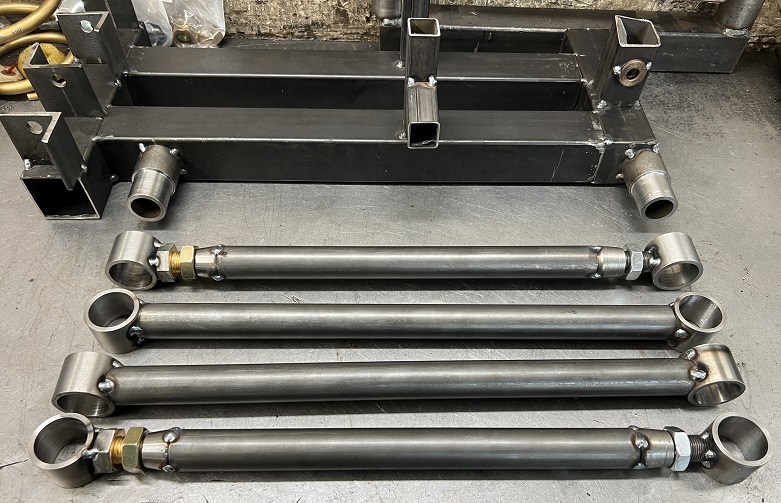
Modified the trailing arm fixture to also fixture longer lateral links. Tacked up a set. Waiting on Whiteline bushings so we can easily test fit these. Much easier to swap in and out than the stock bushings.
B's driveshaft has been vibrating occasionally. He thought it was the center support bearing. He filled the old one out of his green Forester with urethane and then swapped it out. As he was doing that he noticed the front u-joint on his driveshaft was extremely worn, probably missing all the needles in two cups.
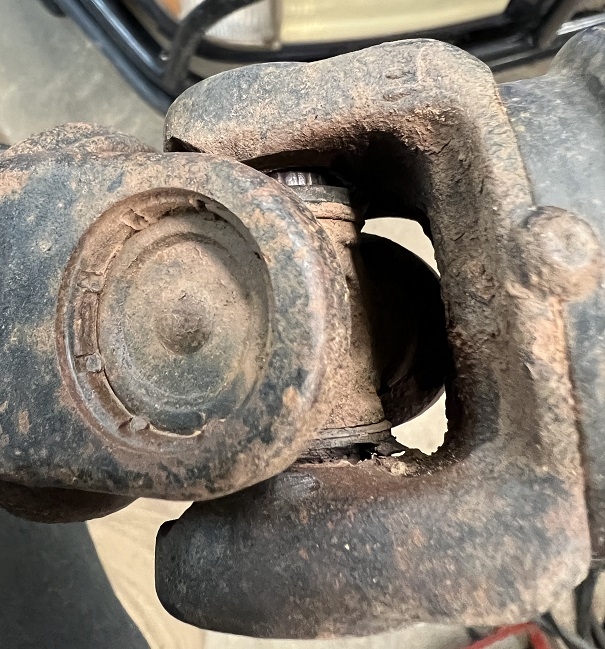
Good thing he replaced it but the one he just put in vibrates over 55mph. Didn't get marked when it got disassembled so we'll probably try clocking it 180.
TT called today and told me the writing on the rear diff of the red Impreza was just his way of telling me when he'd replaced the fluid. So that five bolt diff is probably stock. Maybe the one bolt diffs were a base model automatic thing?
-
 1
1
-
-
21 hours ago, docmidBratt said:
How's it going
We have had the brumby at the track a couple of times now with mixed results.
Since the change to the sf5 engine out of my forester no engine problems other then running on gate. (6 psi)
And the handling need some work. but got a plan for that.
Hooked up boost control solenoid and got boost jumping up around to 5000 the solid 10 psi. Got a fix for that.
But seems really slow for a turbo 2.0.
Down the back straight its only getting to 165kph which i would expect it the be 180kph with say 190hp?
My honda with a b16b does 185kph with 185hp. There's not push into your seat.
So the handling we are going to run a stiffer front spring and toe in the back a little to force it to turn in better
as I can feel the back wanting to brake loose.
Now the problem is we decided to swap out the 1996 sf5 300000km block that through a sparkplug out the head
for the 1996 bg5 200000km block which is in way better condition.
Swap everything over, blocked up unused holes, wiring etc.
Problem is it won't start.
Now my guess is that the crank and maybe cam triggers are different?
Any ideas
Thanks doc
Glad you're getting it out and using it. I'm sure we'd all love to see more pictures of it in action.
I don't know much about Subaru turbo engines so I'm no help there.
With equal power I wouldn't be surprised if the Honda is faster on the straights, it's probably lighter and has less air and drivetrain drag right?
-
Originally put this together for a friend, then realized it might be helpful to others wanting to do an STI swap. Basically everything you'd need to upgrade the drivetrain. Prices are roughly what I've paid in the last few months in US dollars. Yes you can use an automatic driveshaft and swap the flange from R160 to R180 but the STI driveshaft has significantly bigger u joints. If you find the right swap kit you can probably get a cheaper total price but I already had the trans. That's what I did in my black Outback, for instance just used the stock clutch and flywheel and only replaced the disc and release bearing. Can also buy a lot of these things from the dealer but they're more expensive. Conversely some of it you can buy on rockauto etc for close to used prices but I'd rather have factory parts for most of this.
$2500 trans used 2006+ to fit our planetary low range
$200 driveshaft used - get one same wheelbase as the car you're putting it in, 2007 STI seems to fit first gen Impreza perfect, got a newer one that fit my Legacy Outback.
$715 diff used 2006+
$150 shifter used -2013? at some point they made the shifter longer I've been told
$150 flywheel used but resurfaced
$10 flywheel bolts (800610740)
$8 flywheel pilot bearing (816212020)
$12 flywheel dust cover (30216AA070) IMO required for off pavement use
$6 pressure plate bolts (800508310)
$450 clutch/pressure plate/release bearing Exedy FJK1000 from Rock Auto, looks like rallysportdirect is cheaper but not in stock
$92 ACT monoloc from IAG - definitely optional
$70 clutch slave used
$10 clutch line 37250FE052
$23 clutch hose 37251FE030
$2 clutch hose banjo bolt 112925161
$2 clutch hose crush washers 114130151
$104 Trans mount 6MT 41022FE010
$75 starter usedProbably not required but in order to run female front axles you need:
$96 front axle stubs 4EAT 38415AA070
$5 front axle stub seals RF806730031
$5 front axle stub seals LF806730032
$2 snaprings for front axle stubs 805329010Also since my car is an auto I needed:
$35 clutch master used
$75 STI pedals used (I think any Subaru manual trans pedals would work, looks like even Forester pedals would bolt in)Finally, you need one of the following:
STI CV axles (rear at least), knuckles/hubs, brakes - can't fit 15s and are a larger wheel bolt pattern
Slammo says "04 STi rear knuckles let you stay 5x100 and use stock 04 STi rear axles with an R180, and you can fit the WRX 2-pot calipers without adapters, but you have to use special rotors since the STi parking brake drum is a bigger diameter" but those 04 STI rear knuckles are rare.
Suberdave's conversion races - maybe these would work OK on a lighter car if driven carefully but then what's the point? Definitely the cheapest route but at least moves the weak link to the axle which can be replaced in the field in a reasonable amount of time.
Billet rear knuckles and R180 to front CV axle stubs - probably cheaper than STI knuckles, hubs, and brakes, and I think the best solution for reasons already discussed.
-
 2
2
-
 1
1
-
-
On 1/18/2023 at 3:51 AM, el_freddo said:
I hang out for these updates!!
With the above, are you saying the one bolt came before the five bolt R160? Or is there and early and later version of the two diffs (that I don’t know about)?
Asking as the five bolt came before the one bolt. I know the 1980 brumby/BRAT models run with the five bolt diff and you could bolt one any five bolt r160 into the back of them.
The one bolt I believe appeared mid to late naughties, but I think the five bolt is still to be found in those years as well depending on which vehicle model you look at - I could be wrong though!
Cheers
Bennie
Excellent question, I don't know.
The EA vintage Subarus had bolt in drive stubs, right? We used many of those in our buggy. I'm almost positive those were five bolt so maybe you're right. Can't remember what my Loyale had in it.
I think all the EJ Subarus we've had have had the five bolt R160. Since this one bolt R160 is out of one of the oldest EJ Subarus I've ever had and it's clearly smaller and lighter I just assumed it was an older design and the five bolt was an upgrade. FWIW my red Impreza has a five bolt but also has junkyard markings on it so it's definitely not stock. Not sure what kind my 96 Impreza had in it, never had to take it out.
-
 1
1
-
-
Haven't accomplished a lot in the last couple weeks, been sick and busy with other things. Still need to get the throttle body sorted at a minimum before we put the engine in. Will hopefully have engine mounts this week.
Biggest thing we accomplished was swapping in the R180. Left to right, "one bolt" (earlier) R160, "five bolt" (later) R160, R180. Some studs and plugs swapped over.
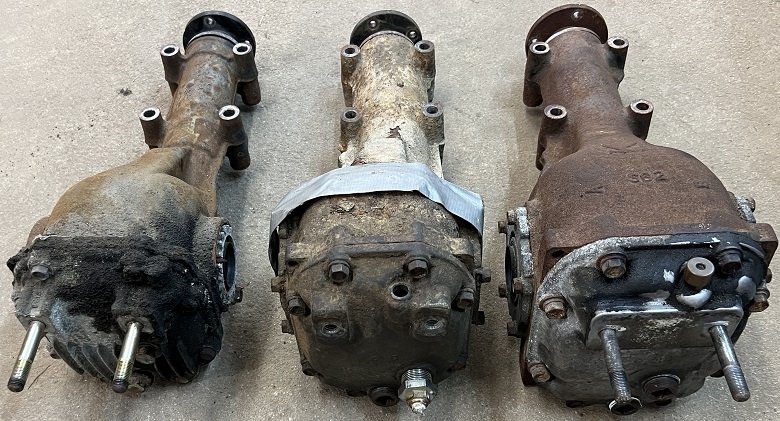
Definitely one good reason Subaru has a Lego reputation. After swapping over those studs the R180 bolts right in.
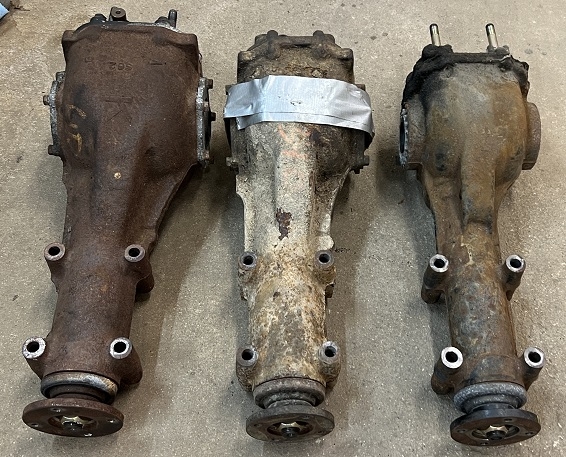
Weights are 37# (1 bolt R160), 47# (5 bolt R160), 57# R180. 5 bolt R160 is definitely a 4.11 open diff, I assume the 1 bolt is open also but probably 3.7 or 3.9. I was shocked how much weight difference there was between the R160s.
Had to trim one of the little diff mount brackets so it would sit flush on the R180.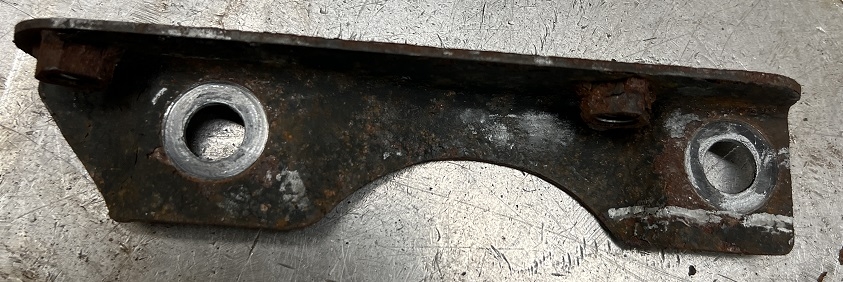
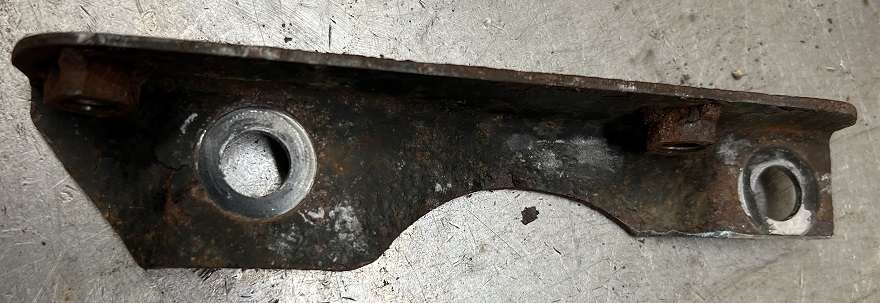
While we had this out I cut the tuned mass damper (?) off.
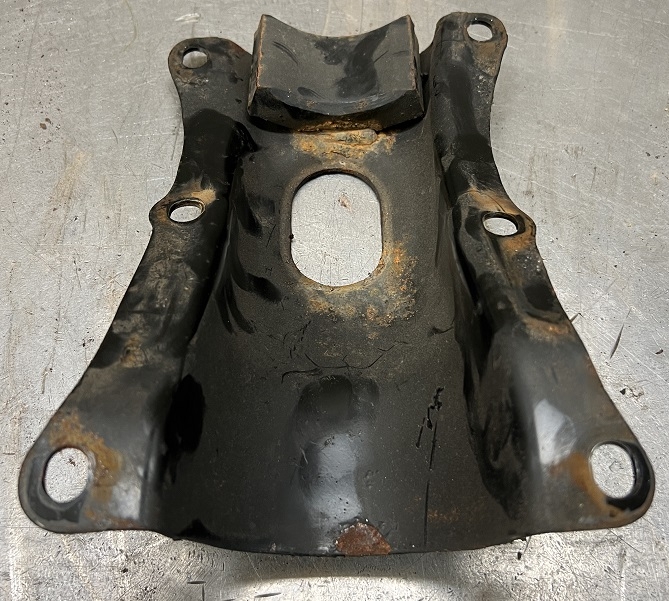
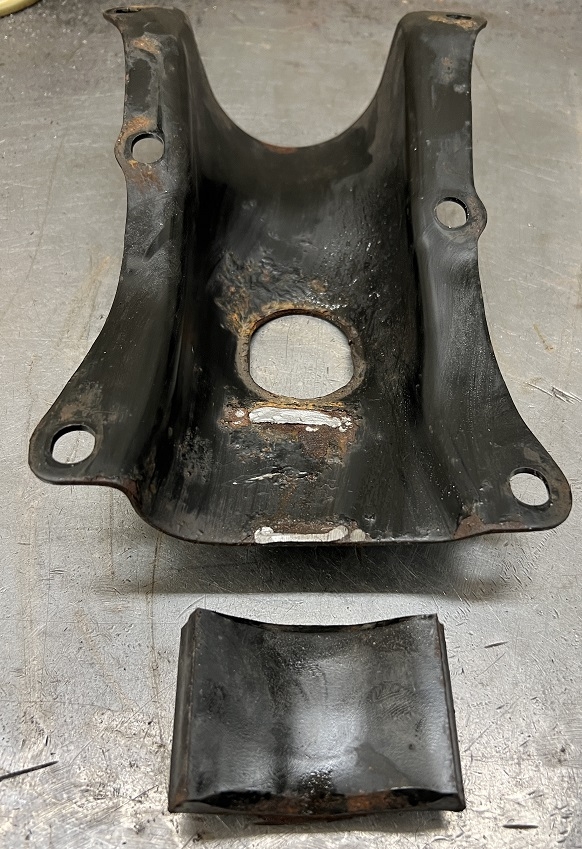
Surprisingly only weighs 1#, seems heavier. Thinking by adding 20# of rear diff we've ruined whatever NVH tuning that was supposed to accomplish.
STI driveshaft appears it will just bolt in. Looks to be a little on the short side, anyone know if the splined part towards the rear is supposed to telescope? There's definitely splines under the rubber cover but we couldn't get it to budge.
Looks like we need to make the rear lateral links a little longer than what we'd mocked up for the R160 but I think then they'd work with either diff. Still need to machine the RR billet knuckle, started programming that the other day.
B and I also worked on putting a planetary low range in my other STI 6MT. He swapped over the various reverse lockout parts, etc. Unfortunately the rear output shaft has about .008" (.2mm) endplay so I need to get a thicker shim and swap that out.
-
 2
2
-
-
On 1/7/2023 at 9:46 AM, slammo said:
OK, I didn't see those lower "gussets" at first but I like the idea. Should be plenty of room there since I'm not running a turbo. I really want to minimize the welding on this body as I think that's going to make it rust faster but will definitely take a look at mine and see what we can do. Also reminds me it might be a good idea to do a strut tower brace that attaches to the pitch stop mount. But maybe that's why the wiper arm on my black Outback keeps scraping the windshield when we beat on it?
-
 1
1
-
 1
1
-
-
On 1/5/2023 at 7:13 AM, el_freddo said:
That swing arm fabrication is awesome! Very neat and look like it’ll more than do the job!
And wow, that salt is NUTS! I’m glad that in Australia it’s illegal to salt roads in our alpine area, it’s a small area that’s also in a very sensitive environment so salt is a no-go. Our Alpine area is not home to millions of ppl commuting etc either, it’s utilised for recreation skiing. Some Australians don’t even realise it snows I this country!
I’m lucky to have worked at lived at Hotham Heights for two seasons. My favourite thing to was drive on snow packed roads - it’ll be something I may never get to experience again.
On the EZ, weird they’d sell it as a complete engine without the throttle body! There’s a massive array of drive by wire throttle bodies available out there these days. I’d probably pick one that you know will be on the market for a long time that’s easily available.
As for the plugs, got a self serve parts yard over your way to grab your own? Other option is to re-plug the engine loom to match an aftermarket ECU setup if you go down that path.
Cheers
Bennie
6 hours ago, travelvw said:Love it! I can't believe you bought headers; car is going to sound good, too. How about doing those head gaskets now while it's out of the car instead of later when it's in the car?
Looks like these cars need more bracing for the front a-pillar; same place that repeatedly cracked on the Outback? Does B's Forester have any bracing up front like a WRX?
K
That salt picture is definitely a worst case scenario but yeah it's bad.
I'm not too surprised they pulled the throttle body off, if you're replacing a blown up engine the one on it could probably be swapped over. More pissed that they cut the wiring rather than unplugging that one connector. I'd like to have as few splices as possible.
Know of any throttle bodies in particular that fit and are better in some way?
I can get the main car side harness plug here, they just listed it:
https://www.corsa-technic.com/item.php?item_id=1783
Headers weren't super expensive. Supposedly +20ft-lbs through most of the RPM range. Engine as expected didn't come with enough exhaust to work with so I was going to have to buy/make something either way.
I'm going to hope for the best again on the head gaskets. Yes 90% of the EZ30s we've bought have needed them but those engines are twice as old as this one. Also it's quite a job.
It's too bad there's nothing solid under the top of the fender to bolt to, I've seen braces that bolt in there but it seems like that part of the body is super flimsy. B's Forester does not have a U brace, that would probably help a ton. For this car I'm planning on bracing the front crossmember to the trans crossmember like I did on the black Outback.
-
 1
1
-
-
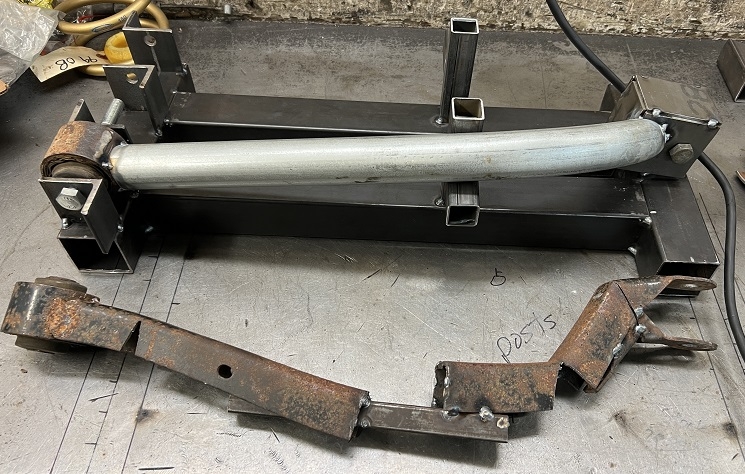
Made a jig and more sano mockup trailing arm.
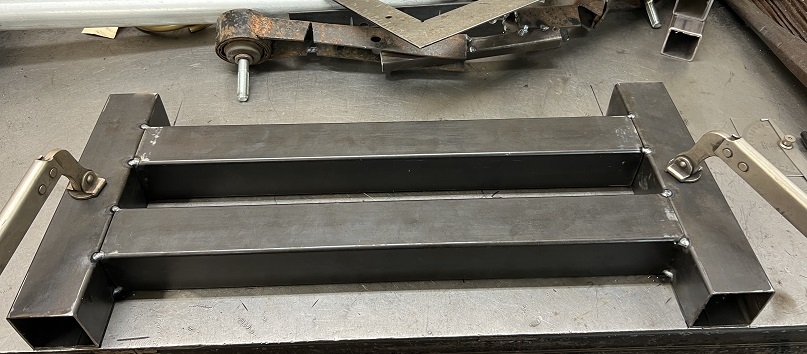
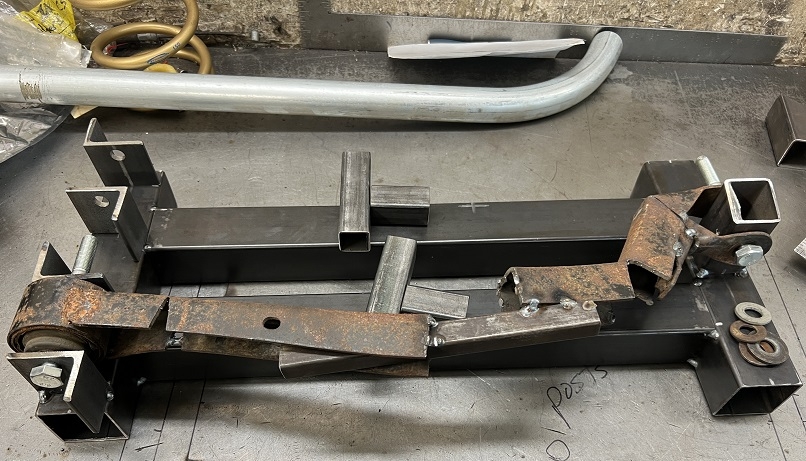
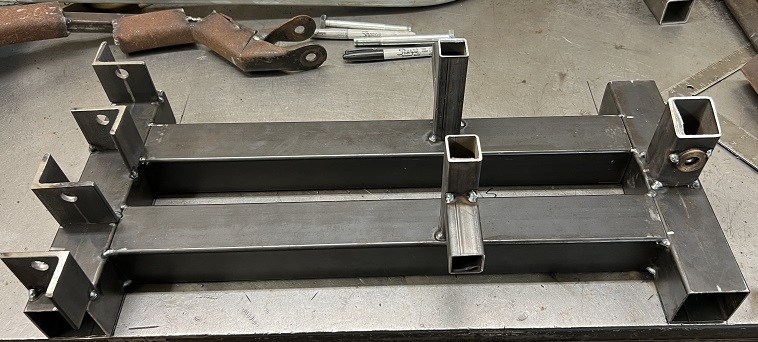
Just used a piece of conduit we'd bent with B's tubing bender. For the actual trailing arms I plan to use 1.5 x .120" 4130 and also turn the sleeve for the front bushing on the lathe.
Incredibly bad picture of it installed.
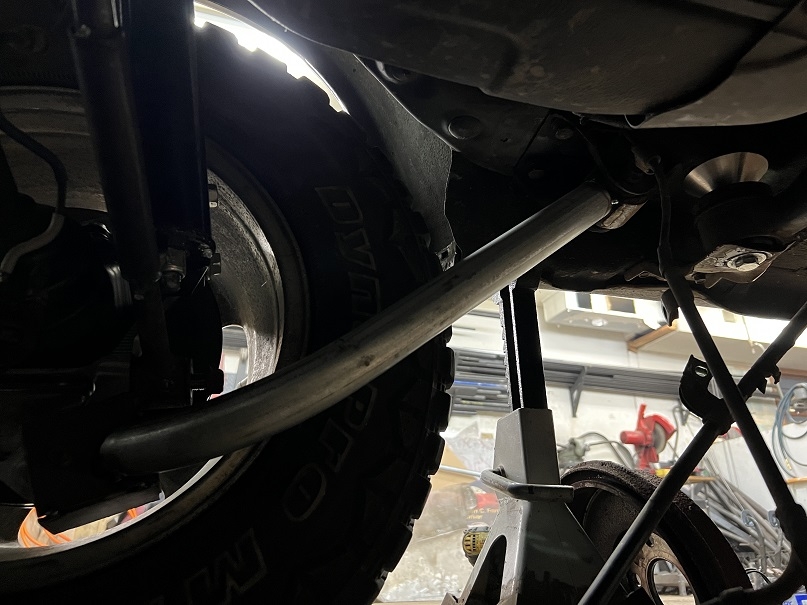
Initially hit the knuckle and lateral link at full droop.
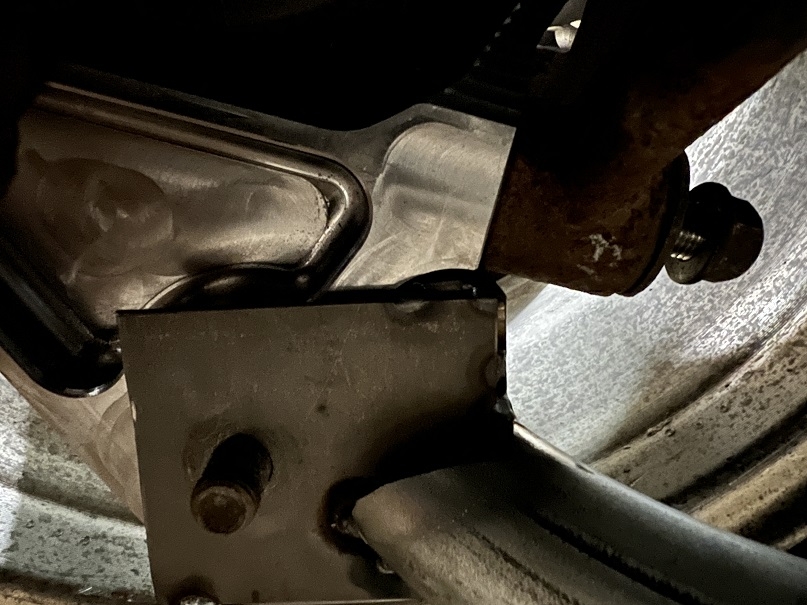
Hit the wheel near full bump.
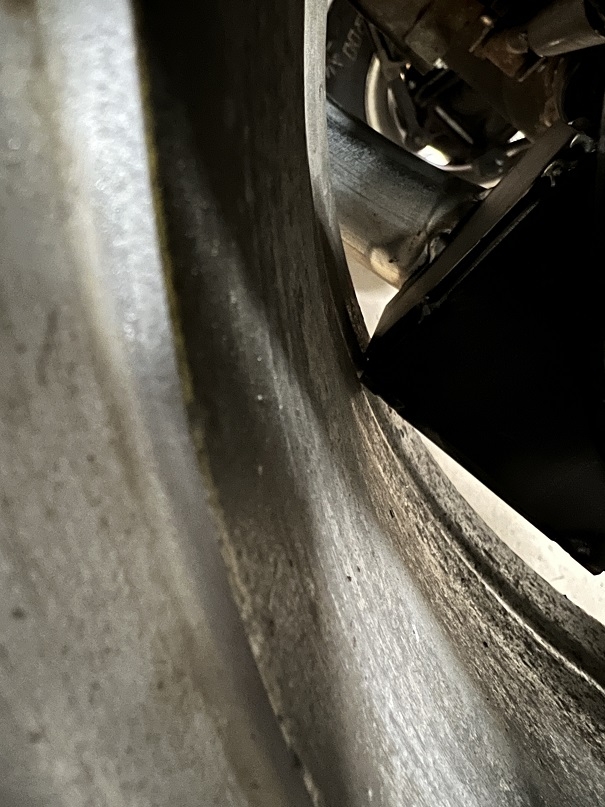
Modified the box clevis on the rear end for clearance.

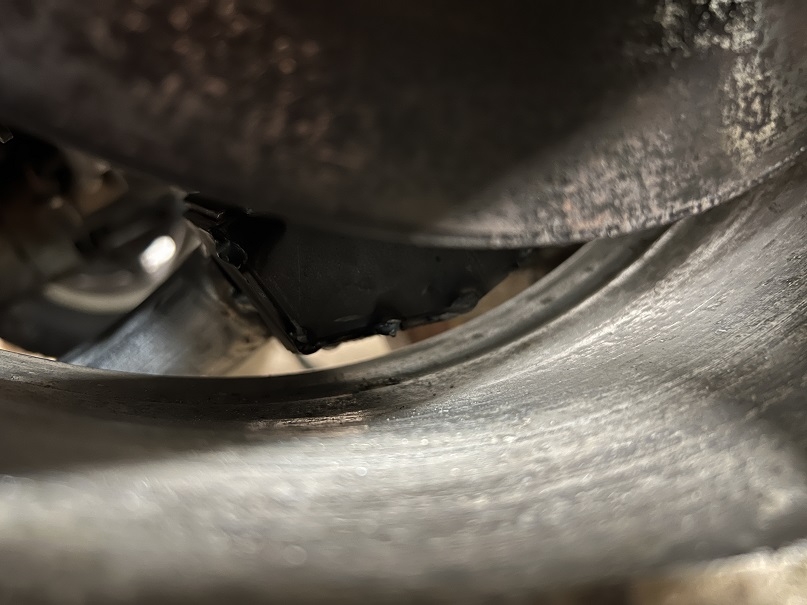
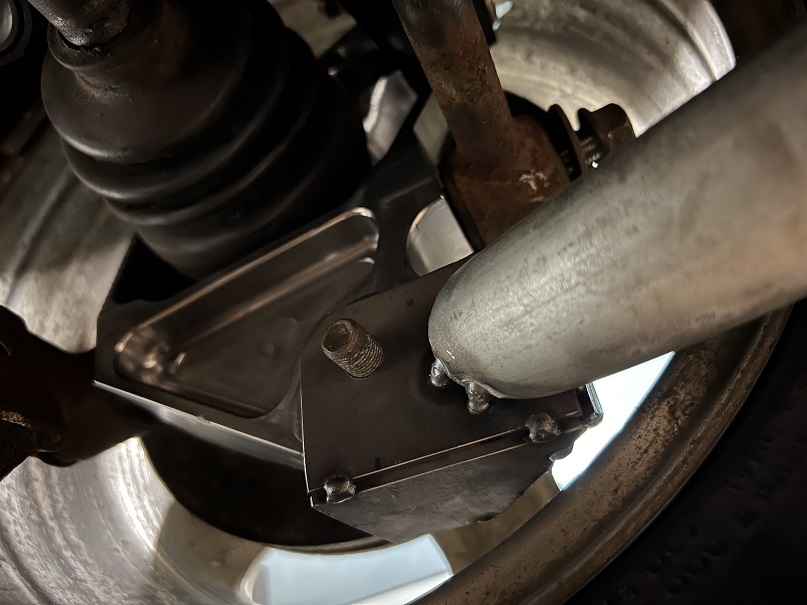
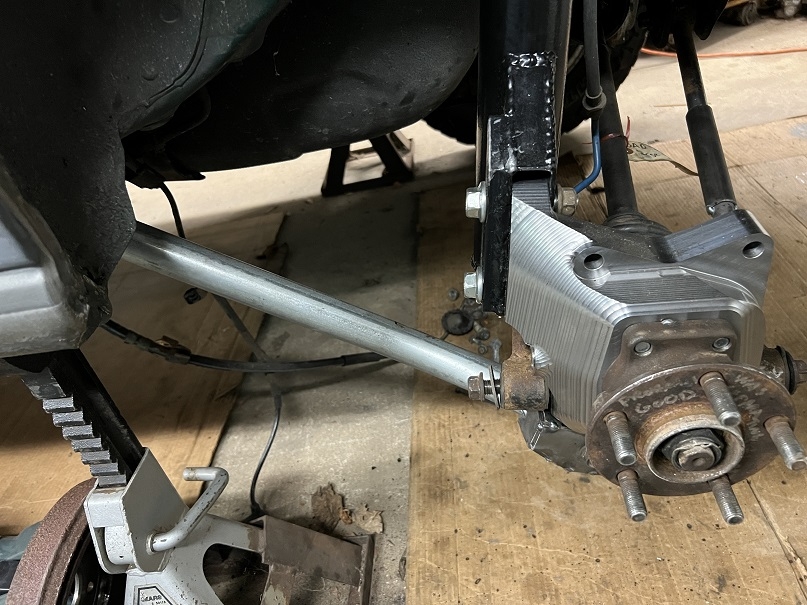
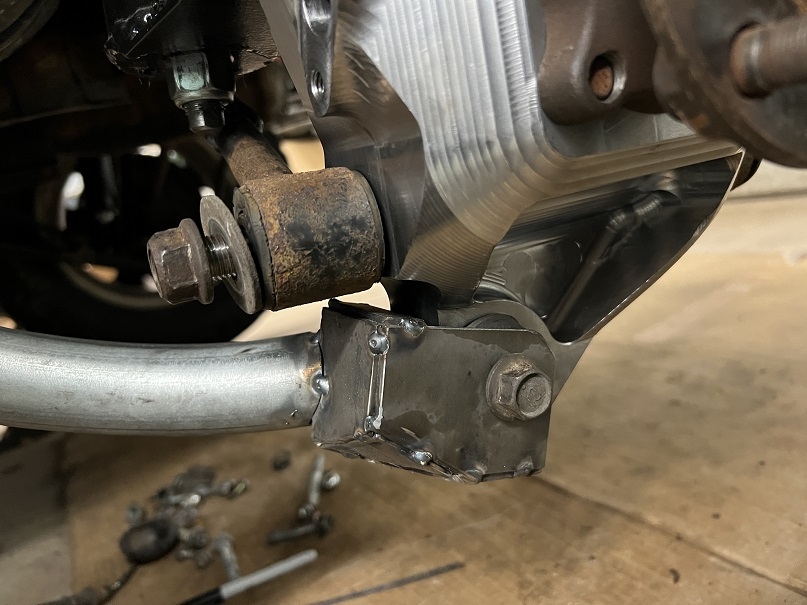
So we've got a good plan on those now.
Side note for those of you living in foreign countries or states. This is what our roads and parking lots look like in the winter time. That's salt, not frost.
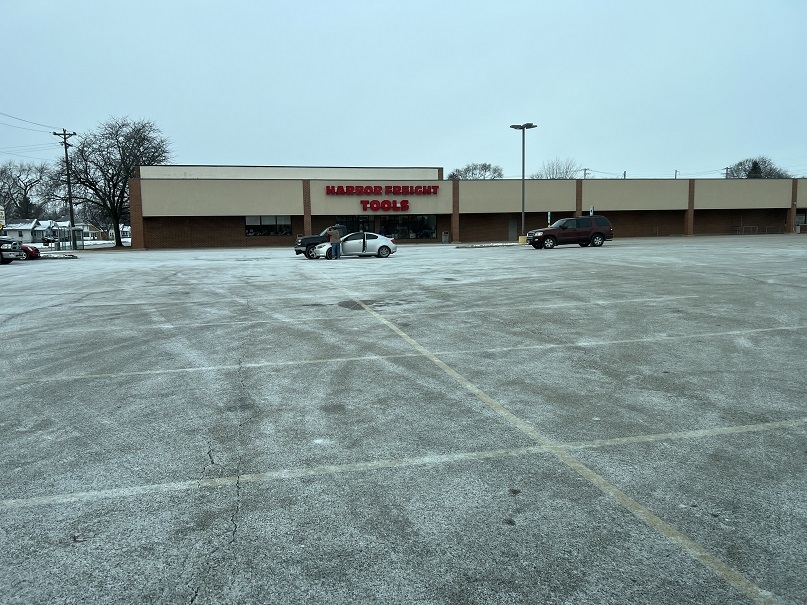
Picked up an EZ36 last week.
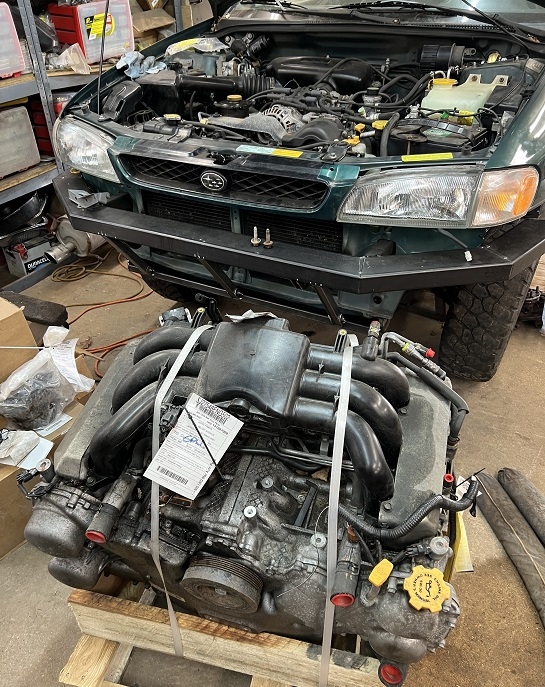
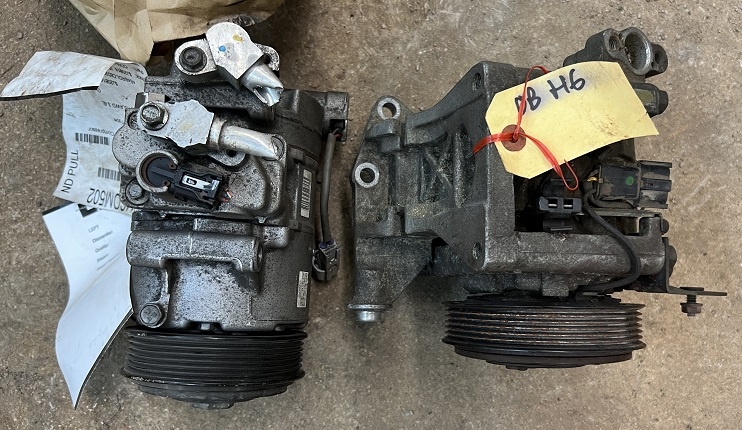
Kinda wished I'd tried harder to find one that's more complete though. Junkyards of course normally sell them without accessories, so I bought those separate. But that means I don't have the brackets for them. Had a bracket that worked for the PS pump but the AC compressor is much different. EZ36 on left, EZ30D on right.
Need to find a plug and pins to fit this.
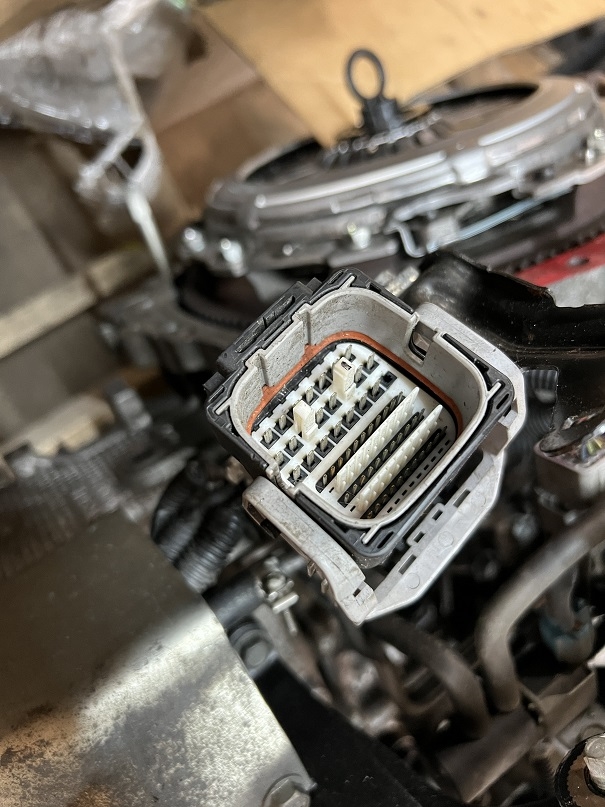
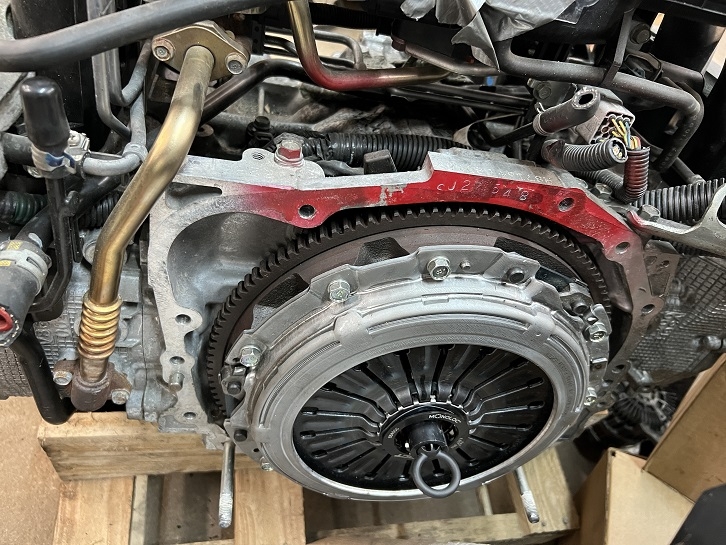
I got a resurfaced STI flywheel and Exedy clutch kit and B assembled all that and chased the threads in the block. You can see here where the junkyard cut the wires and coolant hose to the throttle body (I assume). They probably did this when they removed the throttle body, didn't even think about them stealing that, now I need to get one of those. Have heard of people using non Subaru. Plan on drive by wire but open to suggestion if there's something better than Subaru since I have to buy one either way.
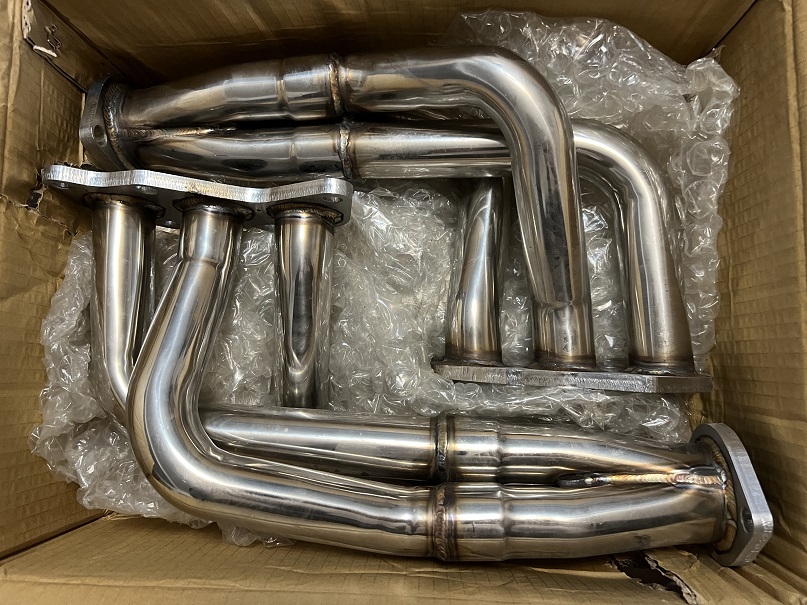
Got a trans mount, still need to install low range in the 6MT. Got a driveshaft and R180. Have engine mounts on order. Got some shiny headers from Australia, last set they had, hopefully we can make them work.
-
 1
1
-
 1
1
-
-
Finally got back to video editing. Had almost run out of hard drive space and also spare time. Video from our tip to the UP June 2021:
https://www.youtube.com/watch?v=OUrIVHmtNPc
Since we've been taking less video the last few years, this one's pretty short. Also it's a lot less often we get out and stop to get video of jumps, whoops, hillclimbs, etc. In those cases we usually just enjoy it and keep going these days. But when we're stuck there's usually plenty of people standing around to document the process of getting unstuck.
Already have two more from 2021 basically edited down and have started on our last trip of 2021. So I should be posting a lot of videos this winter.
-
 1
1
-
-
12 hours ago, slammo said:
From what little I can find the one bolt design is also known as VA type and was used in early Imprezas. The five bolt design is also known as T type and supposedly uses bigger internals. The rear diff in my red Impreza does have a date of Dec 2021 on it in paint marker, presumably from a junkyard. So someone probably put a later diff and axles in it fairly recently.
That semi posterior trailing arm mockup does hit the wheel at full bump. First step was just figuring out how long we want it and how much dogleg (in each direction). Next step will be a closer to production mockup using some conduit bends.
-
B did some work on the blue Forester. It's been getting water on the passenger floorboards for a while now after (but not immediately during) rain or a trip to the car wash. He cleaned out a couple drains near the blower motor, couldn't find anything obvious. It seems to be leaking behind the rubber/foam on the firewall so it's hard to tell exactly where it's coming from. Probably not the source of the leak but he also noticed the area in front of the passenger door hinges was mostly cracked.
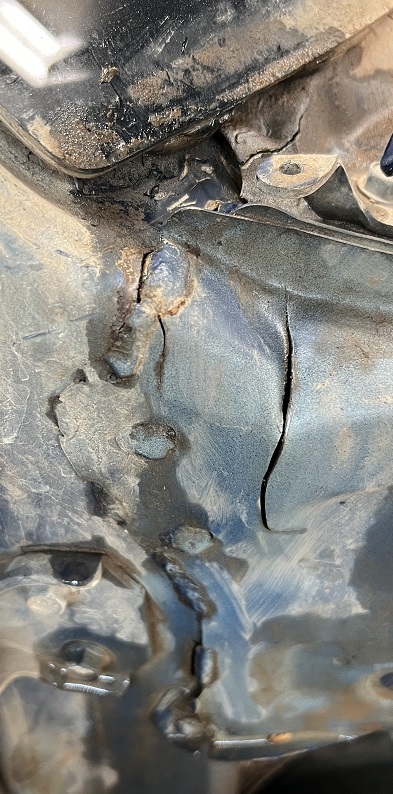
He cleaned off the paint around the cracks.
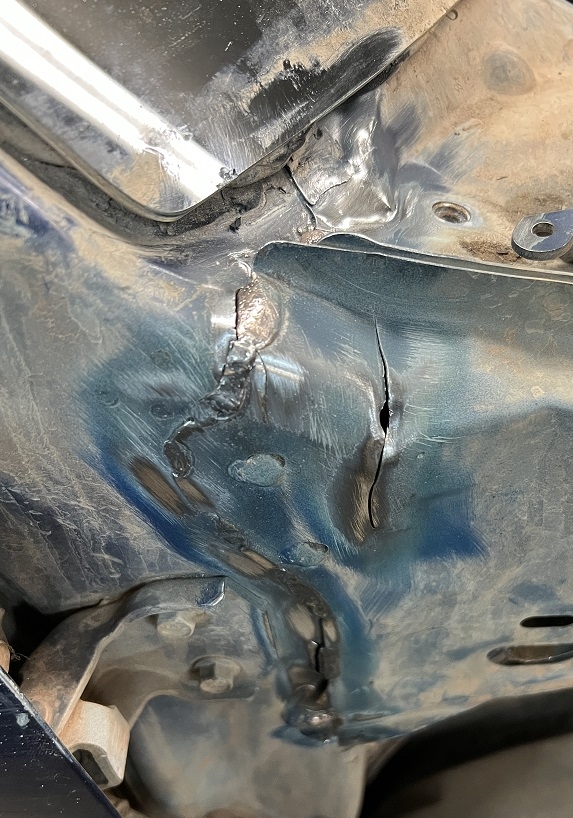
I didn't get any pictures since I was working on my rear suspension but he got it all welded up and painted and put the fender back on.
He also replaced the tie rod and wheel bearing on that corner, they were both a little sloppy.
First issue I ran into trying to mock up the front CV axles in the rear for the billet knuckle was that the rear axles in this thing seem different than any other EJ Subaru rear axles I've run into. This is the rear diff in the green Impreza:
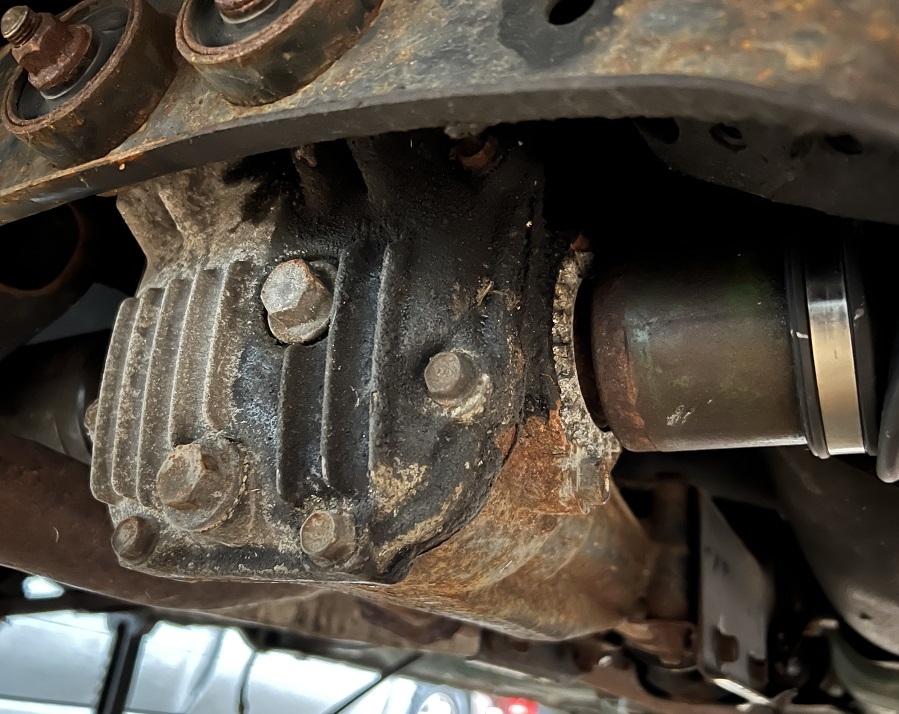
All of our other R160s look like this, including the one in my red Impreza which is a year older:
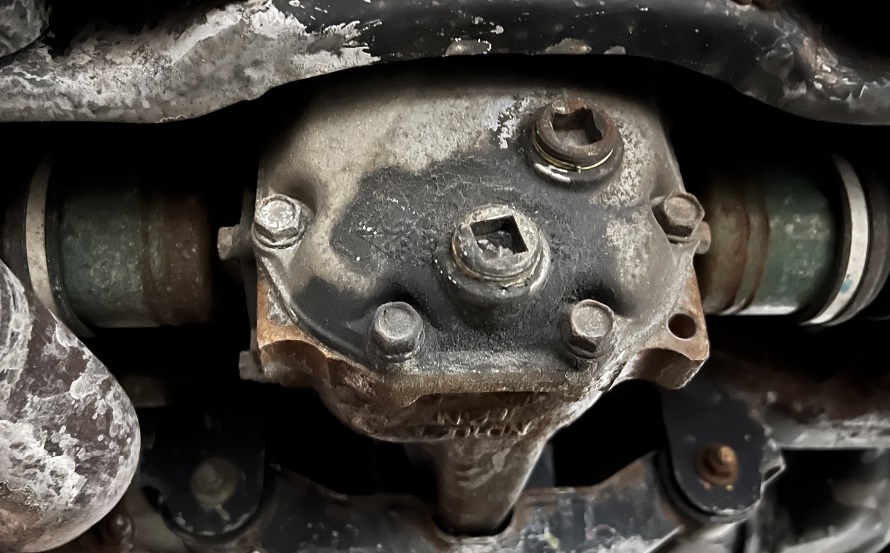
Green Impreza axle on left, "normal" EJ rear axle on right. I think the splines are the same, obviously the snapring groove is totally different, also the spiral cut bearing diameter from the green Impreza is smaller.
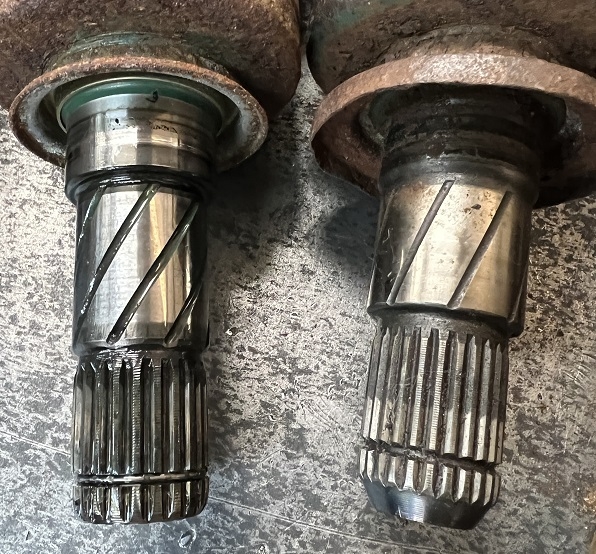
Just made sure I wasn't going crazy and took a look at some of my rear axle collection, they're all like the one on the right in the picture above.
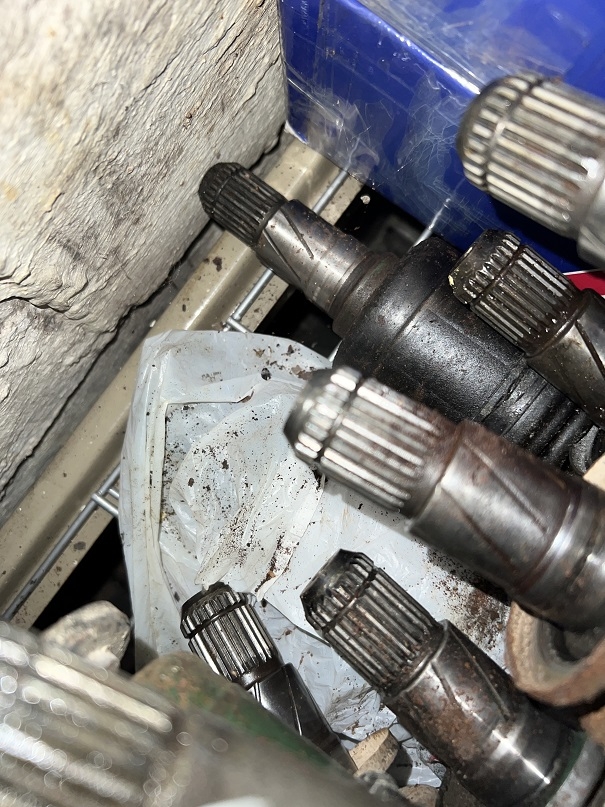
Long story short I turned up a dummy stub for mockup instead of using one of the ones we'd made. Ultimately it doesn't matter since I'm not going to use this diff but surprised me a little. Need to swap the R180 in (finally got one) and put those stubs in to see how that works out.
Mocked up some new links with the billet knuckle. Surprisingly it doesn't seem like the trailing arm should be much longer, just needs a big dog leg at the rear end to clear the wheel. Need to mock that up better with some round tube bends. This is with the Impreza trailing arm bracket and no spacer. Lateral links need to be a little over an inch longer as expected. Surprisingly the tire doesn't rub the wheel well much worse than it did before. Camber is zero at ride height in the middle of the adjustment as best I can tell.
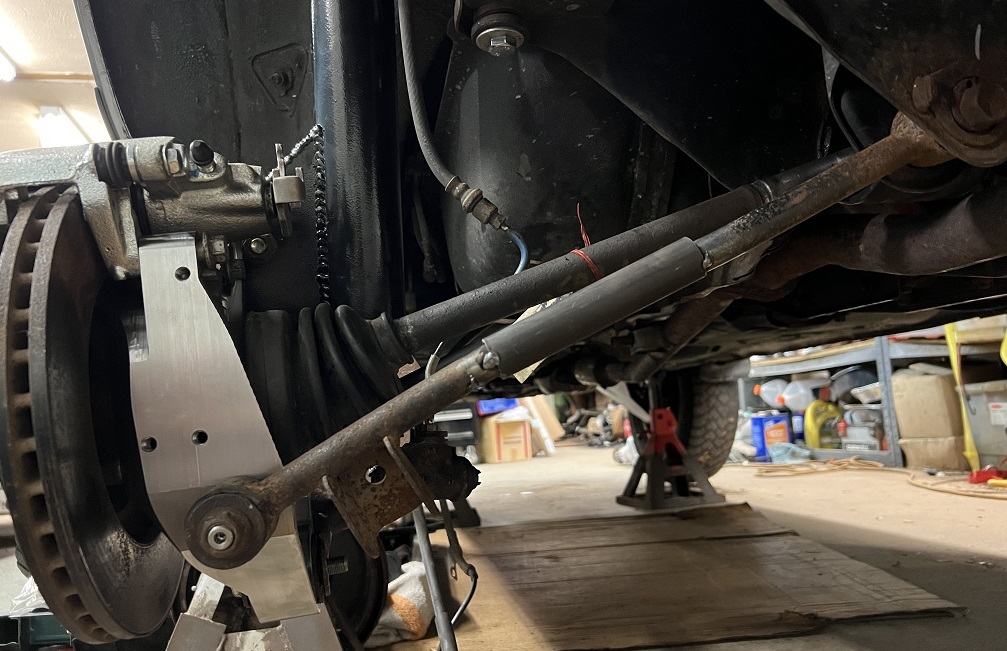
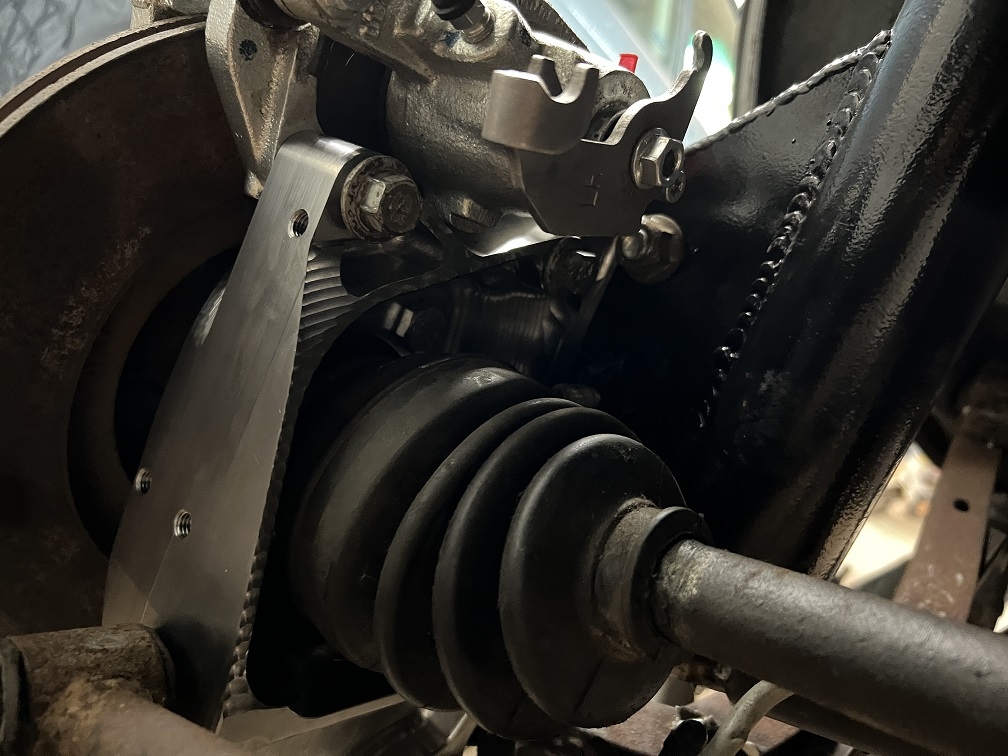
Caliper bolt and strut nut are close to each other but can be removed and installed independently.
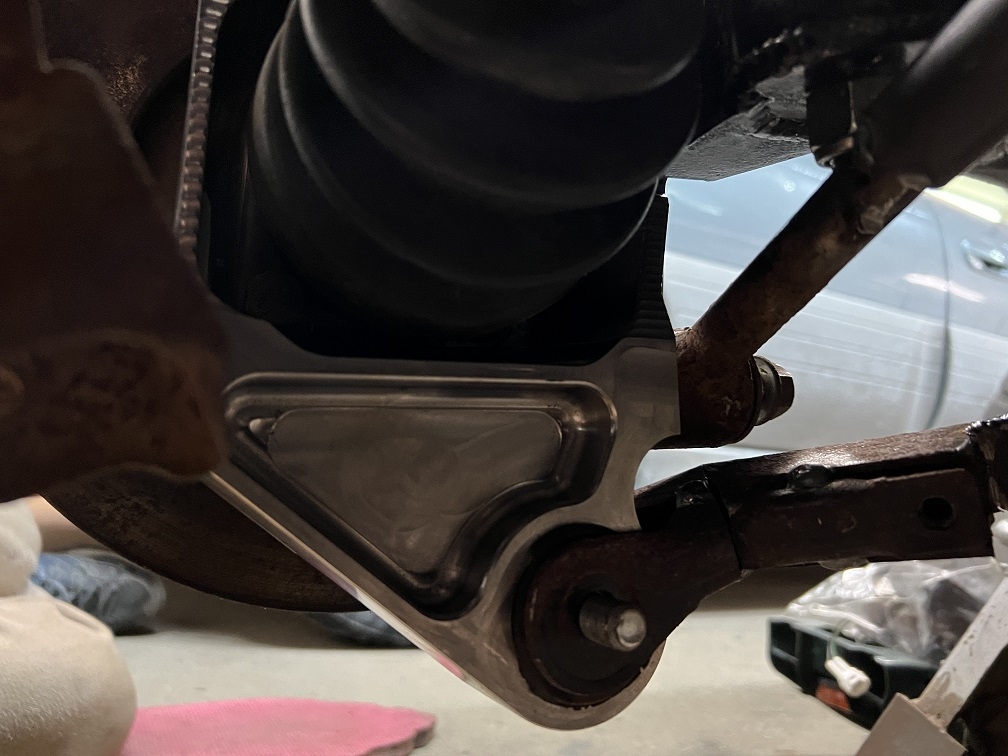
Hard to tell in this picture but decent clearance even with the "big" front axle installed. Boot needs a strap but there's plenty of room for it.
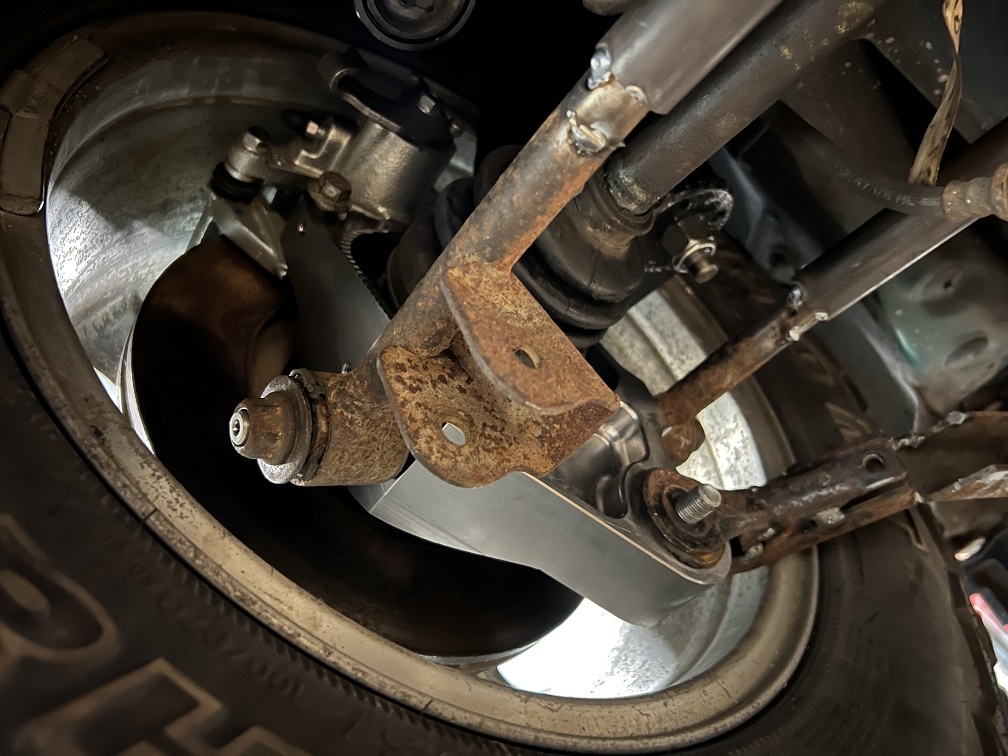
-
 1
1
-
-
15 hours ago, el_freddo said:
Sweet work on that billet hub! Ditch the bearing to help reduce unsprung weight!

Seriously, you could make a set of aluminium billet hubs and carry the steel billet hubs as back up if one cracks out bush. Best R&D there is.
Cheers
Bennie
That would improve our sprung/unsprung weight ratio! Think I'll just stick with steel and not worry about it. Considering a wheel and tire assembly weighs 50#, 5-10# here or there isn't going to make a huge difference.
10 hours ago, Numbchux said:Well, I've used an Impreza pedal box on a Forester.....
I did some googling for the ones I was thinking of, which have a little dam on the front edge, but I found many other designs. Our GC rally car had a JDM aluminum hood, but just stock OBS/RS vents (I don't remember if was had the plates under them or not) and scoop. But we also had a big aluminum radiator, FMIC, and didn't really ever have any cooling issues.
Good to know, B measured the Forester pedal box and seems like it will bolt right into the Impreza.
Not too worried about overheating either but I am tempted to unblock the hood vents when it gets hot out to see if it makes any difference.
-
 1
1
-
-
Billet knuckle vs stock knuckle
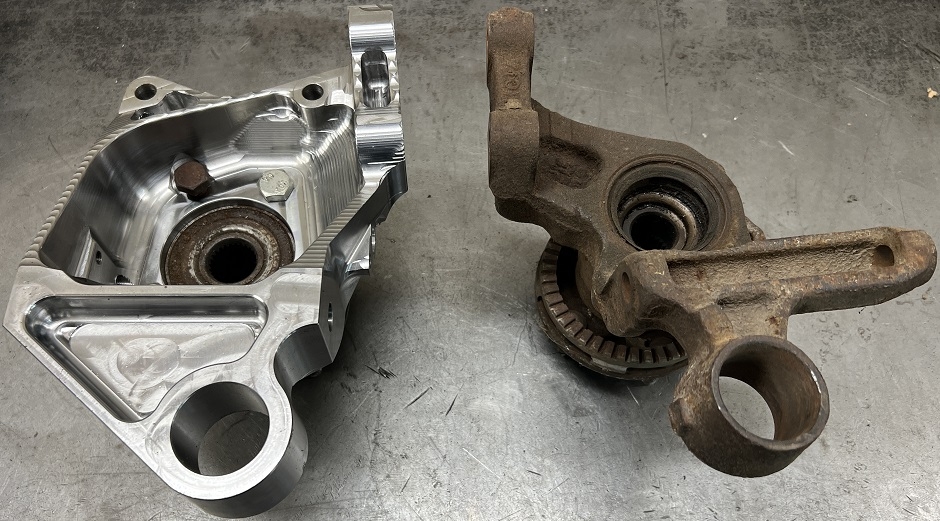
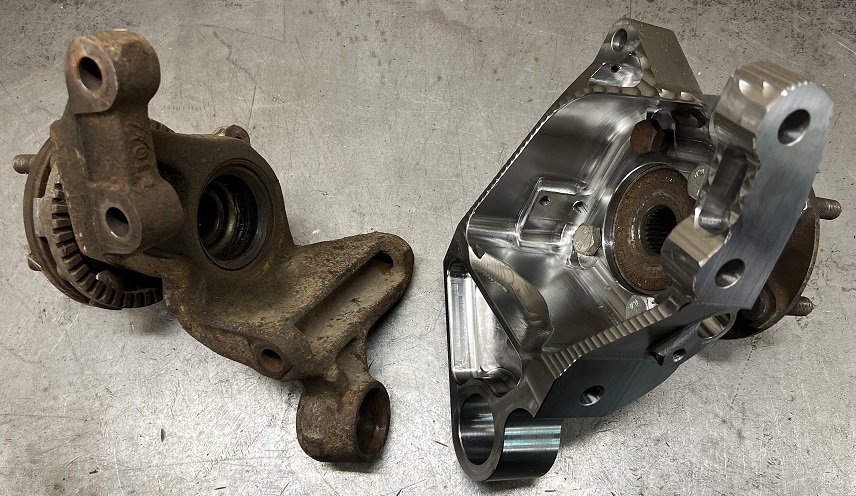
Stock knuckle with wheel bearing weighs 14#.
Billet knuckle with wheel bearing weighs 19#.
Bare billet knuckle weighs 13#.
We kinda knew this up front but after seeing them in person compared to the stock knuckles, aluminum would almost certainly be strong enough with this boxed design. Would require steel sleeves for the strut bolts and long bolt but the machining would go a lot faster.
The brakes will probably be heavier than stock and CV axle will definitely be heavier but I think a ~10# unsprung weight increase per rear corner will be worth it.
-
 3
3
-
-
58 minutes ago, slammo said:
It'd look better with the stock plastic bumper.
As you know I'm putting it that low to fit light bars and get more air to the radiator.
-
Finished machining the first billet knuckle. No major problems, went as well as I could have hoped.
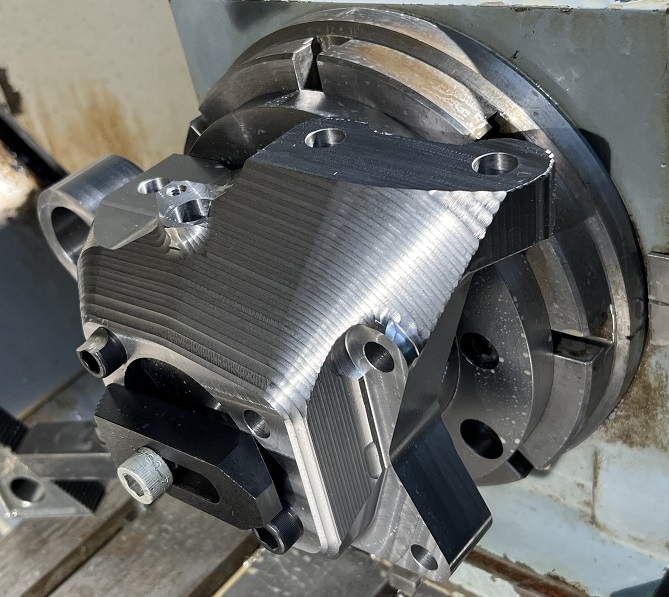
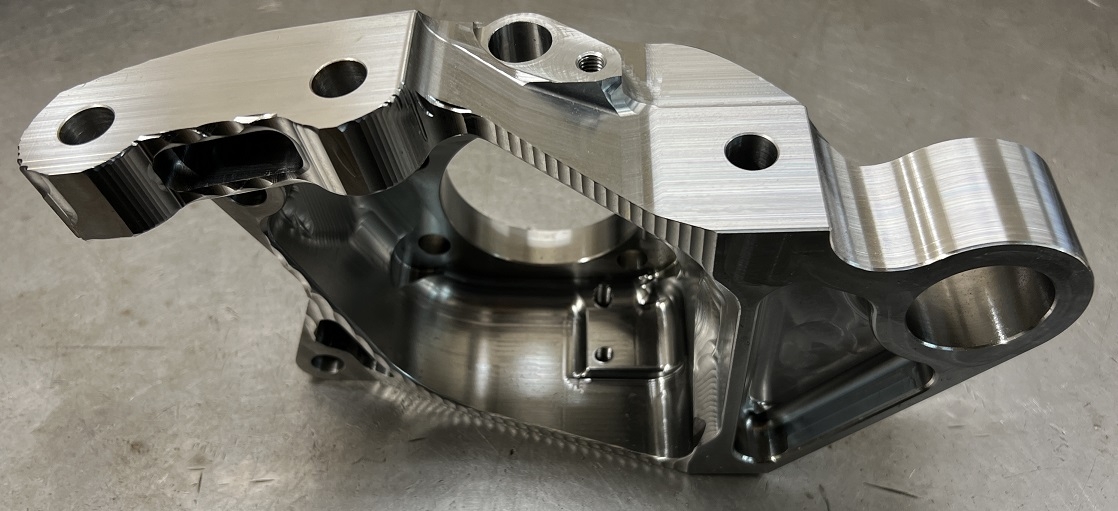
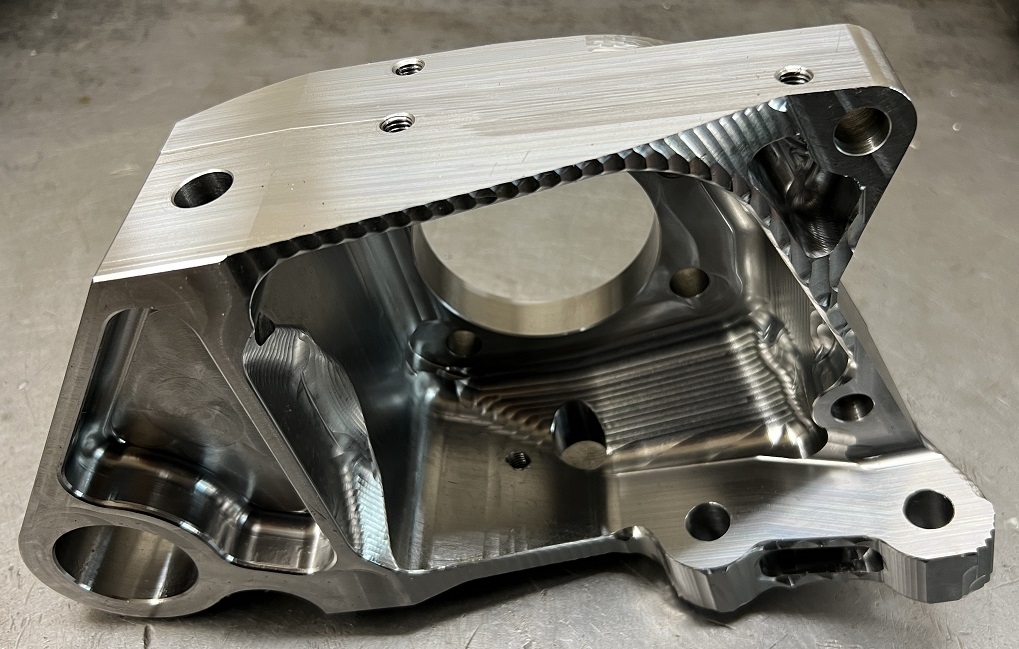
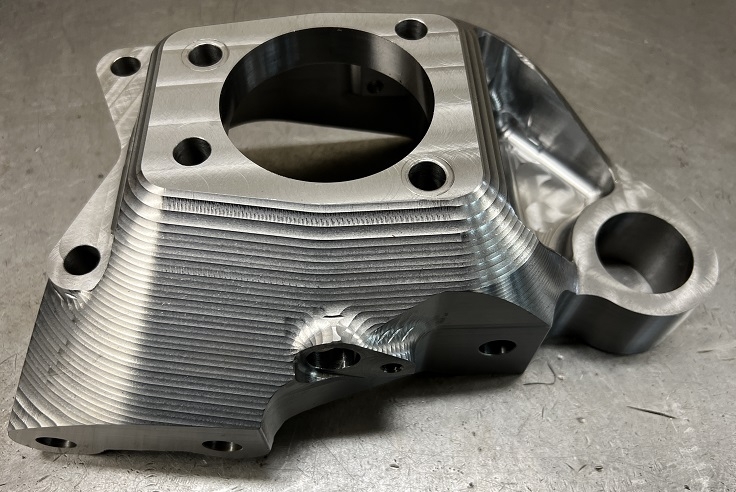
With caliper, wheel bearing, disc, and ABS sensor bolted on.
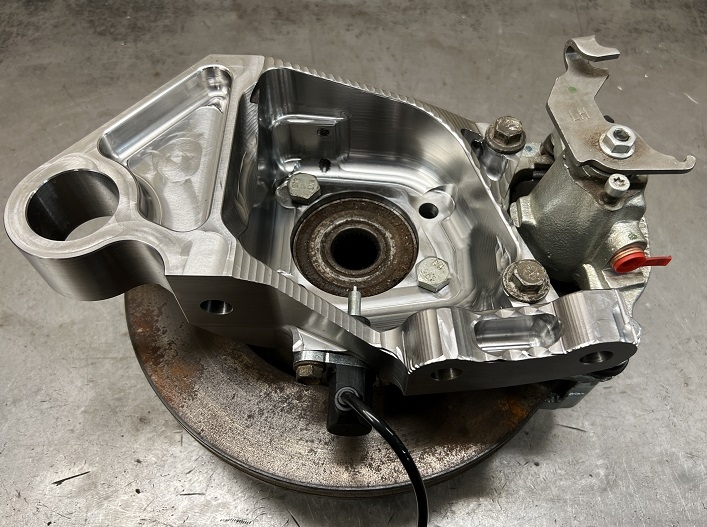
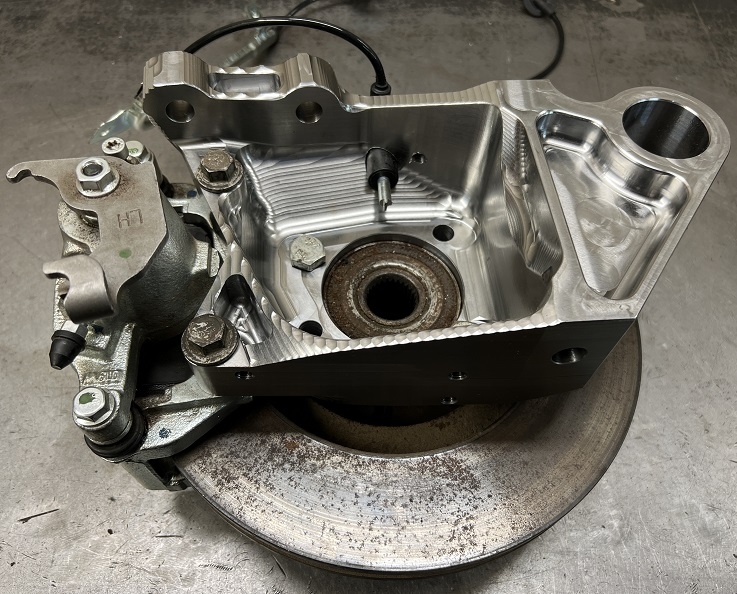
Edit: Just noticed I first started designing these almost two years ago now. We 3D printed the first prototypes over 20 months ago. Didn't realize they've been in the works that long. Thanks again to slammo for helping with a cleaner more compact design.
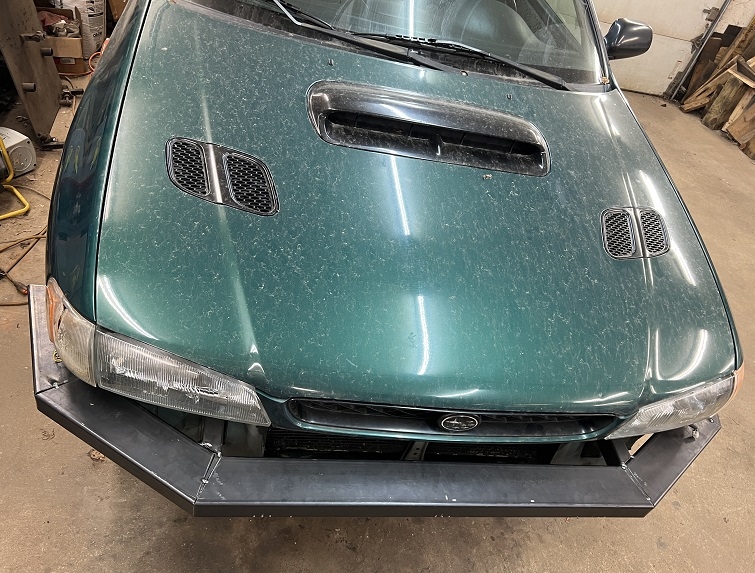
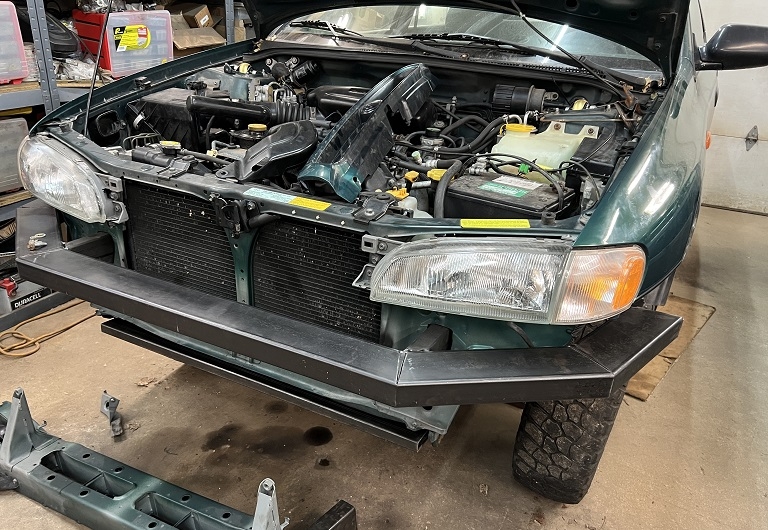
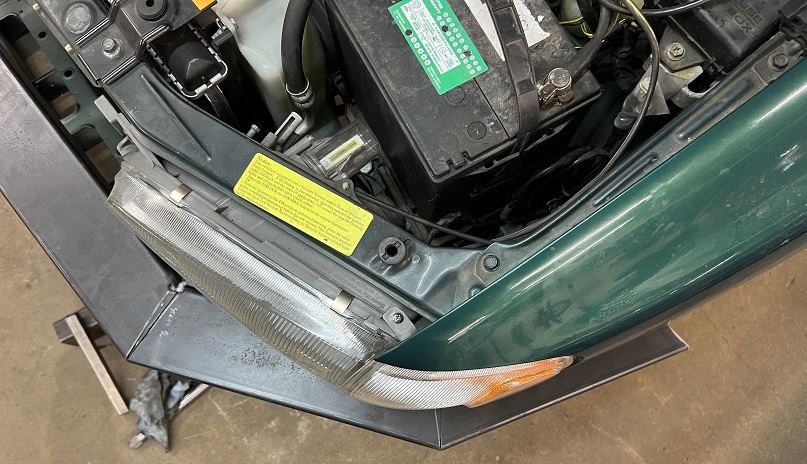
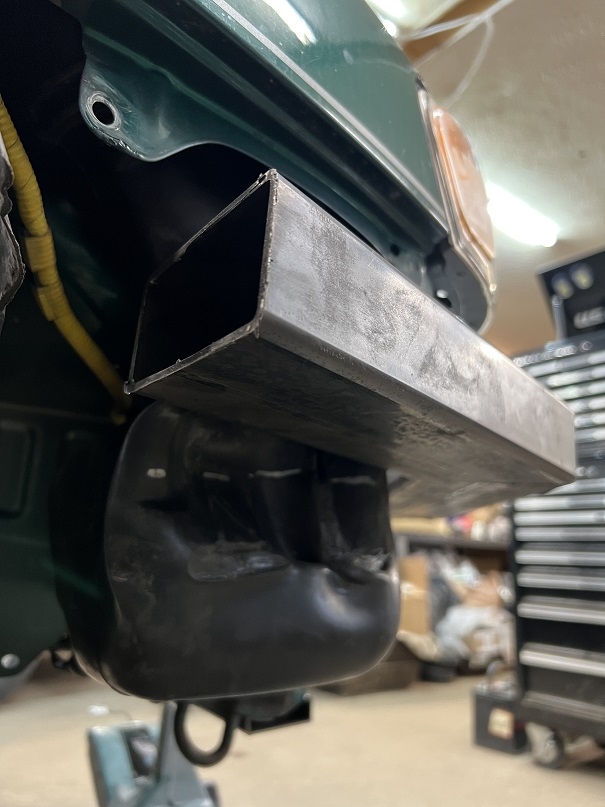
Some pictures of the bumper, most of the fitting is done now. Ran out of 1" square tubing so we stopped here. Got the tow bar mounts done, barely visible under the main beam. Ran some tubes from the radiator support back to the swaybar mounts, barely visible. Ordered some 1.25" receiver tubing but they sent 2". Even says 1.25" on the shrink wrap but it's definitely not. So we'll still have to add those, planning on having one in the center and one on each side like we did the white Outback. Waiting until we get the EZ36 in to make the engine skid.
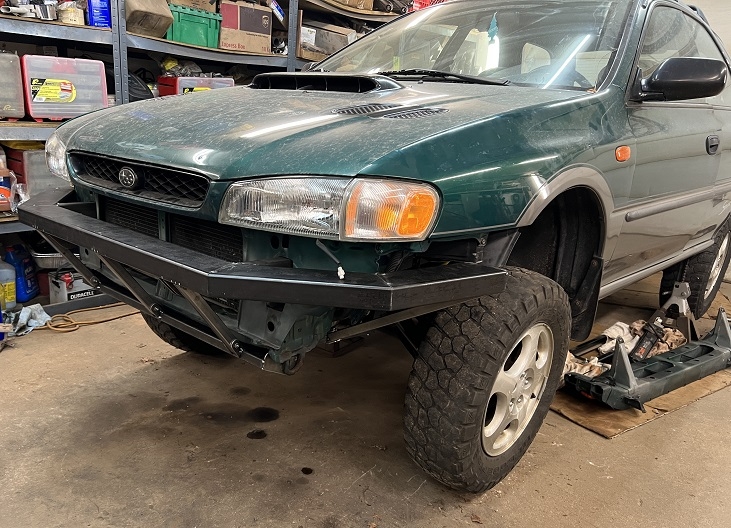
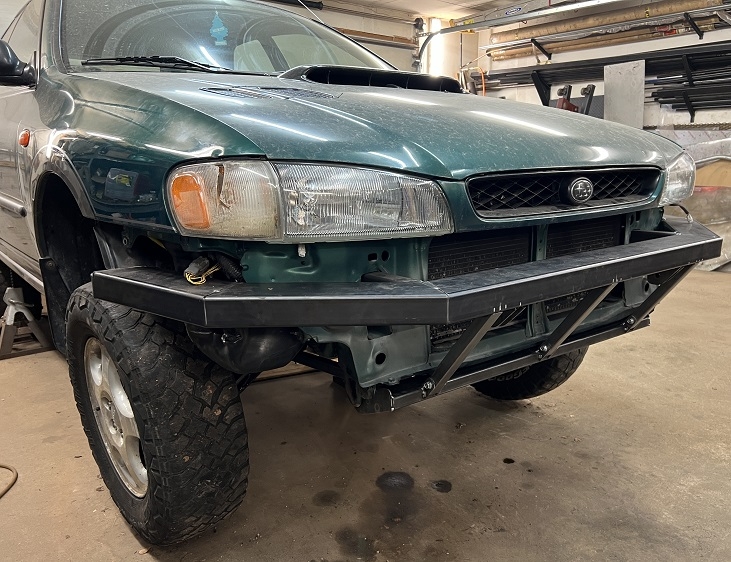
Might be getting engine, driveshaft, and diff this week. Might order a Haltech today.
-
 1
1
-
-
On 12/8/2022 at 12:10 PM, slammo said:
Just my opinion, I think you should do the 6MT/R180 swap first and drive the car with the 2.2 and low range for a while before tearing it apart for the 3.6.
Can you share a pic of the new bumper with the hood down and the grille in place?
That might make sense but I when has that ever guided my decisions? I really want to get started on the 3.6 swap. Should be picking one up next week, figure it makes sense to just swap the whole engine and trans together. Speaking of which, gotta get a flywheel and clutch, any advice on those? Figuring stockish STI would be best.
For that matter, anyone happen to know if Forester pedals will work? Figure I'll get STI master, hose, and slave.
Will try to remember to get a bumper pic for you, will probably be fabbing on that more tomorrow.
On 12/8/2022 at 6:49 PM, el_freddo said:We don’t get vents or scoops on NA models over here so I don’t know if they’re plugged or have air ducting under them.
Vents would probably help dispel some heat as they would help with creating a Venturi effect at speed which would help with creating the low pressure zone you want in the engine bay to draw air through the radiator. Plugging the scoop would help too I reckon if it’s not ducted already.Cheers
Bennie
The vents and scoop have solid sheet metal bolted under them, I don't think they flow any air stock.
11 hours ago, Numbchux said:I don't think that style vent would offer much in the way of cooling. Maybe at slow speed....but that's probably it.
There are many factory and aftermarket options that fit there that are more shaped to help create some negative pressure above the vent while moving that would likely have a bigger effect.
Then again, reversing the scoop would likely have a much bigger effect, if you don't have a TMIC or intake right below it.
Any vent options in particular you'd recommend?
I don't expect to have any cooling problems but might experiment with unblocking the vents and/or scoop at some point.
Finally took the diff stubs to heat treat. Made some for R160 and some for R180 for using the female front CV axles in the rear.
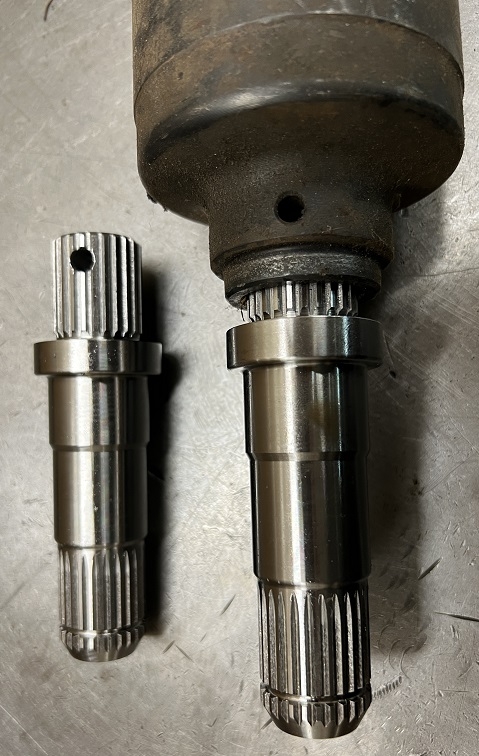
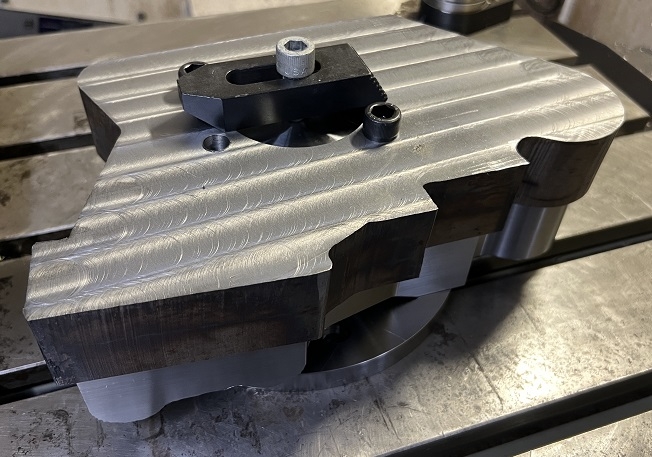
Figure you guys might want to see a little of how the sausage is made. Billet knuckle fixture.
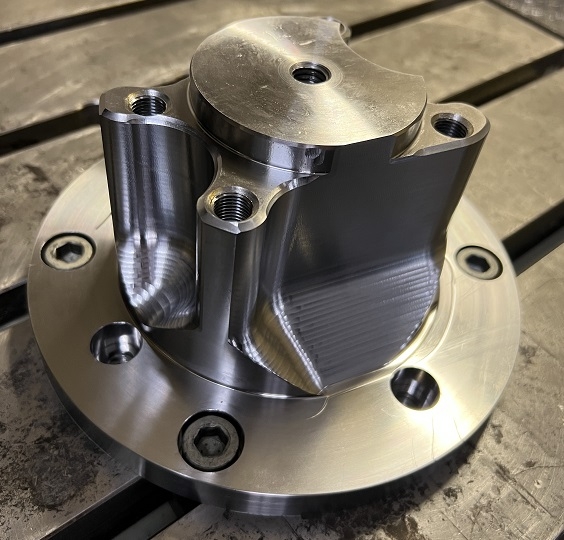
Ready for op4.
op4 finished
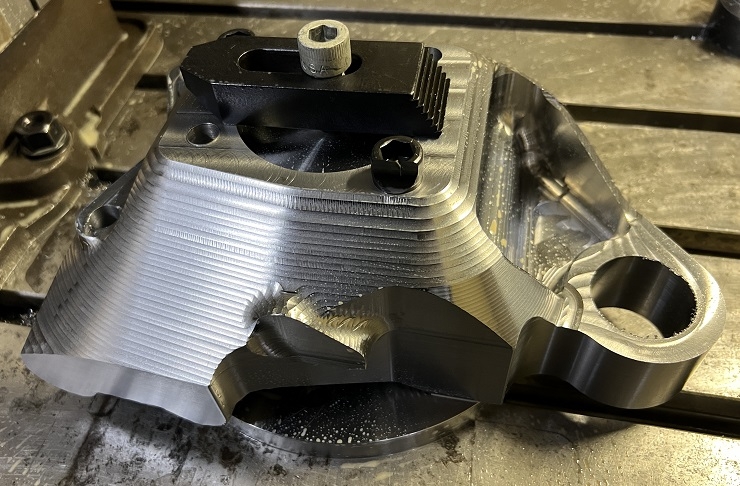
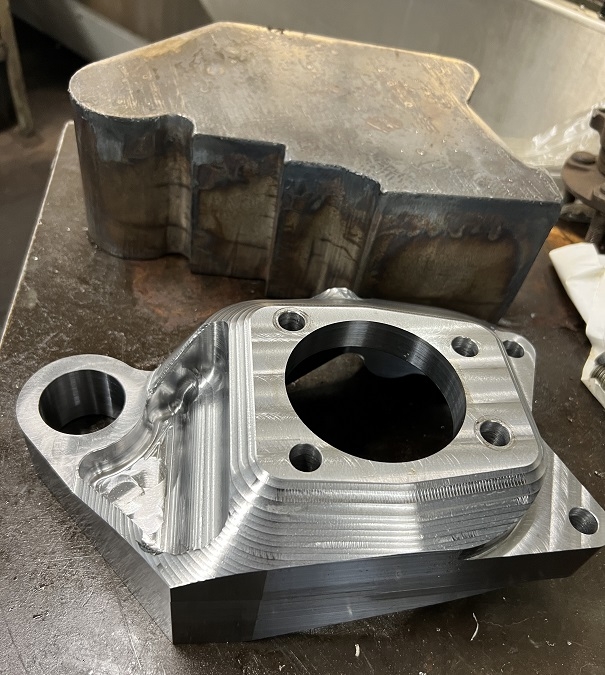
Made fixture to fit milling table and fourth axis.
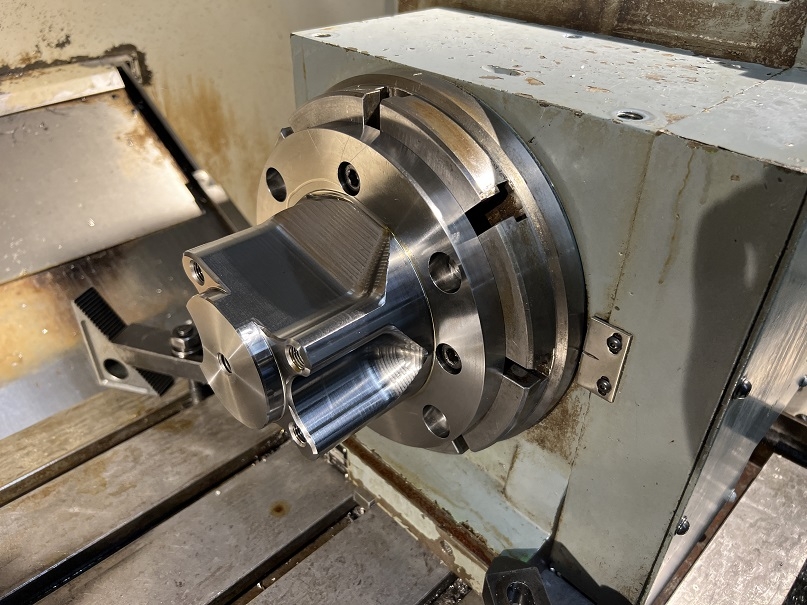
Got it all set up on the fourth axis to do the side holes today but didn't quite get to making chips before I had to leave.
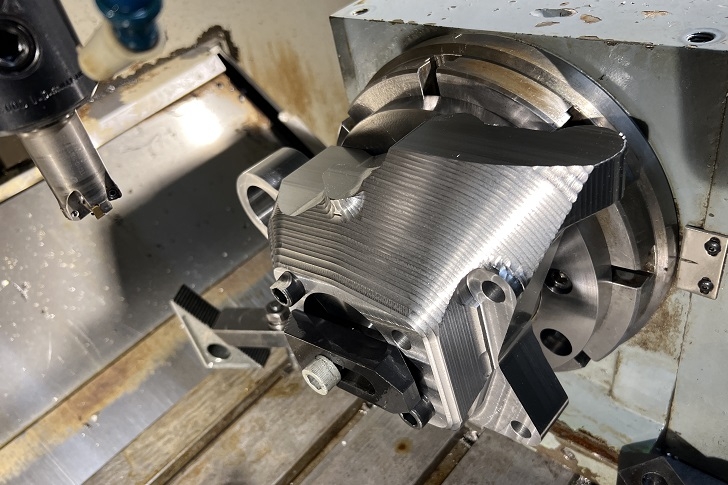
-
 1
1
-
-
6 hours ago, el_freddo said:
Definitely leave the black or colour code it to the body colour for the vents and bonnet scoop!
Painting them gold will, as @slammo said, look tacky! Steer clear of that at all cost!
I love the fuel tank guard. I can’t see any other mount points other than those two forward bolts. It would also be a good way to help stabilise the rear subframe too.
Keep up the good work and the pics

Cheers
Bennie
Not sure if you saw but the guards are also bolted into the diff mount, so four bolts for each one.
I really was planning on getting the vents and scoop painted goldish with the bumper but you guys have convinced me that would look tacky. So I'll eventually paint them green but that's super low on the list. On that topic, does anyone remove the sheet metal under the vents and does it help at all with cooling?
Made some more progress on the knuckle, should have that one done next week.
Have an engine, headers, and driveshaft on order, have a line on a rear diff, will probably order an ECU soon. Local buddy has a good stock radiator and fans(which I probably can't fit) out of a 2002 H6 Outback I plan on using, at least to get started.
-
On 12/2/2022 at 1:27 PM, slammo said:
Did you do anything with the pitch stop mount for the subframe drop?
We were able to pry it enough to get it bolted back in. Maybe not the long term solution but seemed to work.
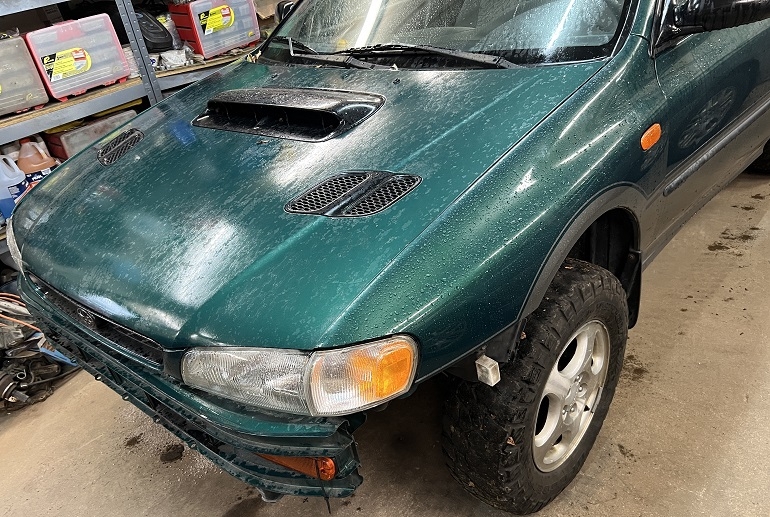
Dumb question but might as well throw it out there. Hood vents and scoop are black which I don't like. Seems like most of these have body color (green) scoop and vents. Leaning towards getting bumper professionally painted gold/champagne (whatever the bottom part of the body is). Based on the other parts we've gotten painted by them it should hold up pretty well so I'm not too worried about touch up. Also leaning towards getting vents and scoop and skids all painted that color while they're at it. Figure worst case on the vents and scoop I can get a can of spray paint to match the body and paint them later if I don't like the gold. Thoughts?
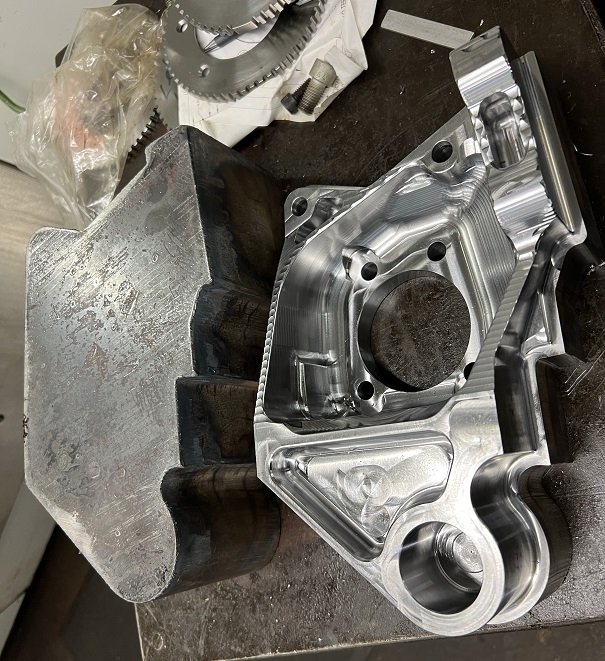
Billet rear knuckle so far next to blank. Been working on the programs and fixturing, will probably make more progress this week.
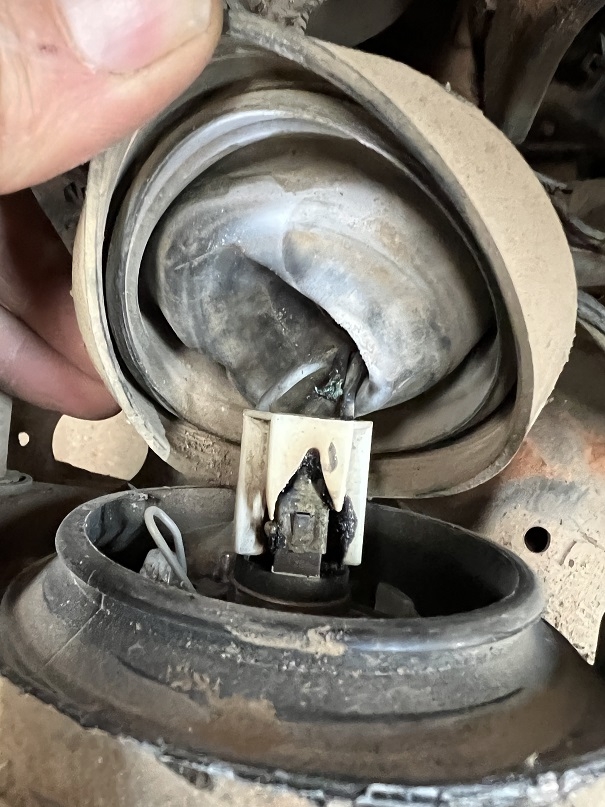
Think I figured out why the passenger headlight wasn't working in the black Outback.
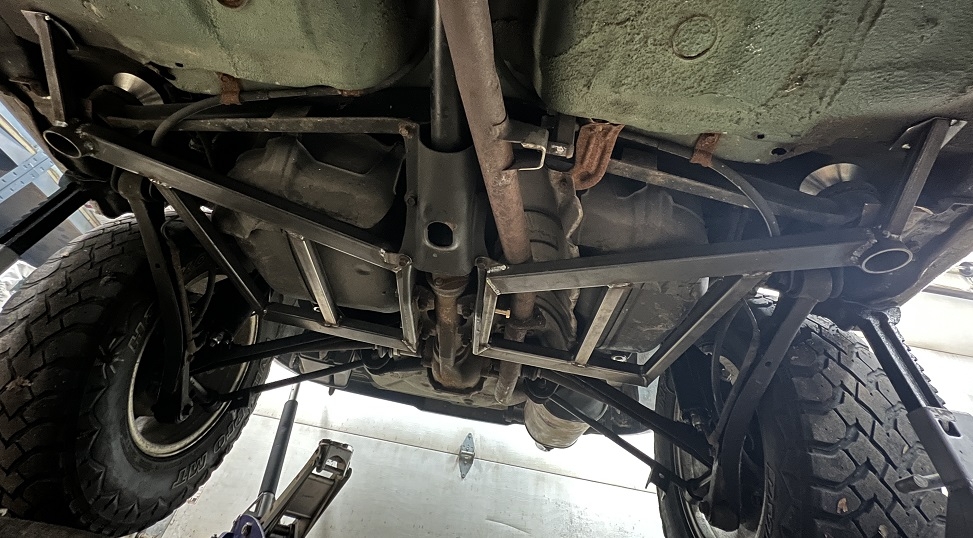
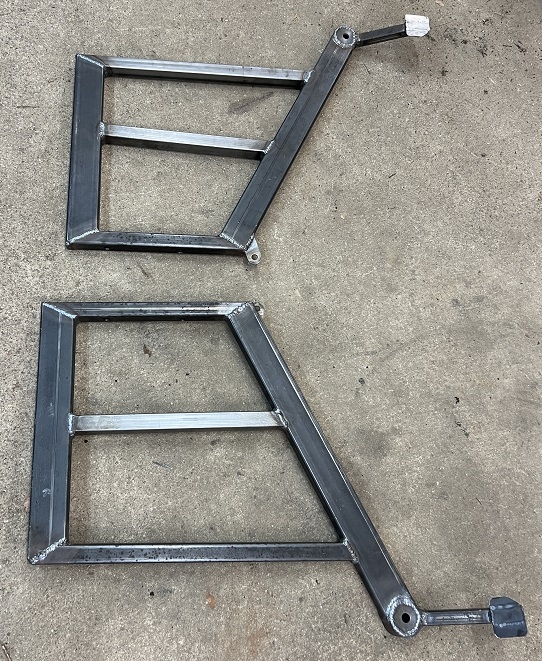
Built some gas tank guards. Jacked up back corners a bit to get them up against the gas tank and mostly welded them in place, didn't really spring back afterwards.
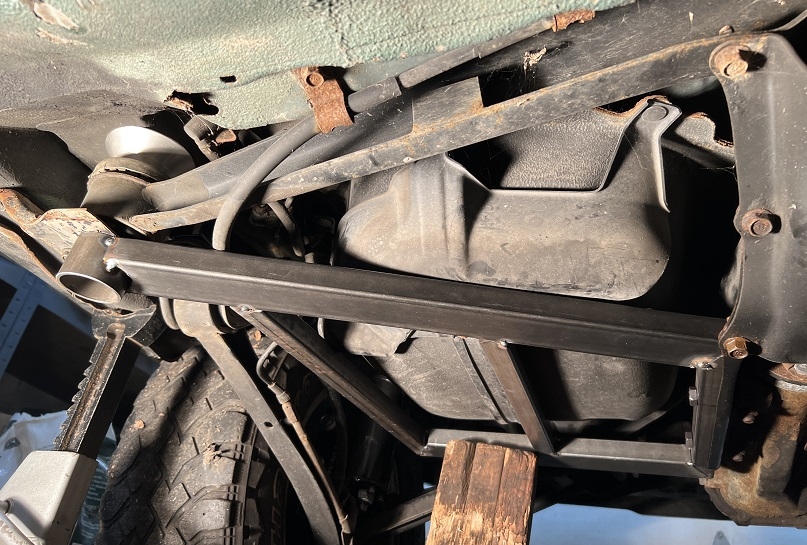
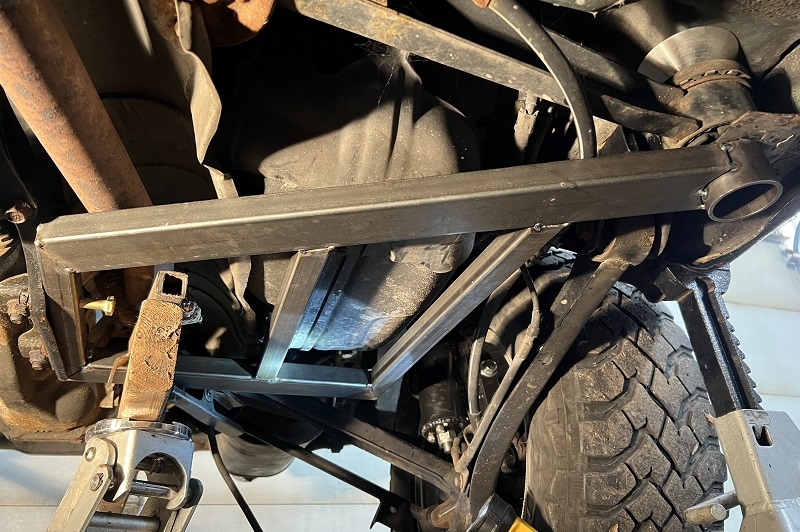
Small square tubes going forward just have little sheet metal feet that rest on the floor. That part of the floor is recessed so they probably won't get directly hit, should provide a little ramp for the front of the subframe. I think these are slightly more heavy duty than the other ones we've built. Also did cut down those round tubes at the front subframe mounts.
Got the main part of the front bumper tacked up.
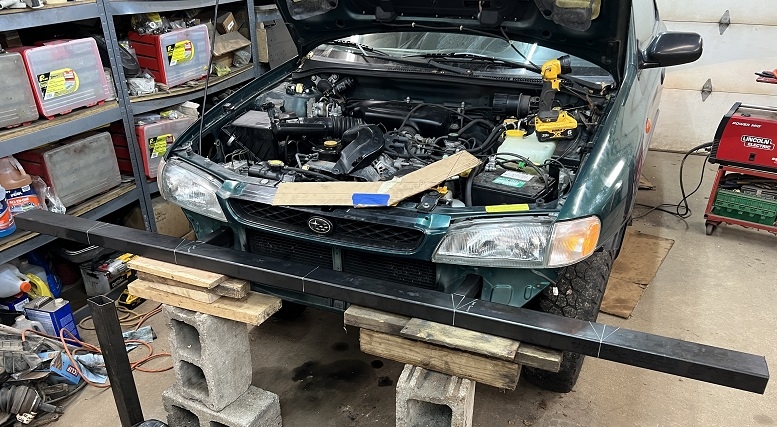

Need to get some receiver tubing and tie it into the radiator support (tube under that just bolted in with a couple 8mm bolts for now). Bumper sticks a little farther forward than I'd really like but I wanted to make sure to leave plenty of room for pusher fans, even a little room to shift condenser and radiator forward a bit if we have to. Could barely fit fans behind the front bumper of the black Outback when we added them. Bumper should also be low enough to fit some little light bars under the headlights, might just take the ones off the black Outback and put them on this.
Smashed the airbox with the press and a propane torch. Looks pretty rough but should still flow air the same. Will almost certainly go when we put the H6 in anyhow.
Maybe this week I'll get an engine, diff, driveshaft, radiator, etc etc etc etc.
-
 1
1
-
-
On 11/23/2022 at 7:47 PM, slammo said:
🅱️illet knuckles looking great 👌
My understanding FWIW, some of the appeal of the all-aluminum radiators is that the plastic end tanks on oem-type radiators can be prone to cracking.
Where'd you find the Golpher for $300? I saw it on Aliexpress but with $150 shipping, and it looked out of stock on eBay but maybe I just didn't find the same listing.
On 11/24/2022 at 1:51 AM, el_freddo said:The OEM plastic end tanks only crack due to age or when in a crash that’s significant enough to do the damage, at which point many radiators would do the same thing anyway.
Cool pics! Can’t wait to see the end product. How many hours in machining there already?
Cheers
Bennie
Agree with Bennie, can't remember us having issues with any of the plastic end tanks on the various 20 year old radiators we've been using.
Yeah I guess you're right, forgot about $200 and one month shipping on the Golpher.
It's going to be a while until we see the end product on the knuckles. Maybe one hour of actual spindle on milling time into it so far. At least a solid day of set up and test cuts before that. At least a day of various CAM before that. Still think it's a better overall solution than making a bunch of pieces and fabricating them. Assuming it works out.
-
 1
1
-
-
19 hours ago, el_freddo said:
You’re a tease Todd!

The twin radiator outlets can be sorted with a pipe that adapts two outlets into one to the factory radiator. My mate had his H6 Gen2 converted Liberty setup like this. He only had one puller fan on the RHS that did the job well, even when working hard in summer and sand.
I can’t remember if he had the 3L or the 3.6L though as I’m sure that would make a difference somehow…
Cheers
Bennie
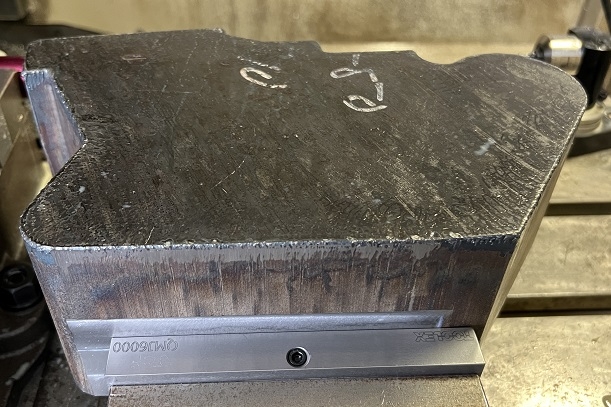
Not trying to be a tease, just need a longer rougher before I can proceed. A few more pics though, starting with flame cut blank (4.08" thick, ~104mm).
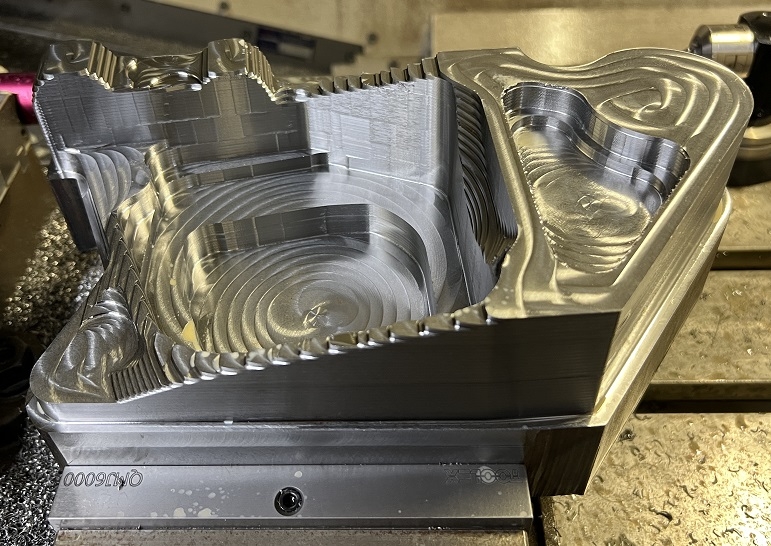
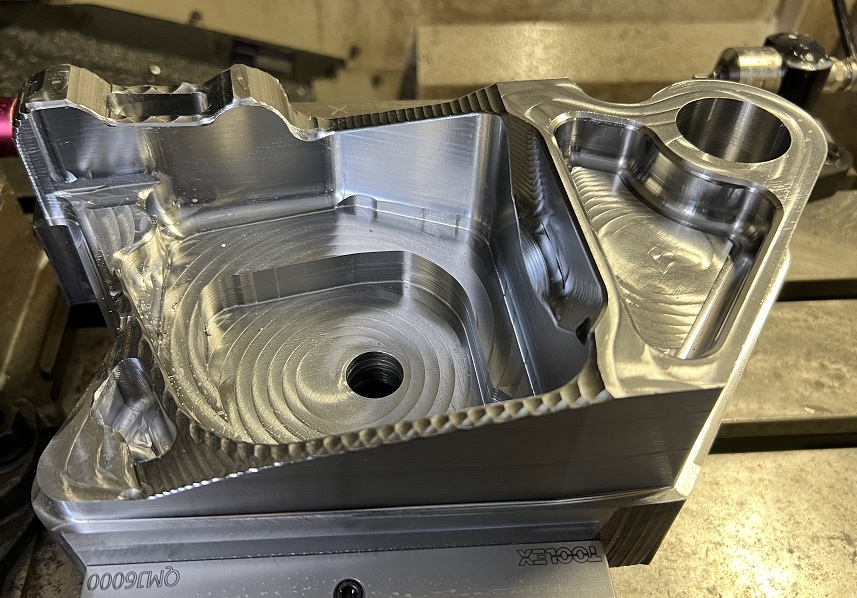
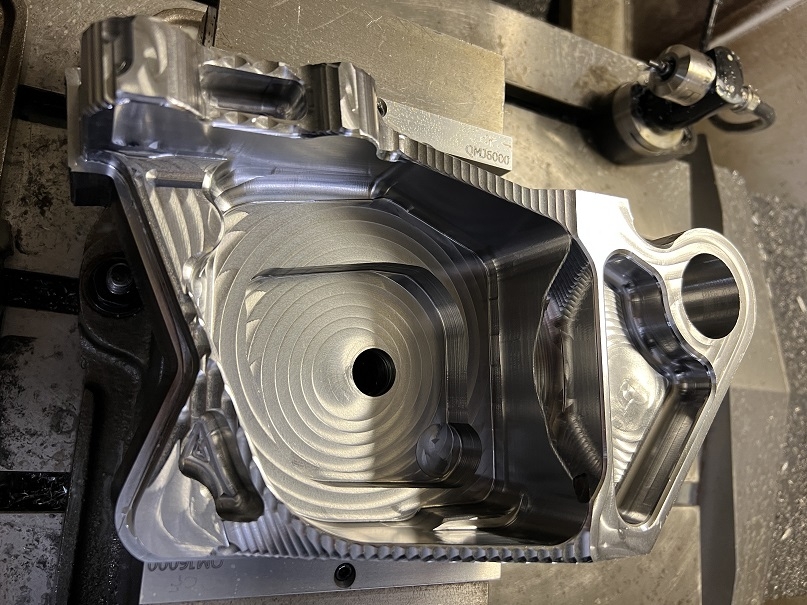
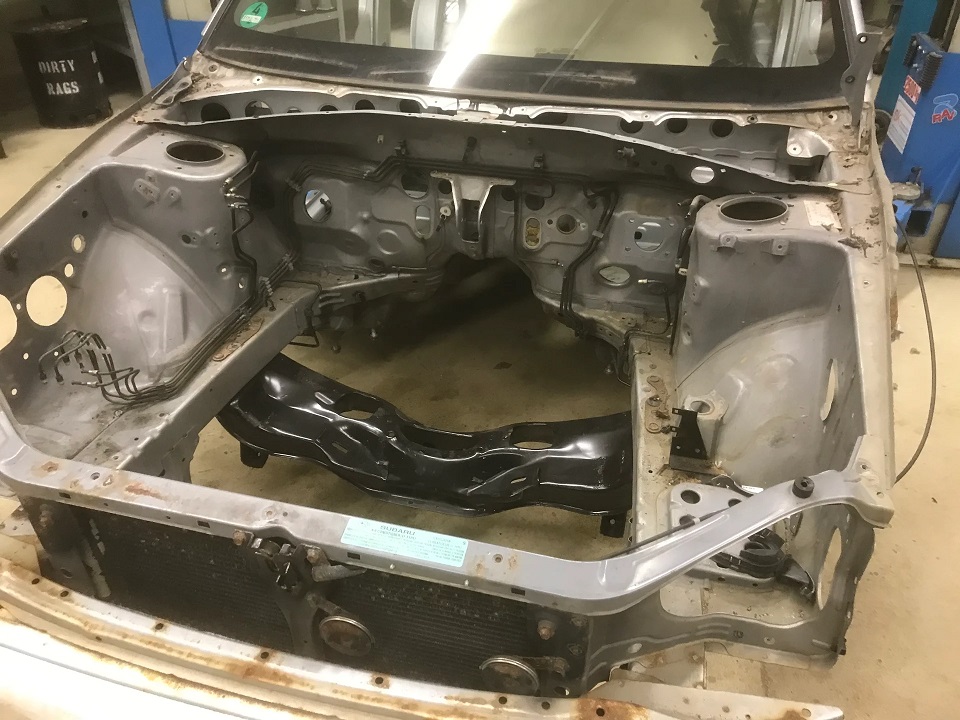
Made a Y fitting for my black Outback to use a single inlet radiator. Works fine but kinda trying to avoid that, nice having off the shelf parts and the stock H6 radiator hoses are less at risk of rubbing on a belt or pulley.
18 hours ago, slammo said:Sounds like these guys have developed and maybe produced some; kinda pricey though.
Thanks, added that to my list. For comparison, those are $520. There is a "Golpher" radiator which I've read a few good things about for $300. But I'm still leaning towards a stock EZ30"D" radiator, $230 from the dealer, 25mm thick core. Haven't had any overheating issues in my white OB with that radiator. Aside from the aftermarket one the tubes ballooned out on.
-
-
7 hours ago, slammo said:
Looking great man, can't wait to see this thing yeet.
Have you considered something like the holley hydramat for the fuel pickup? Would drastically increase the filter surface area and is supposed to help get every last drop out of the tank when it's close to empty. I understand they are kinda pricey though.
Front subframe makes sense to be solid mounted because it has to carry the engine and provide strength between the frame rails in the engine compartment, since there's a big hole where the engine goes. Soft mounting the whole front subframe would mean those bushings would react loads from the steering rack, engine, and control arms all at once - not great for steering compliance, chassis feel, drivetrain alignment, etc. Solid mounting the front subframe lets the steering rack, control arms, and engine each be mounted with their own bushings that can be tuned for each component.
Rear, the chassis is more whole above the rear subframe so there's less need for added strength/stiffness. The engineers would want some cushion/compliance for lateral loads for ride comfort, but they would want to prevent toe compliance so your rear wheels don't steer all over the place. If they had solid mounted the rear subframe and used softer bushings for the lateral links, then compliance in the lateral link bushings would cause the rear toe to vary with lateral load. Using stiffer bushings for the lateral links and (relatively) softer bushings for the subframe lets the system be comfortable but still keep toe in check since the subframe bushings can react moments across a wider distance.
Rear subframe mount, my concern is that the bolts without bushings will induce more stress in the chassis at those points. If you have two solid mounts and four rubber mounts, the solid mounts will be doing almost all of the work. The rubber grommets sandwiching the subframe might help but probably won't do much for the lateral loads which would be the most impactful. IMO your best move would be to add an OEM-style rubber bushing to those middle bolts, but if you don't want to go through that trouble I'd say get rid of the rest of the rubber subframe bushings and hard mount the whole thing. That way lateral force can be shared by all six bolts instead of just two. I don't think any decrease in ride quality is much of a concern in this context haha, and it might make it easier to mount the gas tank skid plate.
Yes I considered the hydramat. Not much concern with having an uninterrupted fuel supply since it has a one gallon surge tank. Yes it'd probably take longer to clog up, probably long enough I'd never have to touch it again, but they're expensive, like $200+. Talked to a couple off road racers who say they just don't use a pickup sock and run an external filter, so that's my current plan.
I understand all that with the subframes and bushings. Going to stick with the rubber grommets on those added bolts. IIRC the holes for them in the subframe are quite a bit bigger than the bolts so they're not doing much lateral location except maybe from friction. That part of the subframe they clamp isn't super rigid so I don't think it will cause a lot of stress. The subframe bushings are very stiff too. Overall just not worried about it.
Gotta do more research on my own but could use some advice on the EZ36 swap.
Radiator - Leaning towards an early EZ30 radiator (they're thicker than the EZ30"R" and EZ36 IIRC). Need to check height. Considering some other aftermarket radiators, including for non Subarus, looks like there are a few with ~2" thick cores but they basically all have just one inlet. Worked around that on the black Outback but not really ideal. Also thought about using something shorter so I can raise the radiator support but I don't think I'm willing to go that far right now.
Fans - Assuming I'll need to use pusher fans again, will probably just see if I can fit a pair of these, they're noisy but work well:
https://www.summitracing.com/parts/spu-ix-30102045/overview
ECU - Leaning towards Haltech especially since they say they have a base map for the EZ36. Will have to figure out the best solutions for AC and cruise control to work with that. Assuming the EZ36 being drive by wire normally just has cruise built in to the ECU and just have to wire the switches to it. Would be nice if the AC wasn't just hotwired and frosted up like my black Outback.
Exhaust - Assuming the engine won't come with full manifolds/headers I plan on buying Raptor headers, they're the only kind I've found much info on. They supposedly sell "Impreza swap" headers but I didn't see them on their site. Some heavy wall tube to the back and then probably a stock EZ36 muffler if I can fit it. Open to suggestion here but want it as quiet as possible.
Might use stock airbox/filter or might put a GM Vortec centrifugal style filter like I have in the black Outback, seems to work well.
Need an earlier EZ36 so the power steering pump bolts on right?
Assuming I can make the AC, fuel, and coolant lines work. Returnless fuel pump for the EZ36?
Aside from that, need to get an STI driveshaft and R180 and put a low range in my other 6MT. Very tempted to maintain the front CV height at the trans but tip the back end of the trans down to get the front of the engine up for better approach angle. Will hopefully start on the billet rear knuckles this week. Need to fab a bumper and skids too.
-
 1
1
-





long travel Outbacks or making Subarus faster and more reliable offroad
in Off Road
Posted