nvu
Members-
Posts
352 -
Joined
-
Last visited
-
Days Won
13
Content Type
Profiles
Forums
Gallery
Store
Everything posted by nvu
-
1995 subaru legacy found something that doesn't look factory need help identifying
nvu replied to gros ventre's topic in Shop Talk
I only see one wire tapped from the main harness. can you trace blue/pink wire and see if it runs into the ignition switch? guessing it's a breathalyzer module that needs breathing into to start the car. -
As long as it doesn't leak it's fine. They are tapered threads so likely the new one has more meat on it and sits higher. Is the 2010 an EJ engine? If so don't worry about cracking the block. The oil galley has a nut with a tapered hole for the sensor. Worst case you only need to replace that nut if the sensor threads get ruined. Random picture, but you see the nut where the pressure switch goes on to.
-
Just occurred to me there's an intake air temp sensor on the maf. The codes are pointing at the maf, did they clear after you plugged it abck in and reset the ecu? On my 2003 impreza, I've had the maf heater wire cook itself brittle before. Cut open the wiring loom and see if any individual wires have discolored. With my case, the car never threw any codes, but the plastic tab was broken off for a while. Only found it after splicing in a new pigtail, the burnt area was about 6" before where there was a cable tie on the loom.
-
Does it start without the maf connected? Try disconnecting battery to clear all maf learning, unplug the maf and keep it disconnected, plug back in the battery and start it. At very least it should start the engine in failsafe limp mode. If it starts again, the problem is likely sensors. If it's not starting then, it's more basic mechanical: fuel, spark, timing...
-
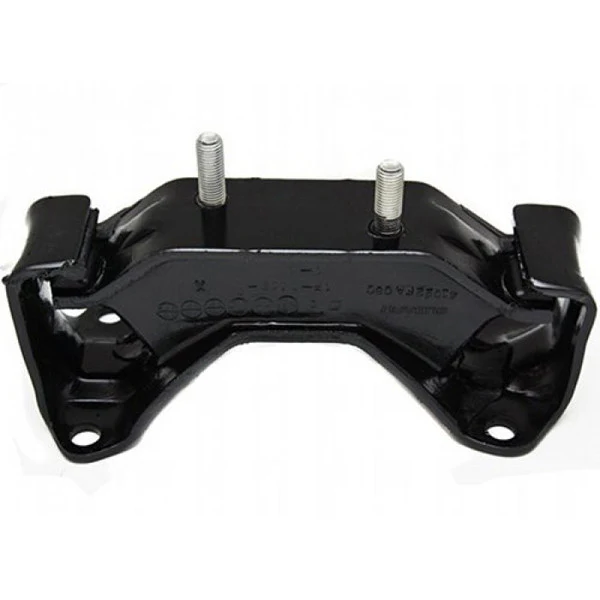
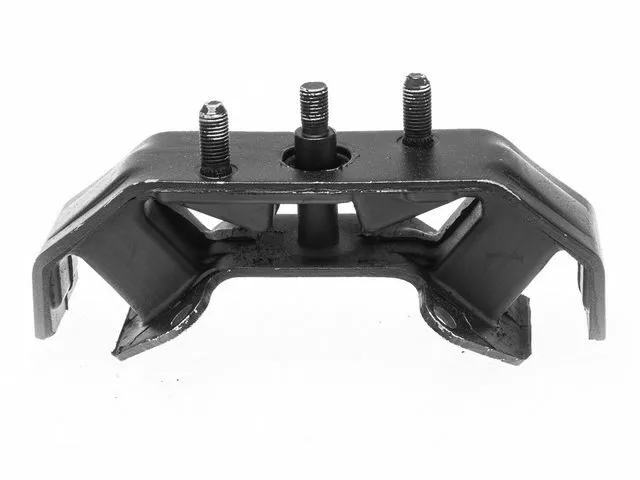
When the tail end of the transmission jumps up and down, it tilts the engine back and forth. If your rear transmission mount is the oem open style, change it to the solid group n style. If the prev owner already installed it, the pitch stop is sort of redundant. These are probably not the exact ones for your car, they're even different. but you get the idea, look at the rear trans mount and see if they're already solid.
-
Good point el_freddo, the results won't be accurate. My reasoning would be to rule out any seriously broken parts. With only the compression tester in one hole and the no spark plug in the others. The main idea is to verify each cylinder still has any compression. If one cylinder has bent valves or something broken, the starter wouldn't have much resistance and spin freely. If there's really a 0psi at this point, something is majorly bent, not tightened down, or broken.
-
Zero psi anywhere sounds bad. You need to test and make sure you have compression at all cyls. The belt has to come off again. Turn each camshaft by hand until they're unloaded so the valves are closed. With the spark plugs out, turn the crankshaft by hand to confirm it's not catching on anything. If all is well, test the compression without the timing belt installed and confirm you're getting pressure.
-
2003-07 impreza should be a safe bet, but other models are the same in the era should work too. It's been a while, I forgot which year compressor I swapped in to replace the 2002 impreza wrx. The electrical connector was different. My 03 had a 1 pin connector. It's 12v to activate the clutch. Cut the connector from the old clutch and put it on the newer unit. Been working fine since 2015
-
How was the state of old compressor, did it frag and sent metal down the line? If you still have it around, try dumping out all the old oil. If it's close to black, chances are it's been grinding away and the iron particles have oxidized. If there's moisture and gunk in the oil, it gets extremely thicker when it starts to freeze. It'll coat the walls of the evaporator and not transfer heat from the cabin. The refrigerant stays liquid until it reaches the outside line in the engine bay, then it can finally flash off and that's why frost builds up.
-
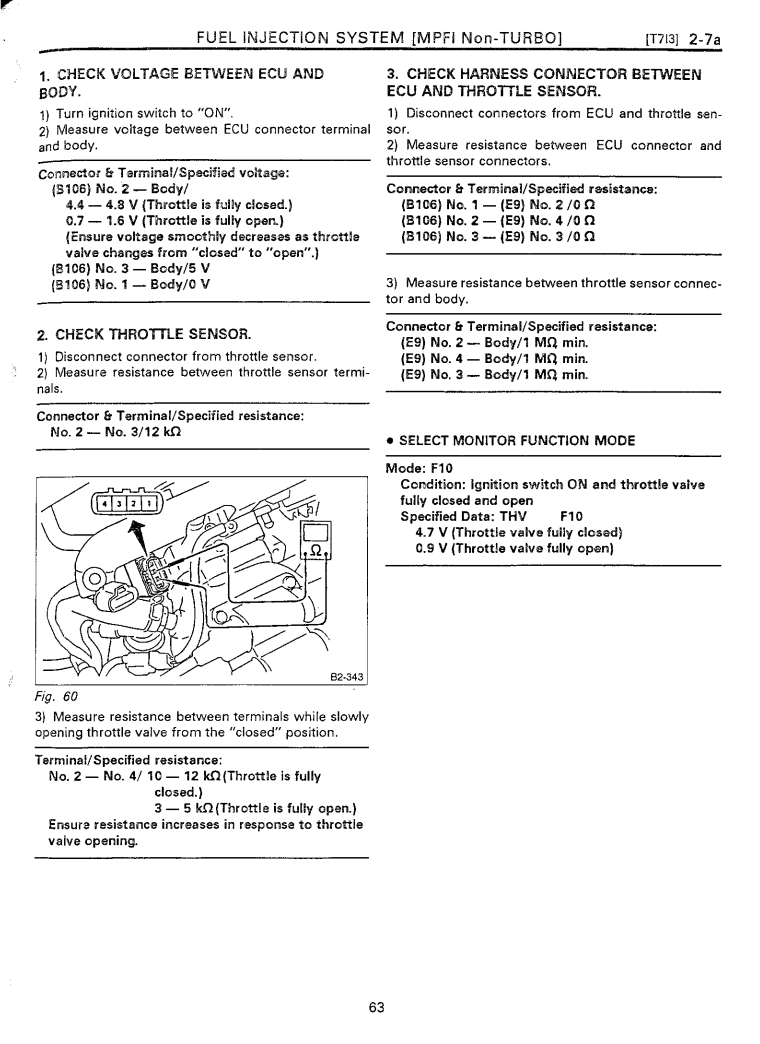
Looking at the TPS, I haven't seen those old square ones first hand, but it looks like you can take apart the cover on those? They are probably just potentiometers. if you can take apart the cover, spray on some electronics contact cleaner. It should work again at least until you can source a replacement.
-
Pressure bleeders are hit and miss as stated before. It's the newer style reservoirs with a foam float in them. They'll sometimes block the orifice and make things difficult. I've had the motive one before, More hassle than it's worth. Especially cleaning it out after storage. Any remaining brake fluid you have will turn into brown gunk where black pump tube is, maybe it's the rubber bits. I've had good results with a hand pump vacuum. To get a good vacuum seal over the threads, I use thick grease and build a cone around the entire fitting. Since mine is hand operated, I'd pump until there's enough vacuum, open and shut the valve, pump again. The trick is to work the grease into the threads by getting a high vacuum with the bleeder closed, open slightly and close in small increments. Once you're sure the grease has worked in, open just enough to get the fluid flowing while having moderate vacuum. I just buy a big bottle of brake fluid, and slap it on top of the reservoir like a water jug. It was a mityvac kit from 2000's, dunno if they're as good nowadays.
-
Overheating on idle sounds bad. Get one of those radiator fill kits where you hook a bucket to the top of your radiator cap. With the bucket filled, massage the upper radiator hose to get rid of bubbles. Let the car warm up and spit out the remaining air bubbles. It should be running fully warmed, with radiator fans cycling on and no bubbles. You can force the car into limp mode to get a stable idle if needed. With engine off, key out, unplug the maf. Start the car, it'll be in open loop and it won't rely on any o2 sensors to idle. The idle should be stable as the ecu injects the default fuel amount. If idle is still bad, it's something more basic, fuel, spark, compression. You won't be able to drive in limp mode, it'll be rev limited and probably beep a lot. To reset the ecu back to normal, unhook the battery, hold the brakes for a while. Hook back the maf and start the car.
-
It sounds like your threads are gone, can you try threading in the bolt without the crank pulley to see if you can find some good threads left? If so, you can get a longer crank bolt to grab those threads with the pulley on. You really want to be able to torque it down to full specs. It's the force of the bolt clamping the pulley down that transfers power. The key alone wasn't designed to bear the torque of both cams, crank pulley, and all the accessories. They key is mainly for alignment of that sprocket, the crank pulley isn't as critical. It looks like the sprocket is still aligned even if the key looks dinged up. If you can find some good threads further down, then just leaving the timing as is and using a longer bolt should be adequate. File the key to get the new crank on flush, it doesn't need to be perfectly aligned.
-
Yes, the timing belt needs to come off to replace the woodruff key. It's a half moon shape and can't slide out without removing the sprocket completely. You need to address why the bolt doesn't fully tighten first though. If it can't get to at least 90ft-lbs, the key will fail and take along whatever parts associated. It could be bad luck that the previous owner didn't tighten the crank bolt enough, but it also could be stripped threads in the crank since you noted the bolt isn't getting tighter.


