nvu
Members-
Posts
383 -
Joined
-
Last visited
-
Days Won
15
Content Type
Profiles
Forums
Gallery
Store
Everything posted by nvu
-
Looking at the TPS, I haven't seen those old square ones first hand, but it looks like you can take apart the cover on those? They are probably just potentiometers. if you can take apart the cover, spray on some electronics contact cleaner. It should work again at least until you can source a replacement.
-
Pressure bleeders are hit and miss as stated before. It's the newer style reservoirs with a foam float in them. They'll sometimes block the orifice and make things difficult. I've had the motive one before, More hassle than it's worth. Especially cleaning it out after storage. Any remaining brake fluid you have will turn into brown gunk where black pump tube is, maybe it's the rubber bits. I've had good results with a hand pump vacuum. To get a good vacuum seal over the threads, I use thick grease and build a cone around the entire fitting. Since mine is hand operated, I'd pump until there's enough vacuum, open and shut the valve, pump again. The trick is to work the grease into the threads by getting a high vacuum with the bleeder closed, open slightly and close in small increments. Once you're sure the grease has worked in, open just enough to get the fluid flowing while having moderate vacuum. I just buy a big bottle of brake fluid, and slap it on top of the reservoir like a water jug. It was a mityvac kit from 2000's, dunno if they're as good nowadays.
-
Overheating on idle sounds bad. Get one of those radiator fill kits where you hook a bucket to the top of your radiator cap. With the bucket filled, massage the upper radiator hose to get rid of bubbles. Let the car warm up and spit out the remaining air bubbles. It should be running fully warmed, with radiator fans cycling on and no bubbles. You can force the car into limp mode to get a stable idle if needed. With engine off, key out, unplug the maf. Start the car, it'll be in open loop and it won't rely on any o2 sensors to idle. The idle should be stable as the ecu injects the default fuel amount. If idle is still bad, it's something more basic, fuel, spark, compression. You won't be able to drive in limp mode, it'll be rev limited and probably beep a lot. To reset the ecu back to normal, unhook the battery, hold the brakes for a while. Hook back the maf and start the car.
-
It sounds like your threads are gone, can you try threading in the bolt without the crank pulley to see if you can find some good threads left? If so, you can get a longer crank bolt to grab those threads with the pulley on. You really want to be able to torque it down to full specs. It's the force of the bolt clamping the pulley down that transfers power. The key alone wasn't designed to bear the torque of both cams, crank pulley, and all the accessories. They key is mainly for alignment of that sprocket, the crank pulley isn't as critical. It looks like the sprocket is still aligned even if the key looks dinged up. If you can find some good threads further down, then just leaving the timing as is and using a longer bolt should be adequate. File the key to get the new crank on flush, it doesn't need to be perfectly aligned.
-
Yes, the timing belt needs to come off to replace the woodruff key. It's a half moon shape and can't slide out without removing the sprocket completely. You need to address why the bolt doesn't fully tighten first though. If it can't get to at least 90ft-lbs, the key will fail and take along whatever parts associated. It could be bad luck that the previous owner didn't tighten the crank bolt enough, but it also could be stripped threads in the crank since you noted the bolt isn't getting tighter.
-
B is right. You could probably trace back where C7 leads to and run off that. It's probably a good idea to figure out what C7 is and measure the voltage. Come to think of it, I've not any experience with newer cars with led gauges. I've been used to the 12v bulbs and assume they'd all be 12v. C7 >> diode + >> diode - >> led + >> led - >> ECM Put a real diode in between to protect the ecu.
-
It's a coil spring on the base of the pedal. You can see it if you're on your back and shine a light up where the pedal pivot is. They never break. Actually while you're under there, check the entire brake/clutch bracket for any cracks from corrosion. It really sounds like something wrong with the hydraulics, to the point where it can't overcome the pedal assist spring.
-
The pedal is has a bistable helper spring mechanism. The first half of travel the spring wants to push it back up, when you pass halfway, the spring wants to pull the pedal down. Think of an old school light switch. Could you try pressing the clutch all the way down, then keeping it held down with a 2x4 or something. Check if the slave cyl is holding the fork down after an hour.
-
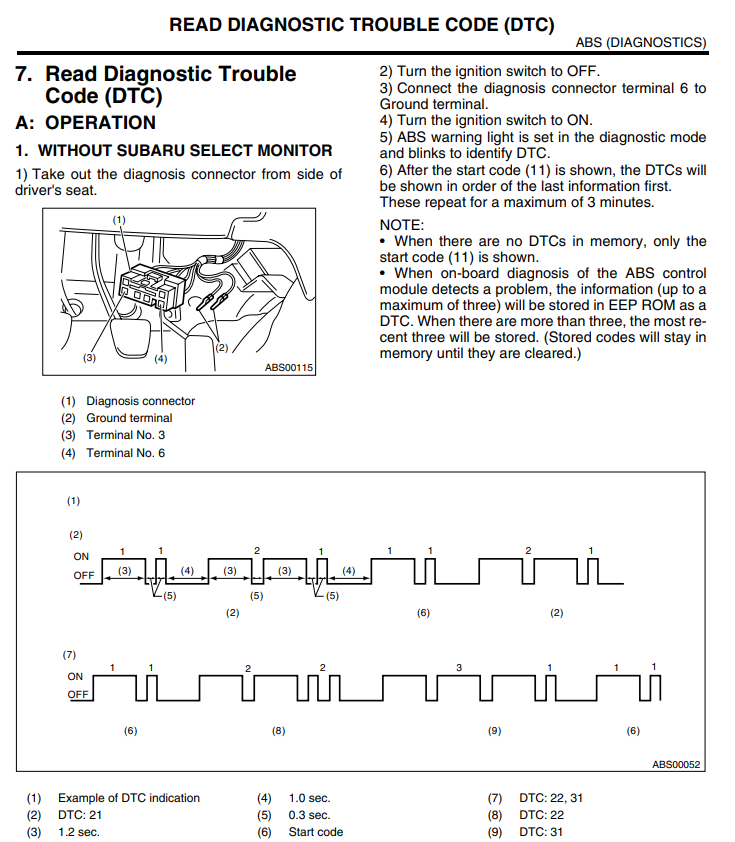
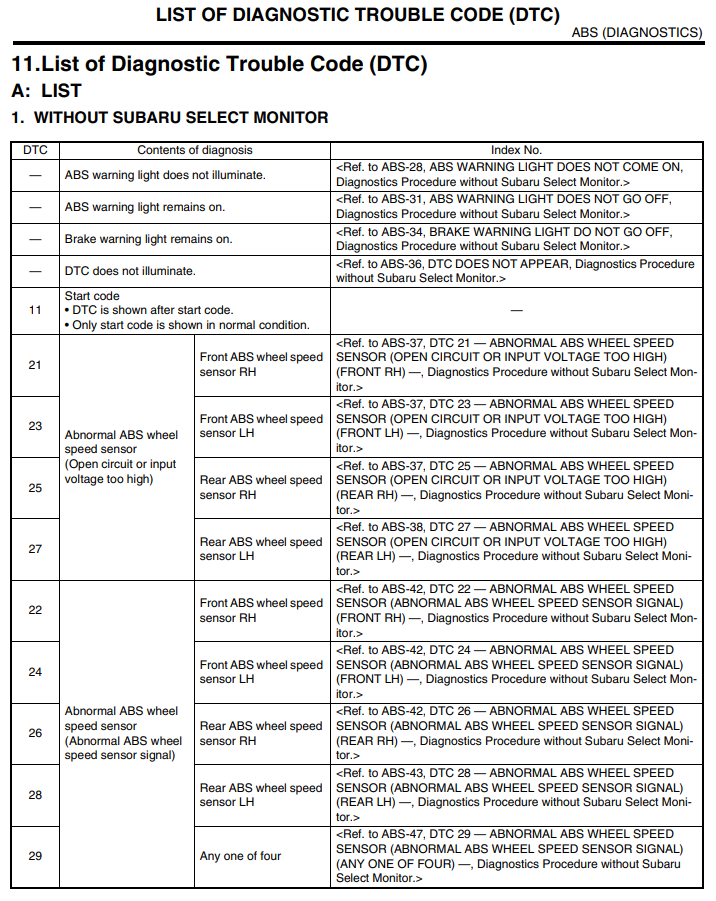
If you want to test the new fans, there's two green connectors under the driver side dash. When you connect them together, it throws the car into test mode. It cycles all the relays on and off. You should see the fans go from off, fast, slow. If you see only fast, it's probably a non-oem fan. Unplug the green connectors when you're done.
-
It sounds like the low temp sensor is triggering. Assuming the compressor is good and there's no blockage in your refrigerant system, next step is check if the evaporator coil clogged with debris. Maybe some leaves got in and is blocking airflow causing the thing to freeze over. If it's making cold air consistently at max fan speed, likely just debris causing the evap to freeze over..
-
Oh right, el freddo reminded me about the heater core circuit. When the thermostat is closed, a majority of the flow in the upper coolant tank gets pulled back thru the bottom tank port. It's taking whatever heat from the turbo and recirculating it through the engine. Pretty well thought out design. So that bottom port goes back directly to the waterpump suction side, or tee's into the heater core's suction side back to the water pump. It doesn't go to an output port from the head.
-
There's a line that goes out from the head and directly in the turbo. There are two coolant ports on the turbo, lower one is in, top one is out. The purple one shown is out from the turbo. If you push it hard enough, the turbo can get red hot. The tank is there to make sure the turbo is always covered in coolant even if the engine is off. It's also the at the highest point of the car, making it easier to purge air pockets. If you run your own tank, place it as higher than the turbo and make sure the line flows back into the turbo without any weird bends or loops that can trap air.
-
The yellow line is needed for constant flow from the upper tank to the radiator. The green line is just for moving coolant in and out of the reservoir tank. The yellow hose connects directly to the radiator. It allows the hot coolant to flow back into the radiator once the thermostat opens. The purple hose is heated coolant flowing out from the turbo. Also internally at the turbo tank, the yellow nipple extends to the bottom of that tank to prevent from pulling any bubbles. The green lines are for over pressure purging when the car coolant expands, and also sucking back coolant when the car cools. In normal operation it sees no flow. In that picture, the coolant caps are installed wrong. The tabbed cap should be up top, the circle one should be on the bottom. If you keep in mind, any coolant lines coming out from the heads is positive flow, air bubbles can collect at the highest point where they can be purged to the overflow. The tabbed cap opens first and is a 2way cap that also allows coolant to be sucked back in once the engine cools. The circle cap is higher pressured and is there as a fuse of sorts to prevent blowing out radiators should you get a bad headgasket blowing high pressures into the cooling system..


