

andrsn
-
Posts
139 -
Joined
-
Last visited
-
Days Won
1
Recent Profile Visitors
1933 profile views


andrsn's Achievements
USMB is life! (4/11)
20
Reputation
-
custom lift kit blueprints
andrsn replied to pnw91wagon's topic in Old Gen.: 80's GL/DL/XT/Loyales...
I did a write up of it as well, feel free to scope it out. It's pretty easy aside from the front strut blocks. I build a little jig for the front blocks, it just ensures for x" of lift you are offset x". https://www.ultimatesubaru.org/forum/topic/163207-83-brat-build-thread-with-questions/?do=findComment&comment=1365398 -
83 BRAT Build Thread with Questions
andrsn replied to andrsn's topic in Old Gen.: 80's GL/DL/XT/Loyales...
I was considering selling my project, I still am for the right price. I was driving around the other day and its inspired me to keep my dream alive and continue working on it. I just ordered what I hope are all the things I might need to get it on the road: -disc caliper rebuild kits -power steering pump rebuild kit and tie rods/ball joints -new O2 sensor Hopefully that'll address the brake pulling and steering shimmy issues. I'll also take it around the corner to have an alignment/balance done once I get steering stuff installed. I'm pretty busy trying to finish up a remodel in the basement of my house right now... hopefully I can get my permits completed soon and then dig into the BRAT. I also bought a 1958 Triumph motorcycle... so too many projects but driving this car around is toooo fun. -
Sorry to go off topic but do earlier ej22's (1991-obd1) have 1 o2 sensor or 2?
-
More rust repair 81 Brat
andrsn replied to TXJayhawk's topic in Historic Subaru Forum: 50's thru 70's
I got some in the same spots between cab and bed... what a pain -
1979 DL Wagon Project (91EJ22T)
andrsn replied to 79DL's topic in Historic Subaru Forum: 50's thru 70's
Love those old wagons, can't wait to see it progress! Always excited to see some local builds. -
I wish I would have done mine this way. I'm at the point now where the car is running and driving seemingly fine but its failing DEQ. I'm guessing I just didn't hook something up correctly in my wiring as the donor car I got it from had passed DEQ a few months before I bought it...
-
POR 15 - what it can not, and can do...?
andrsn replied to idosubaru's topic in Old Gen.: 80's GL/DL/XT/Loyales...
I've used a lot of different methods for rust removal. Mostly for smaller parts and motorcycle gas tanks. I have to agree in saying that if you follow the instructions you can get great results. I also use vinegar and electrolysis for rust removal, both of which take a bit longer but can be just as effective. But typically when I'm doing rust removal I do the following: 1. brush/scrape/sand off rust as best as possible 2. use a rust remover - POR15, vinegar bath or electrolysis for as long as necessary 3. use an etching product to prep surface for paint or sealers depending on the method used to de-rust (POR15 Metal Prep is usually what I use) 4. apply primer/sealer etc... Other products to check out that I've found nice to have on hand over the years: RedKote - I have found it to be far far far superior to all other tank sealing products. Kreem is the absolute worst, POR15 is ok, but ReKote works soooo much better. Don't waste your time with the other brands, just not worth the headache that can ensue if every step isn't 100% perfectly executed. Penetrol - This is a paint additive (thinner/reducer/sealer) and a favorite of mine. On its own, it is a great clear sealer. I've used it on all kinds of outdoor metal project that I want to keep from rusting or stop rusting where it is and keep a 'patina'. It takes forever to dry but dries smooth and hard. Its also great in its intended use as a paint additive, I've had excellent luck getting decent looking and durable brush paint jobs on metal. Japan Drier - This is great for expediting drying times of oil based paints, can be used in conjunction with Penetrol but it still seems to take forever to dry. Rustoleum oil based metal primer/paints - These are compatible with the above items and are great to have around when you just want something to be kinda close in color but mostly just don't want it to rust again. I keep a can of primer around and a can of each Yellow/Blue/Red so I can mix stuff to get whatever color I need. ***Above all, read all product directions and product compatibility -
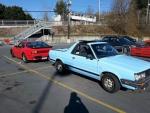
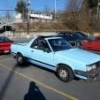
1985 Brat lift kit questions (kit already installed)
andrsn replied to Evinrude's topic in Old Gen.: 80's GL/DL/XT/Loyales...
If the blocks don't move the shock mounts in towards the car, something is off. If the lower mounting holes are offset, you may just need to let things settle but its really hard to tell from your picture. -
on my 83' brat there is a pink connector terminal near the right strut tower/ac stuff. it is a test terminal i believe and if I remember, one of them will supply 12v constant. you can use a multimeter to determine which one it is
-
I'll try and hook up a light and check the codes this weekend but then I'll be out of town for 2 weeks. The engine came from a FWD 1993 Legacy. Its an OBDI non-interference engine with about 120k on it. I looked over the service records that came with the car and it appears it logged an o2 sensor and TPS error before I owned it that may not have gotten fixed. I'll probably start at the o2 sensor.
-
Yeah, I'm required to meet the standards of the original engine/car so I assumed the EJ would breeze through... I feel confident the catalytic converter is fine, the donor car had recently passed DEQ no problems when I got it. It failed at both idle and cruise. That is a long list of things to check... good thing I'm about to head off on vacation. I did replace the timing belt when I had the engine out. I thought as long as the belt was on the correct teeth there wasn't a way to adjust the timing. I can't find any write ups online for adjust timing on these engines, just how to install the belt. Would it run even half way decent if I installed the belt 1 tooth off? I was pretty careful doing it... but I am learning a lot of this stuff for the first time.
-
Hey crew, I recently got everything sorted on my 83' BRAT (EJ22 swap with a 5spd D/R) and I thought it was running great. It seems to start up/idle/run just fine but I took it down to DEQ the other day to get some new tags and it failed! It failed for unburnt hydrocarbons and 1 other thing that I can post to the board when I get home. The car has some other driving issues and needs an alignment so I am planning on taking it to a shop here in town soon because I'm sick of working on it. I would like to save the shop the nightmare of sorting through the wiring if that could possibly be the DEQ fail culprit. Keeping in mind it seems to run decently, is there anything in the harness I could have forgotten that could cause a DEQ failure? Thanks all.
-
Parting out 1986 BRAT GL
andrsn replied to BrattyMcBrat's topic in Old Gen.: 80's GL/DL/XT/Loyales...
sent a pm regarding the rear tailgate 'Subaru GL' emblem. thanks -
How accurate are 80s dash guages?
andrsn replied to markjs's topic in Old Gen.: 80's GL/DL/XT/Loyales...
I've had the opposite problem. My oil pressure and temp gauges are wild but my battery charge seems to be accurate. They go from zero to hero and back over and over. I bought a cheap set of Bosch aftermarket gauges. Once I get them wired in and working I'll take the stock gauge cluster apart and mount them in there so they look clean. With a recent ej swap, its piece of mind... -
I haven't heard of anyone pushing the lower control arms out to correct camber, not to say it wouldn't work. It is necessary to offset the strut spacers when lifting the car to retain camber, I'd guess you could probably just adjust it at its stock height by offsetting the mount (you'd have to remove some material for clearance etc).
