-
Posts
240 -
Joined
-
Last visited
-
Days Won
6
Content Type
Profiles
Forums
Gallery
Store
Everything posted by Mitchy
-
-
It looks like I might need the camber bolts after all. Now on to the fronts.. Later this year I shall be getting some Yokohama 215/70 15 on some 7” alloys which I have been storing
-
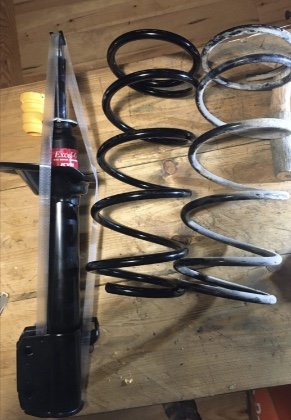
Well now, KYB Legacy Outback struts with KYB Forester SF springs has given me a surprising additional 2” clearance at the rear end. More than I was hoping for! The Outback struts are very similar in dimension to the Forester ones when put side by side, but obviously they must be stronger. They have a thicker piston rod, larger nut, etc, but it all fits into the original Forester top hat So these struts with thicker Forester springs makes for a good strong rear end on the Forester. I thought the struts I removed were aftermarket, but they have Tokico stamped on them. The springs were certainly softer than these new ones.
-
In the words of Ronald Regan; “I distinctly remember not being told that” when I overhauled and 1” lifted our first Forester, and as a possible result there has always been some muffled clunking over bumps. I left the original bushes all around other than the front suspension rear CA and steering rack bushes. This green Forester will get pretty much the same treatment. Thanks for your input
-
On the Forester SF I am about to replace my shocks and rear springs with more-or-less stock items. The present tired set-up, with aftermarket struts and the original 20 y.o. SLS stings, sits very low at the back. I’ll see how it settles and decide later if I will lift it further like I did with our other Forester. My question is whether anyone recommends slacking off the suspension component bolts when changing suspension geometry, whether it be a simple overhaul or a lift? Trailing arms, radius arms etc.. I can’t help thinking that this would aid greatly the installation of certain parts, and prevent additional torsion in the numerous bushings once the geometry has been changed. I have never read this in the hundreds of lift threads, but I did once see it done in a wheel alignment video. Can anyone say whether it is a necessary or at least sensible idea? Thanks
-

Tire size
Mitchy replied to Junebug2014's topic in 1990 to Present Legacy, Impreza, Outback, Forester, Baja, WRX&WrxSTI, SVX
Thanks for getting back with this. I would be especially interested to know how the Geolandars are, as they are what I am going to fit next. The G015’s, right? And there is really 2 inches of clearance to the strut perch on the standard Legacy Outback rear struts? Cool. -
Beautiful. I like your style.
-
I have changed them on both Foresters; a ‘99 and an ‘00. I think as the originals last for 15-20 years then for the small additional cost I buy OEM again. I usually source oil seals and gaskets (which likely will only need renewing once) at the Subaru dealer as I know exactly what I am getting, and that there will be no surprises as far as fit and finish are concerned.
- 16 replies
-
- spark plugs
- rocker cover
-
(and 2 more)
Tagged with:
-
I too use NGK wires, though a week or two ago I pulled the wires on the Legacy, and one of the connectors stayed on the distributor, with a piece of lead attached. I fitted them about 6 months ago! They don’t come from the dealer. They were from a local parts supplier. Who knows what’s fake and what is not? I am not forking out 32 euros plus 21% tax for each cable at the dealer...
-

Tire size
Mitchy replied to Junebug2014's topic in 1990 to Present Legacy, Impreza, Outback, Forester, Baja, WRX&WrxSTI, SVX
Hi heartless, I think you need correcting on your incorrect correction of my “15mm increase in tire diameter” comment. It is indeed correct. It looks like you misunderstand; we are comparing the overall diameters of 205/70r15 and 215/70r15 tires, which is obviously not the same thing as comparing 205 and 215 section widths. Apology accepted. :p Thanks -

Tire size
Mitchy replied to Junebug2014's topic in 1990 to Present Legacy, Impreza, Outback, Forester, Baja, WRX&WrxSTI, SVX
I am planning this tire size on our second 1st generation Forester, using Legacy Outback struts. After months of research it would appear to be fine on a Legacy Outback. The fronts will have even more room. The Legacy Outback struts have more distance from the spring perch to the hub, allowing much taller tires. Generally speaking if the rears fit then the fronts will fit as there is more room for the front tires. The increase in tire diameter from 205/70 r15 to 215/70 r15 is around 15mm, therefore only reducing clearance to the spring perch by 7.5mm (the additional tire wall height). Have a look under your rear wheel arch and measure the clearance at the top of the tire to the spring perch. Then subtract 7.5mm and you know if it will fit or not. Also slip a finger behind the tire at its fattest part to feel how much clearance there is between the tire wall and the strut tube behind. Then subtract the added tire width divided by 2 (5mm) and you’ll know if it will rub. Let us know your answer! -
I find that no sealant is necessary here, as per the original assembly and the Subaru tech service manual. The aluminum surfaces are in good clean condition, and the Subaru rubber is very good and squishable; Gasket part #13294AA053 (L&R) for the EJ202 SOHC and others. If you are asking if the sealant is needed to hold the gasket in the cover during assembly then the answer is ‘no’. The little ribs on the (OEM) gasket hold the gasket fast in the groove. I should add that I have had mixed results with rocker gaskets; The gasket (aftermarket) on my little 660cc Subaru Vivio leaked at the camshaft end caps after installation, so I opened it again and used a minimum of Victor Reinz ‘Reinzol’ .That stopped the leak dead. I do not know if it is holding as the car was sold on. The Vivio also has a plastic rocker cover, and I noticed it was slightly deformed after 23 years, so sealant was indeed necessary, otherwise I’d have to source a long-discontinued rocker cover. HTH
- 16 replies
-
- spark plugs
- rocker cover
-
(and 2 more)
Tagged with:
-
I just sprayed some engine degreaser over the necessary areas, scrubbed and rinsed well.
- 16 replies
-
- spark plugs
- rocker cover
-
(and 2 more)
Tagged with:
-
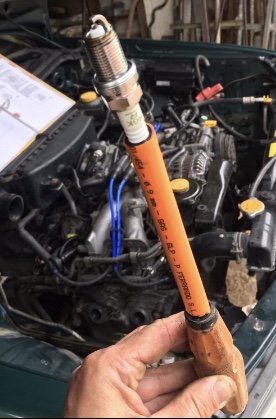
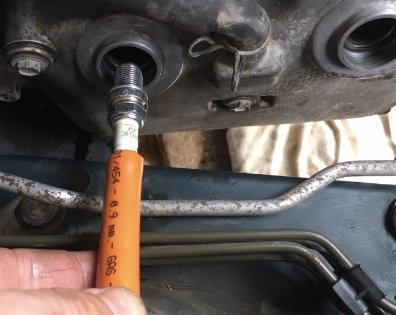
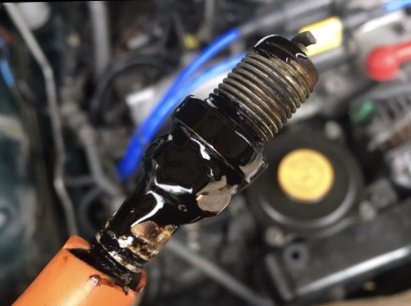
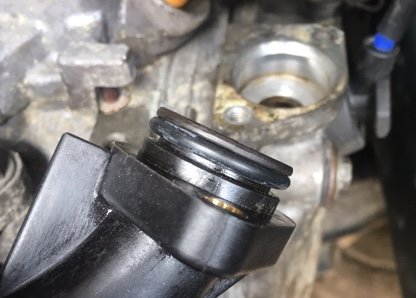
18. Gap check and install the plugs. To install the plugs I use a piece of rubber gas tube over a wide flathead screwdriver, and slip it over the neck of the plug. This way if you miss the thread the tube slips on the plug and does not force a crossed thread. Once snug you can then tighten up to spec with your favorite socket/box spanner. In you go.... Press on the boots, and then fit everything else you removed. Here is #4 plug, just to remind you of the urgency of this job: As I removed the oil filler neck from the LH cover to aid removal and refitting, I replaced the O ring there too. Remember to be clean, well-prepared, clean, methodical, clean, and do not rush. I hope this helps some of you, I felt it was time to give a little back! The low rev hesitation problem is completely sorted after this job, and the car runs and sounds better, including at idle. Thanks for looking Mitchy
- 16 replies
-
- 2
-

-
- spark plugs
- rocker cover
-
(and 2 more)
Tagged with:
-
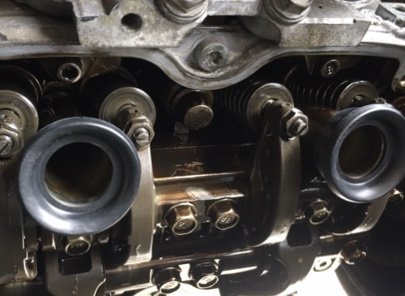
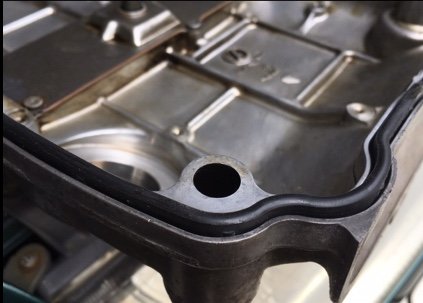
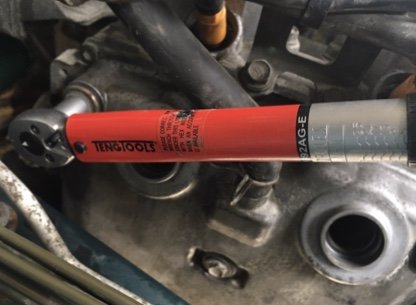
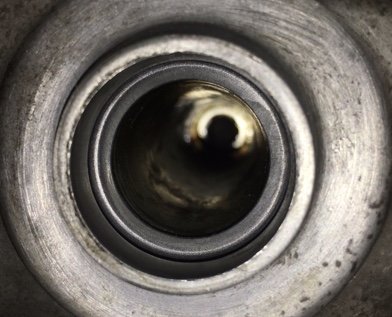
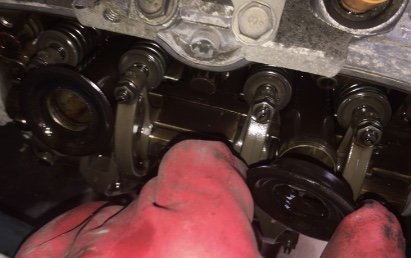
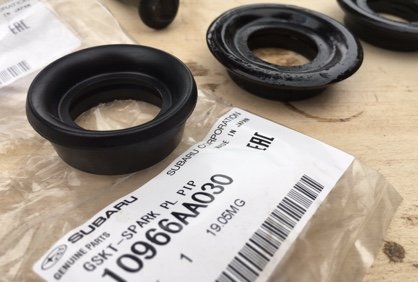
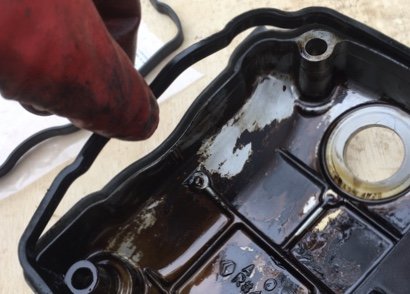
15. Happy with the valves, now on to the reinstallation. Press the new tube seals onto their tubes, about 5mm until squarely seated. 16. Fit the new gasket into the groove on the clean rocker cover. Note that the gasket has little ribs all around it. These aid the postioning of the gasket in its groove. You can just see the top of some of these ribs on the curves nearest to the camera. 17. Now wiggle the assembled cover back into position on the head. Be very careful not to nick or scrape the new rubber parts or aluminum sealing surfaces. Fit the bolts in their respective holes and tighten carefully to 5 NM. **It is not a lot, 5 NM; those bolts are shouldered and once they butt up to the head they need very little extra tightening** Inspect the plug tube seals to make sure they are not deformed.
- 16 replies
-
- spark plugs
- rocker cover
-
(and 2 more)
Tagged with:
-
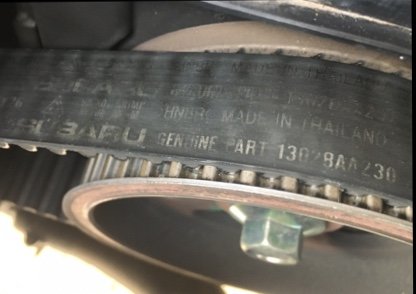
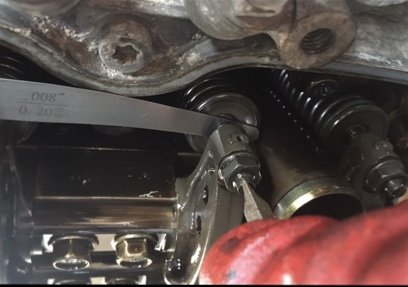
14. This is where I deviate to set the valve clearance; 0.20mm intake, 0.25mm exhaust. With the LH timing cover removed, one will see that the LH camshaft pulley has an arrow. At the 12:00 position the valves for #1 cylinder are closed, TDC. The valves needed a slight adjustment. Rotate the CRANK pulley clockwise as you look at it 90 deg so the arrow on the camshaft pulley faces the 15:00 position, and you have the #3 cylinder valves closed and ready for inspection. Repeat the 90 deg. steps in order (18:00 for #2 cyl., 21:00 for #4). I inspected the timing belt as I am soon to be changing this too. Encouragingly it is a Subaru part, though I imagine it to have perhaps 150,000km. The car has 249,000 km, and asuming that the belt was serviced by Subaru at 100,000, I am unsure if it also had a Subaru service at 200,000. I have had the car for only the last 2000km!
- 16 replies
-
- spark plugs
- rocker cover
-
(and 2 more)
Tagged with:
-
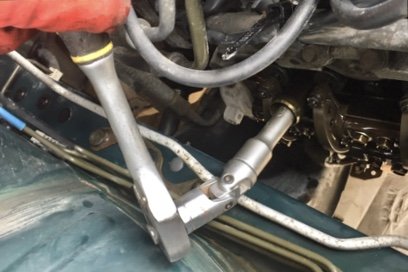
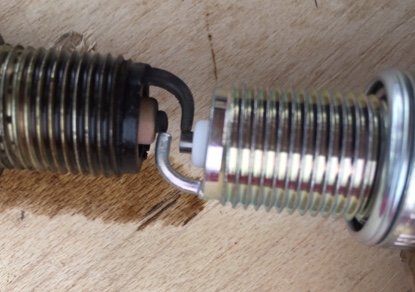
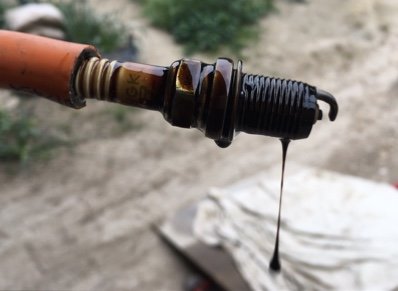
12. Pull off the old, hardened and deformed tube seals, and compare them to your new set. No surprise they were leaking then. Gently remove the rocker cover gasket, and clean up the parts the best you can. 13. Now pull the plugs. This is where a UJ on the socket comes in handy. These old plugs were over-gapped at 1.4mm compared to the 1mm - 1.1mm recommended gap. They look like they have done 100,000 miles. That and the heavy oiling probably explains the engine hesitation at low rev pulls.
- 16 replies
-
- spark plugs
- rocker cover
-
(and 2 more)
Tagged with:
-
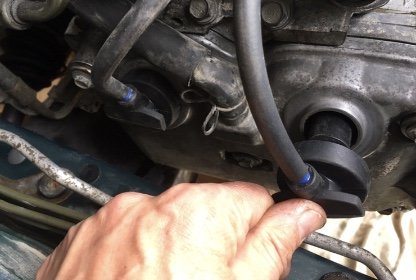
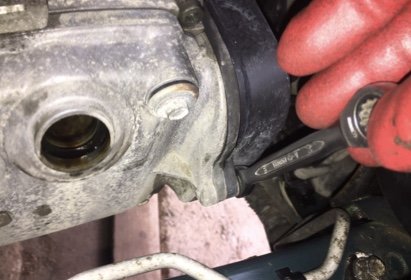
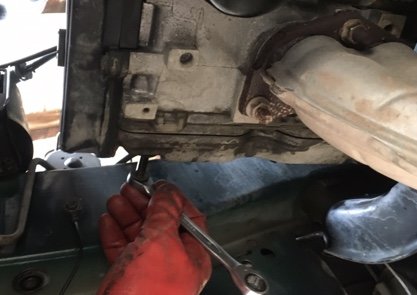
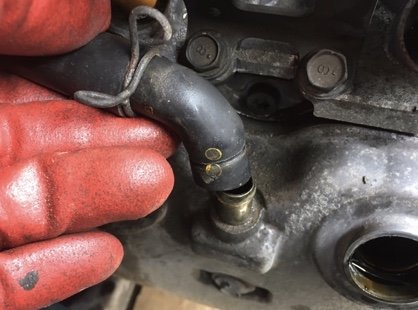
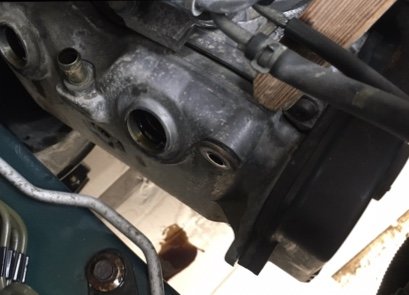
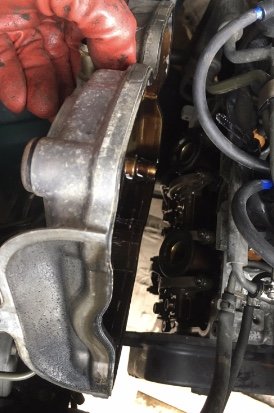
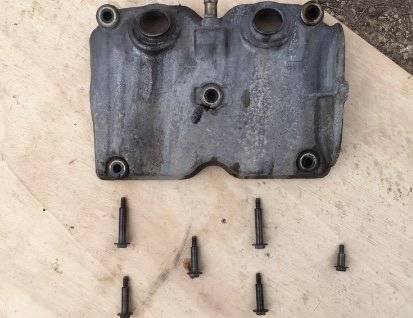
7. Remove the m10 bolts from the rocker covers. There are 5 on the LH and 6 on the RH; the 6th is on the timing belt cover. It helps to be able to get underneath for some of them. 8. Remove the hose from the rocker cover. 9. Place some cardboard beneath to catch the bit of oil retained in the rocker cover. Using a piece of wood and a mallet, gently tap the corners of the rocker cover and it slips off the head. I left the centre bolt in a few threads so the cover could not fall. 10. Wiggle it out as best you can. Mine came out with no force and some fancy maneuvering. 11. Set the bolts and cover to one side. Notice that there are three different bolt lengths on the RH cover.
- 16 replies
-
- spark plugs
- rocker cover
-
(and 2 more)
Tagged with:
-
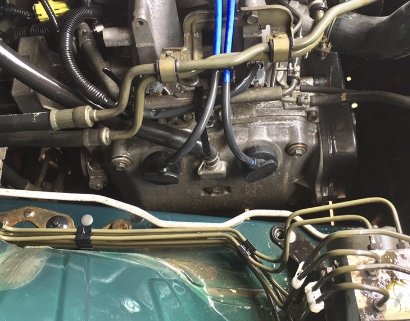
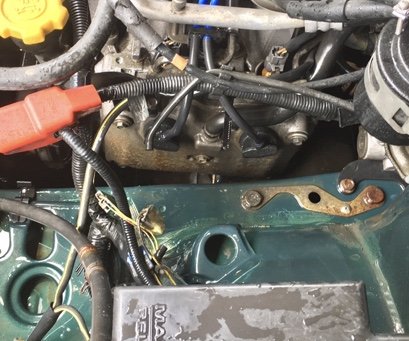
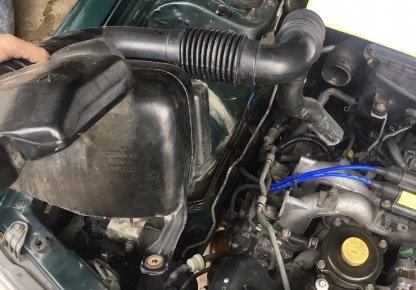
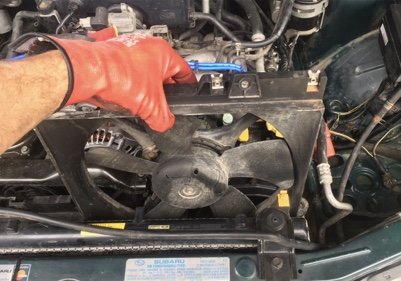
Today was the day to get on with some necessary engine work. The 150,000-mile EJ202 has been stuttering at low revs and generally felt sluggish. The PO told me that the CEL light came on every so often due to the plugs needing renewal. I quietly wondered why he hadn’t done it. The leads are brand new NGK, and the distributor has been replaced by an aftermarket one. Luckily the original Hitachi remained in a box in the trunk so I have reinstalled that one. I didn’t have to search for long to discover the spark plug problem. Oil on the lead boots is due to one thing; the plug tube oil seals in the rocker cover. The plugs were in a state. No.2 cyl: so here’s my process for changing the spark plugs and seals, and checking the valve clearance whilst the covers are off: 1. put the front wheels on blocks to get underneath. 2. Remove the under guard. 3. Remove the air intake assembly, Battery and screen wash bottle. 4. Give the area a good washing as dirt must not enter the open heads. 5. I drained the oil. I believe it is not necessary, but I wanted to change it anyway. 6. I also removed the radiator fans and coolant overflow to gain access to the crank pulley, to be able to rotate the engine 90 degrees at a time for the valve clearance service. Now we are about ready to get on with the job...
- 16 replies
-
- spark plugs
- rocker cover
-
(and 2 more)
Tagged with:
-
I really couldn’t tell you. I look for Japanese OEM manufacture parts whenever possible though. The struts I am fitting are also KYB so I reckon that the springs should be a perfect match.
-
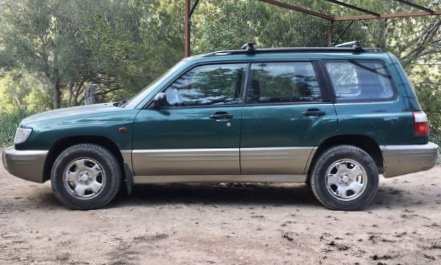
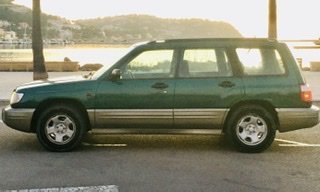
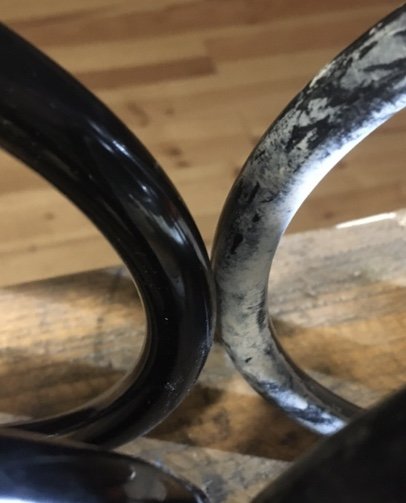
Speaking of rear suspension, I just had my KYB springs delivered. They look good, and are certainly are about 10% thicker than the old SLS springs I pulled off the Silver Forester when I installed Pedders springs and struts some years ago. The rear springs on the green Forester are indeed the same thinner SLS springs, but with aftermarket struts, so they’re giving a really saggy butt! Can’t wait to get the new hardware on there!
-
Stripped out the rear interior trim again to find a leak through the roof headlining. It was dripping from the top of the LH ‘D’ pilar onto the rubber floor mat. Pulled out the sunroof drain tubes to double check for clogging but the water flowed through fine. I then remembered that the rear washer was not working, and gave it a squirt. With the headliner out washer water sprayed all over the place. I soon found the cut or broken tube inside the tailgate hinge bellows. A piece of pvc tube connecting the ends and that should be an end to at least one of the water ingress mysteries. Not very exciting entries these. Next up will hopefully be clutch changes, timing belts and oil seals, and some suspension mods. The rear of this car is a bit saggy, most likely due to aftermarket struts with the original SLS springs. I have ordered new non-SLS KYB springs to go on the Outback struts, hope that makes a difference!


