Search the Community
Showing results for tags 'Brat'.
-
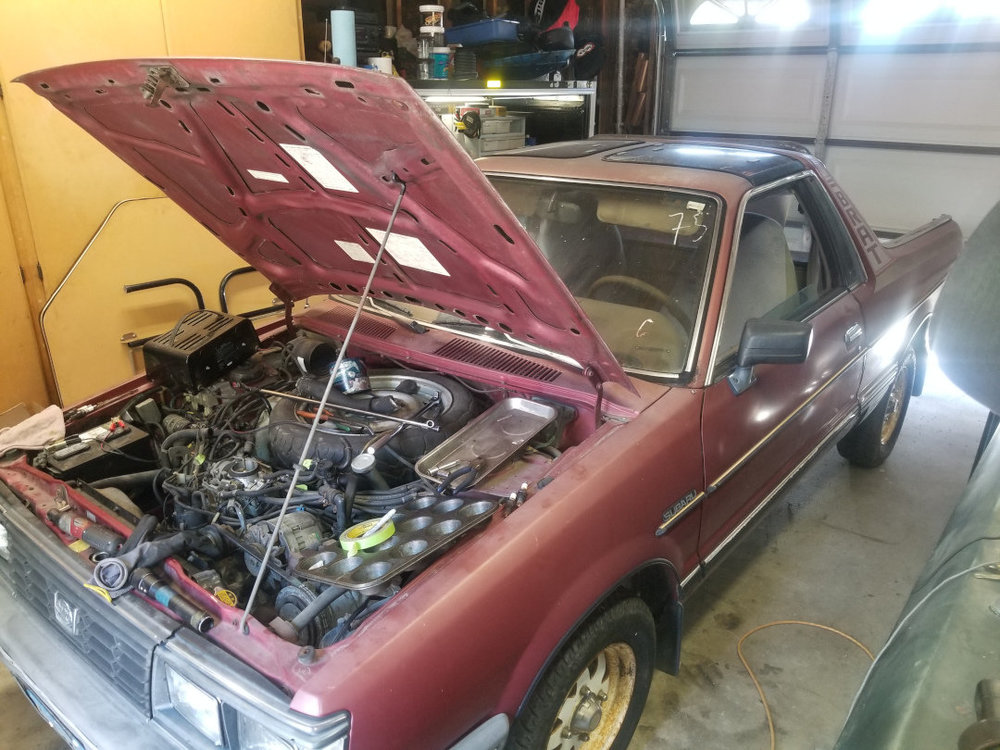
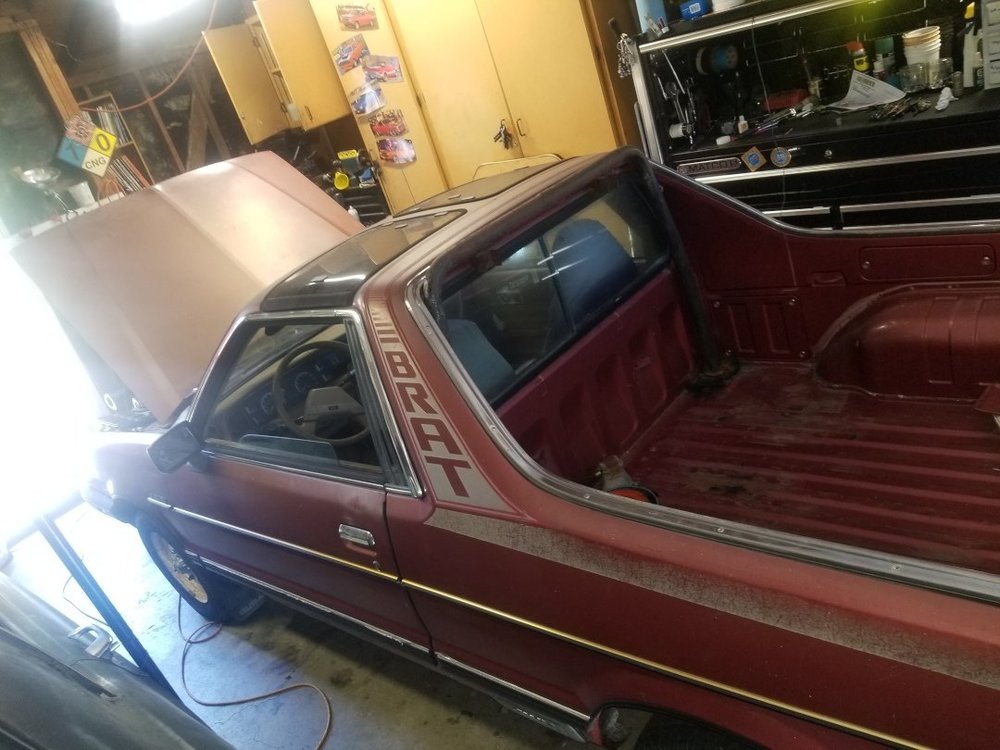
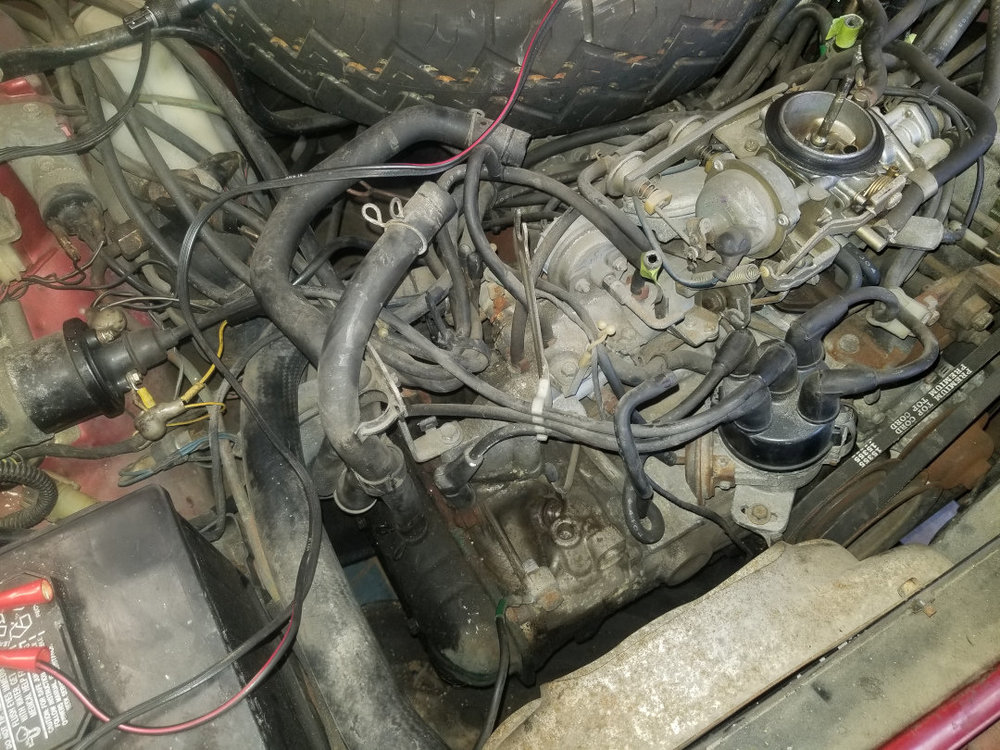
I have a 1982 BRAT that I'm replacing the clutch on. Probe is my clutch is a 24 spline and every replacement I'm seeing is 21 spline. I think it's an aftermarket transmission. The only tag I'm seeing on the bell housing is a sticker with the numbers 064474. I don't see any other markings, but it's hard to tell because the previous owner painted the motor and tranny. Anybody have any tips?
-
"I'm El_Freddo, and this is my Brumby Story:" Ok, time I "came clean" about the Redback Brumby. This is how I picked her up about two years ago. AFAIK I'm the third owner: The previous owner was a bit of a talker/player. I went out to check her out as a bit of a tease for me, it was local enough for the drive - I've always wanted a targa top since Sunnie the Brumby that we got for my mother inlaw. I would've loved a blue one but beggers can't be choosers. The owner said a fella was coming up from Melbourne that weekend so I bid him good luck, he was asking too much for my liking. 6 weeks later it was still there so I made an offer - he still played a hard card so I told him to offer it to the other guy at the price he mentioned and I let it be. Less than 5 mins later he called me back and said deal. As you can see from the pic above there's some front guard damage, pity, it's pretty straight otherwise! The engine wasn't working - reckoned it just stopped one day on the way to work and has been sitting like this for 6 months. I thought blown HGs straight up - empty radiator and creamy oil told the story. In the tub it had a rubber mat that concealed some foundation sand/packing sand (the orange stuff) that had held the moisture and rusted the middle of the tray. The main areas where rust shows up were pretty decent which I was happy about. After getting her home she moved around the yard a few times before making it into the shed for some work. Family photo: First up was pulling the engine - pretty easy in these things! I had to entertain dad as a decoy for his surprise 65th - he sat and watched for most of it :/ Once on the stand we drained the "oil": Second bucket: ~15 litres of water and oil in total. Now thinking major head gasket and a possible engine replacement. Continued stripping the engine before jumping to conclusions though. Heads removed, such a pretty sight (not!). Never seen this before: This was the culprit - and the previous owner's story checked out at this point: That's a Welch plug that dropped out, dumping the entire contents of the radiator into the engine, stopping things pretty quickly I'd imagine! After getting busy with work and other things (4wd trips etc) Dad came up and put the long block back together for me while I was at work - this saved me loads of time! Once the engine was all back together I got it running - it blew a lot of blue smoke and I shat bricks. It was also running as rough as guts. Turned out that I needed to adjust the valve clearances better than I did - it was running on two cylinders, just. Once all 4 were back online it blew more blue smoke. Not happy Jan! This finally cleared up and ran without any smoke. Very stoked. One of the things we had to do was remove rust from the bore. This was a cheap build for a daily cruiser - so instead of a rebuild or even a hone and new rings we hedged our bets and went this way. No1 cylinder had a couple of small pits at the very top of the cylinder so we left it this way and ran with it. Now it was time to look at other parts of the vehicle. Redback got her name when I was working on the rear end pulling drive shafts off that had probably never been removed before. While hammering away a redback dropped out from behind one of the rear wheels. Sorted that one quickly! It wasn't the last - I think there were five all up from memory, so a name was born for this beast. The rear bearings were an unknown and seemed rumbly and one of the rear brakes was leaking. So after a small investment in parts: This was done: Rear end being worked on: Rear diff was out as well, swapped in for one that leaked less instead of swapping seals! Home made tool for bearing retainer nut removal: All coming back together well: "New" rear drums were sourced from one of the parts bombs, the originals had a decent 2-3mm groove dug into them! The new ones barely looked like they'd been used! Then it was off to a mate's place for some detailing - 4 hours of degreaser and pressure washing! Only got a phone pic of that, it's not been uploaded At some point, either in the transit there or back I managed to get a stone chip in the windscreen, just a small one but right in the driver's view. Again, stole a windscreen from a parts bomb. This one cleaned up very well - I was stoked. This also gave me the opportunity to replace the old hard windscreen rubber and tackle the rust that I knew was under the front right corner: Putting the windscreen back in - always fun. Had to look it up on ausubi as to how I did it last time on Sunnie the Brumby. Once that was read the windscreen was in within 20 minutes: A new heater hose above the water pump was sourced - I use another unit from a Toyota Camry, just trim to size: A few other things along the way and it was time for a roadworthy inspection: ^ I didn't like the original rims, different offset and to me they didn't look that great on this brumby. I also had a set of black sunnies in the shed with my snow tyres on them which easily swayed my decision. I reckon they look way better even if they're only 13 inch and don't fill the guards. So she didn't pass first go. A few excited rookie mistakes: 1/ Didn't fill the wash bottle 2/ Didn't bolt down the passenger's windscreen wiper arm, so that didn't move! 3/ Apparently I had a front indicator that was blown - I didn't find it on my check so dunno where they got that from. and 4/ worn front uni joint on the tail shaft. I fixed the other easy little issues straight up, had to order in the uni joint so got two and did them both at the same time. I also smashed my thumb pretty good doing this - only now is the damaged nail almost grown out about 6 months after the event! Once those things were sorted the RWC was issued and I was off to rego. Vicroads now make it nearly impossible to get an appointment! I was pissed that I didn't get one before the weekend, but got one Monday and had to take some time off work to do it - just frustrating! The blessing was that my birthday/christmas/birthday pressie rocked up in the mail at M&D's (home base for important mail!) - so I was able to use them during the rego process, saving me some extra coin on not needing new plates: At Vicroads just after rego was granted: Back at home: Used her for driving to work, loved it! Didn't have to worry about rain (I'd been on the scooter prior to this!) And of course, hanging with the family members: Since this pic Dad borrowed Redback for a few months. I missed the old girl, the scooter's fun but there's just something about a brumby, plus it can do over 55kmp/h without trying hard. It's easier to speed in that Ruby Scoo IMO. While Dad had her M&D headed overseas and I had a conference close to their place, so my wife and I crashed there and I drove to the conference in Redback. The issue that came up after frying a few alternators (dad went through this issue) was a severe lack of performance - the exhaust would become blocked at certain levels of acceleration. This got worse until I was stuck on the way to the conference travelling at 60km/h, and that was before hills! Not fun! Pulled another Y pipe from the parts bomb and that sorted it. This wasn't an ideal fit due to some spacers on my EA81 for the ERG system that wasn't on the earlier year parts bomb, but it works and Redback goes very well for an EA81! I've also got to fix the choke - dunno what's wrong with it but it doesn't work properly. The carb could probably do a with a rebuild too, she runs too rich overall for my liking. I've solved the slop in the gear stick with the classic slot and bolt arrangement: The Welch plugs were sorted by Dad's idea - massive grub screws/threaded plugs: They've worked a treat! I've been hunting for a bullbar - found one in Talem Bend, South Australia, got a mate to pick it up for me. So I need to roadtrip to the city of churches to pick that up soon. I've since found an ideal bar that fits the bill for what I want. If all goes well the first one purchased might end up on Sunnie the Brumby if it's better than the one already on her. I've also been tossing up the idea of a lift kit, but it really comes down the right price at the right time - I don't want to go all out like Ruby Scoo lift/tyres. One thing I would love to do is make the engine run with the stock L series MPFI system. I'm a true believer in EFI over carb setups. I don't know if I can do this due to space constraints without converting the auxiliaries to the EA82 setup - not an easy task unless you've got the EA81 turbo brackets and crank pulley. Also an AWD gearbox would be great. Will have to build one up and fit it in at some point. EA casing an EJ gearbox can be done without issue over here with a dual range gearbox. Cruise and remote central locking would be sweet and I'd like to add a neat little tacho, oil pressure and coolant temp on the steering column in a manner that doesn't cover the other gauges. It's just a case of time and money for those things - after all this is meant to be a cheap build! Cheers Bennie
- 21 replies
-
- 4
-

-
- BRAT
- Brumby EA81
-
(and 1 more)
Tagged with:
-
The time has finally come for the Ignition Lock to get stuck in my Brat. It was already in a state where the key could be removed in any position and while driving around. Currently it is stuck in the Run position, and can start the car, but will not turn back to shut the car off. Is it possible to remove this lock cylinder? I have a parts GL Brat with a good lock cylinder in it to swap out if so. 1985 Brat Gl (tilt column steering)
-
I stripped a hun on my 1985 BRAT, for the second time! The 36mm castellated nut was at the right torque, with cotter pin. What am I doing wrong?
- 2 replies
-
- 1985
- generation
- (and 4 more)
-
I’ve had my brat which is a ‘83 for about 2 years now this December last year my engine went out on me. Before I do anything apart from take out the ea81 I’m wondering if this dream I have of a 300whp brat can become a reality if anyone can give me an idea if this is even realistically possible I’d be very appreciative.
-
1985 BRAT. I have decided to upgrade my alternator to a 90amp 1989 Nissan Maxima model. Is there an online source for a v pulley? Is it possible to use the pulley from the original BRAT alternator on the new alternator? LINK to alternator at Advance Auto Parts
- 1 reply
-
- brat
- alternator
-
(and 6 more)
Tagged with:
-
Thus begins the saga of rebuilding a seized engine, a seized water pump, broken bolts, registration woes, and the many other problems from sitting for years in who-knows-where. So far, it's living up to its namesake, but it's complete and in good condition.
-
I did some searching and couldn't find much. This problem really has me scratching my head. 1982 GL Brat 200K plus on the body When the Left turn signal is on, it blinks normally as it should, however the "Stop Lamp" light will blink on the dash in time with the signal light. When the Left turn signal is on, and the Brake is applied: The LR taillight alternates between turning on/off the Lamp and the Reverse light individually, and the time of the signal light on the dash is about half the speed. It completely forgets to flash the indicator light instead. Having both Brake applied and turn signal on, the "Stop Lamp" light on the dash shuts off. The right side is unaffected and has no problems with the signal under braking or not. I have checked fuses, checked bulbs, and even swapped out the entire LR taillight assembly from another Brat; same result with the slow alternation of Brake light and Reverse light. And just FYI the reverse lights work normally when in reverse. Anybody out there have a similar problem? I'm thinking I have a bad ground or a short somewhere...
-
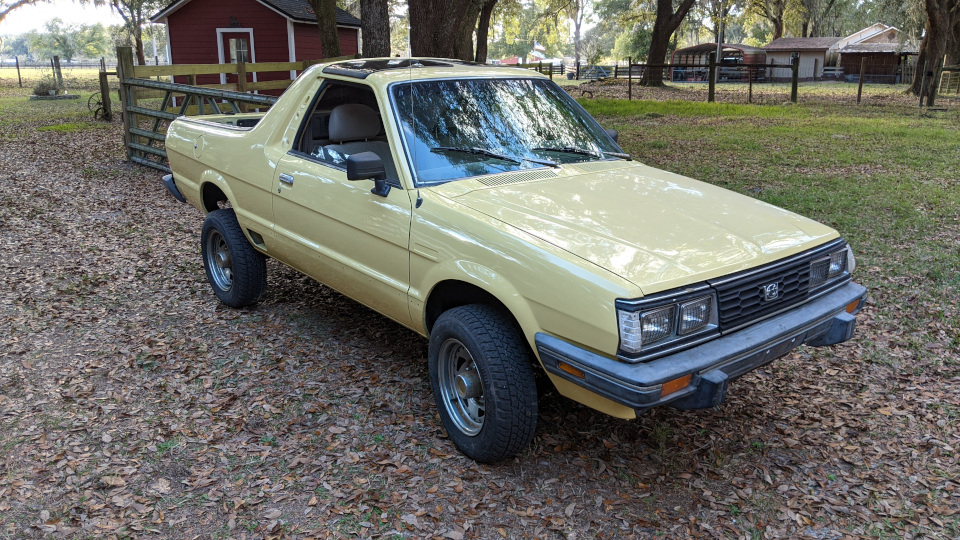
Mostly wanted to just update anybody interested on my 83 Brat project. I just got it painted and some of the trim back on. I originally wanted a tan cream color rather than the factory "Harvest Beige" but made a last minute impulse decision to go with more of a yellow/buttermilk color. It's kind of growing on me because it catches the eye, isn't *too* flashy, and most folks think it might be a stock color. Obviously I am not restoring it to factory original, I'm going for a daily driver that will last a while. I completely and literally scrubbed the under body, hosed it down with Rust Mort, and them covered it with truck bed liner. The bottom lips on the rocker panels were pretty beat up so I welded some angle iron to strengthen them. There were a few serious rust issues on the body but I was able to deal with them and seal both sides of the metal so I think it will last a while. Oh, and it started out in life as an automatic but I put in a 4MT dual range. It just seems wrong to have an automatic Brat, and the original transmission had issues anyway. The previous owner was kind enough to rebuild the engine but the carburetor crapped out so I put on a weber. The plan is to tow it behind my RV, so if you see a buttermilk Brat rolling down the highway behind an RV it's probably me. The next thing to do is to refurbish the bumpers and other exterior plastic trim, and I'm debating just cleaning them up good and clear coating them or else actually painting them black with the super duper SEM stuff. One big thing I am missing is the tail gate trim, and I'm going to use aluminum door threshold (M-D Building products low dome 49") as a base for that. I've also dug up some part numbers that I think would be useful in one place: 791017090 - Large side trim clips. (Obtainable and fit) 791017130 - Normal bed trim clips. (Obtainable and fit) 791017200 - Corner bed trim clips. (Unobtainable, I rigged something from plastic push rivets) 759114020 - Fender liner clips. (Haven't tried them yet) 901120005 - Fender liner bolts. (Haven't tried them yet) After that I should probably do something about the interior but I'm honestly not feeling it. The interior is definitely showing it's age but if I can't restore all of the interior I'm inclined not to do any of it. Then there are some other odds and ends, like the previous owner removed the computer so (among other things) there is a currently a button for the starter on the dash. Finally, there are a few parts I would really like to get my hands on and I was hoping somebody could either guide me towards a part number or source: There are two round holes on the sides hidden by the rear bumper that need plugs. I only have one original plug. There are some rubber grommets (I guess you call them) that go around the rear bumper mount arms to mostly plug the gap. The are sort of squarish, about 2 inches across. I only have one original grommet. There are some rubber bumpers for the tailgate when it is closed. They are short thin rubber, sort of like weather stripping. I only have one of those. There is some rubber that goes on the tailgate supports where it hinges, I assume to keep them from vibrating. They come in two pieces and I need two sets. Also the rubber on the outside edges of the T-tops are a bit chewed up, so if anybody has any ideas what can be done about that I would appreciate it.
-
weird, Brat jump seats, - dunno if they could be salvaged off those bases, fyi https://albany.craigslist.org/art/d/albany-funky-seats/7381909946.html
-
,85 BRAT, Hitachi, 49 state, new fuel filters, old loud fuel pump, new front and rear fuel filters. The car will hesitate and lurch under certain conditions. If I let the car just idle still for a while, and then accelerate, there is not problem accelerating, until about 20 seconds into it, then the balking begins. The normal acceleration indicates to me that both carb barrels are working. I just drove this car up a 1/10 mile 7% incline several times. I let this car idle, still, at the bottom of the hill every time before I did the test. 2nd gear, 2,000 rpm, the car makes it up the hill just fine. 2nd gear, 2,500rpm, the car starts balking halfway up the hill. I am guessing the problem is the fuel pump, or the valve which fills the float bowl. Am I missing something?
-
delete please
-
Anybody have any experience converting the EA81 Quad Headlight setup over to the EA81 Single Headlights with Cyclops? Or know of a writeup? Believe that I have everything needed: Single Headlight Core Support Single Headlight Buckets/Bulbs Single Headlight Bezels with Turn Signals and Pigtails Third Eye (Cyclops) Full Assembly with Pigtail Third Eye Grill Relays that sit on the passenger side (RH) strut tower Third Eye Switch from factory that's used with the HighBeams on. Part that's confusing me is how the wiring goes from twin lights, one for low and one for high beam, to single units that do both functions. Guessing that the turn signal wiring that goes to the front bumper will have to be rerouted so they will go to the corner flashers of the Single Headlight Style. And then there is adding the Third Eye to the equation... The easiest method in my head; Take the entire front harness from an '82. Place that harness in the body of the '86. (thats the year of the EA81 chassis its going into.) Not sure if the connectors between those years are the same or if they were changed? I have an '82 that is badly rusted and is more like a donor vehicle. Ideally would take the cyclops light setup from it and put it on the '86 which is still structurally sound.
-
Looking at SubaruParts dot com or the similar Subaru branded sites, they don't even show the "Loyale" as an option on their drop-down-lists. However using search engines and searching for example a Brat or Loyale part and then including "Subaru Parts" will bring up these older vehicles on their site. Did this for the Brat Tailgate... Trying to find the part number for the Counter-Sunk Phillips Cap Screw/Bolts that connect part number 10 (The support Stays) to both the Gate and the Body. They list all the other part numbers but the hardware I'm looking for... https://www.subaruparts.com/v-1984-subaru-brat--gl--1-8l-h4-gas/body--tailgate Ordered these through Subaru before back when building up my '85 Brat... Now having a hard time finding them. Have heard that someone at the Oregon Dealership has The Book with all the numbers. The nuts here at my local Subaru threw theirs away years ago. Also tried using the Search for this info... got about 5000 results... most of which had nothing to do with what I searched. Tried narrowing it down and the results went to 30,000. Narrowed it down further and went to zero results. Seems the Search prefers the latest posts and the older ones just fall into the clutter.
-
Hey all, I have a 1986 BRAT that has had disty trouble most of its life it seems. It original disty went bad an a different one was swapped in from a parts wagon. Then that one went bad and it got the disty from another parts car. This third disty was from an older model and had some sort of complicated ignition module bolted to the top of the coil. Now I was finally able to track down a cardon rebuilt disty, I installed the new disty, new accel coil, new premium blue NGK plug wires and new NGK plugs. I put all of it in and it won't start. No spark from coil. There is 12 volts at pos and neg. We get a weak spark if we ground the coil neg to a body ground. Otherwise no spark at all. Any help would be appreciated Thanks in advance.
-
Hi y’all, Got my 85 Brat back in the summer and have been slowly fixing it up. Don’t know too much about the history of the car so went into everything pretty blind. I ran into an issue initially where when I would get the car up past 35mph, it would start bucking pretty bad and sometimes even stall out. I just put a new carburetor in thinking that would fix the problem , and while it runs way better, I’m still experiencing the bucking issue. Has anyone dealt with this issue before? Wondering if it could be fuel related but not sure. Thanks!


